

I’m so excited to finally launch version 2.0 of the Pardot Form Style Generator. The original version was created back in 2016 and has been used by thousands of Pardot users. With the new version comes a new UI and some cool new features, including customized checkboxes and radio buttons, embedded Google Fonts, new submit button options and more.
What is the Pardot Form Style Generator?
The Pardot Form Style Generator is a free tool you can use to easily customize your Pardot forms with no coding required. With a couple of clicks, you can customize almost every form element, including fields, checkboxes, buttons, labels and more. When you’re done customizing your form, the generator will compile custom CSS that you can copy and paste into your Layout Template within Pardot.
What’s new?
New UI
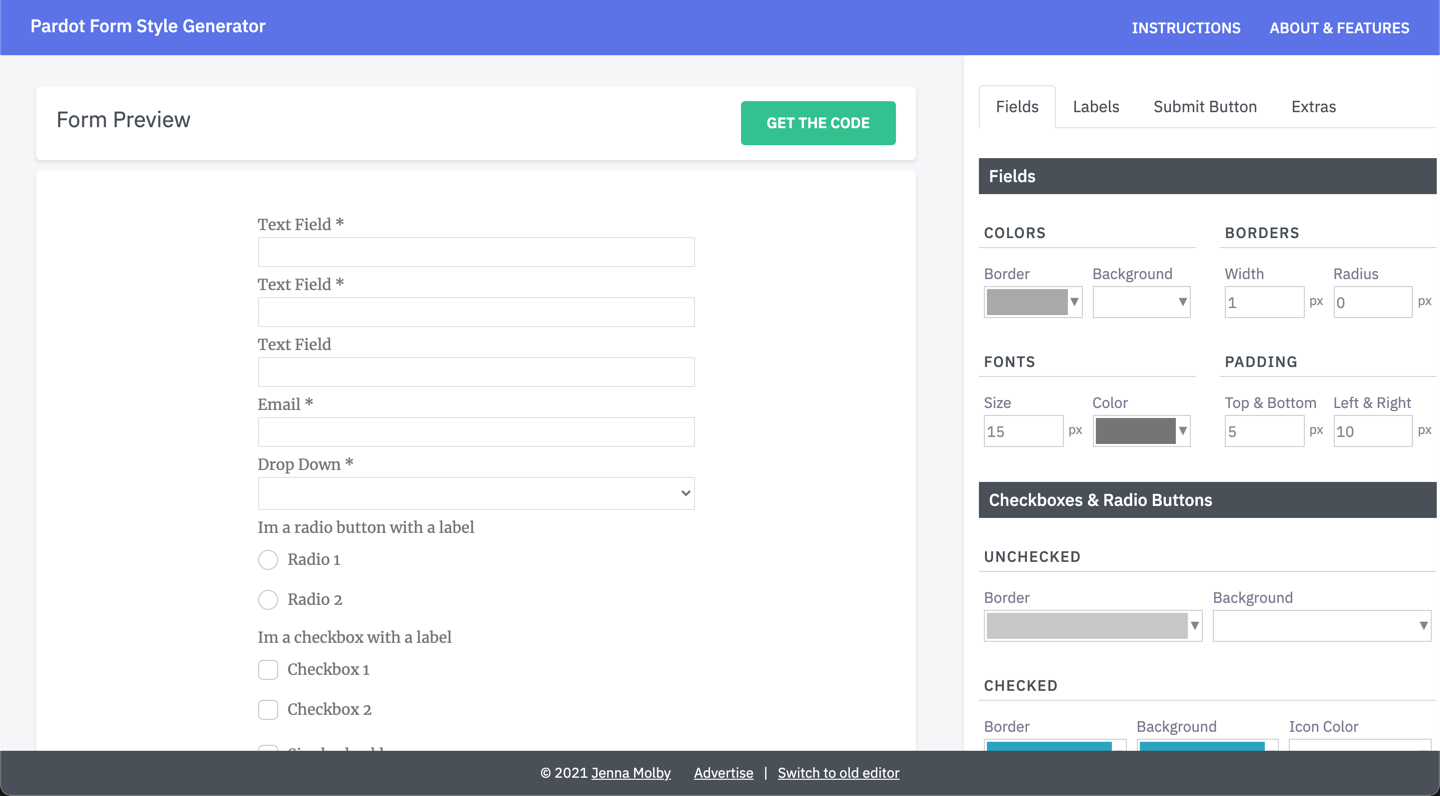
The generator has a complete new look, making it easier to customize your form.
Starts from a template
The old version started with the default Pardot form CSS. This new version starts with a template I use frequently within projects, meaning there are less tweaks needed to create a beautiful form.

Customized checkboxes & radio buttons
Change the border color, background color for radio buttons and checkboxes.

Embedded Google Fonts
The most popular Google Fonts are loaded directly within the editor, including Roboto, Lato, Open Sans and more.
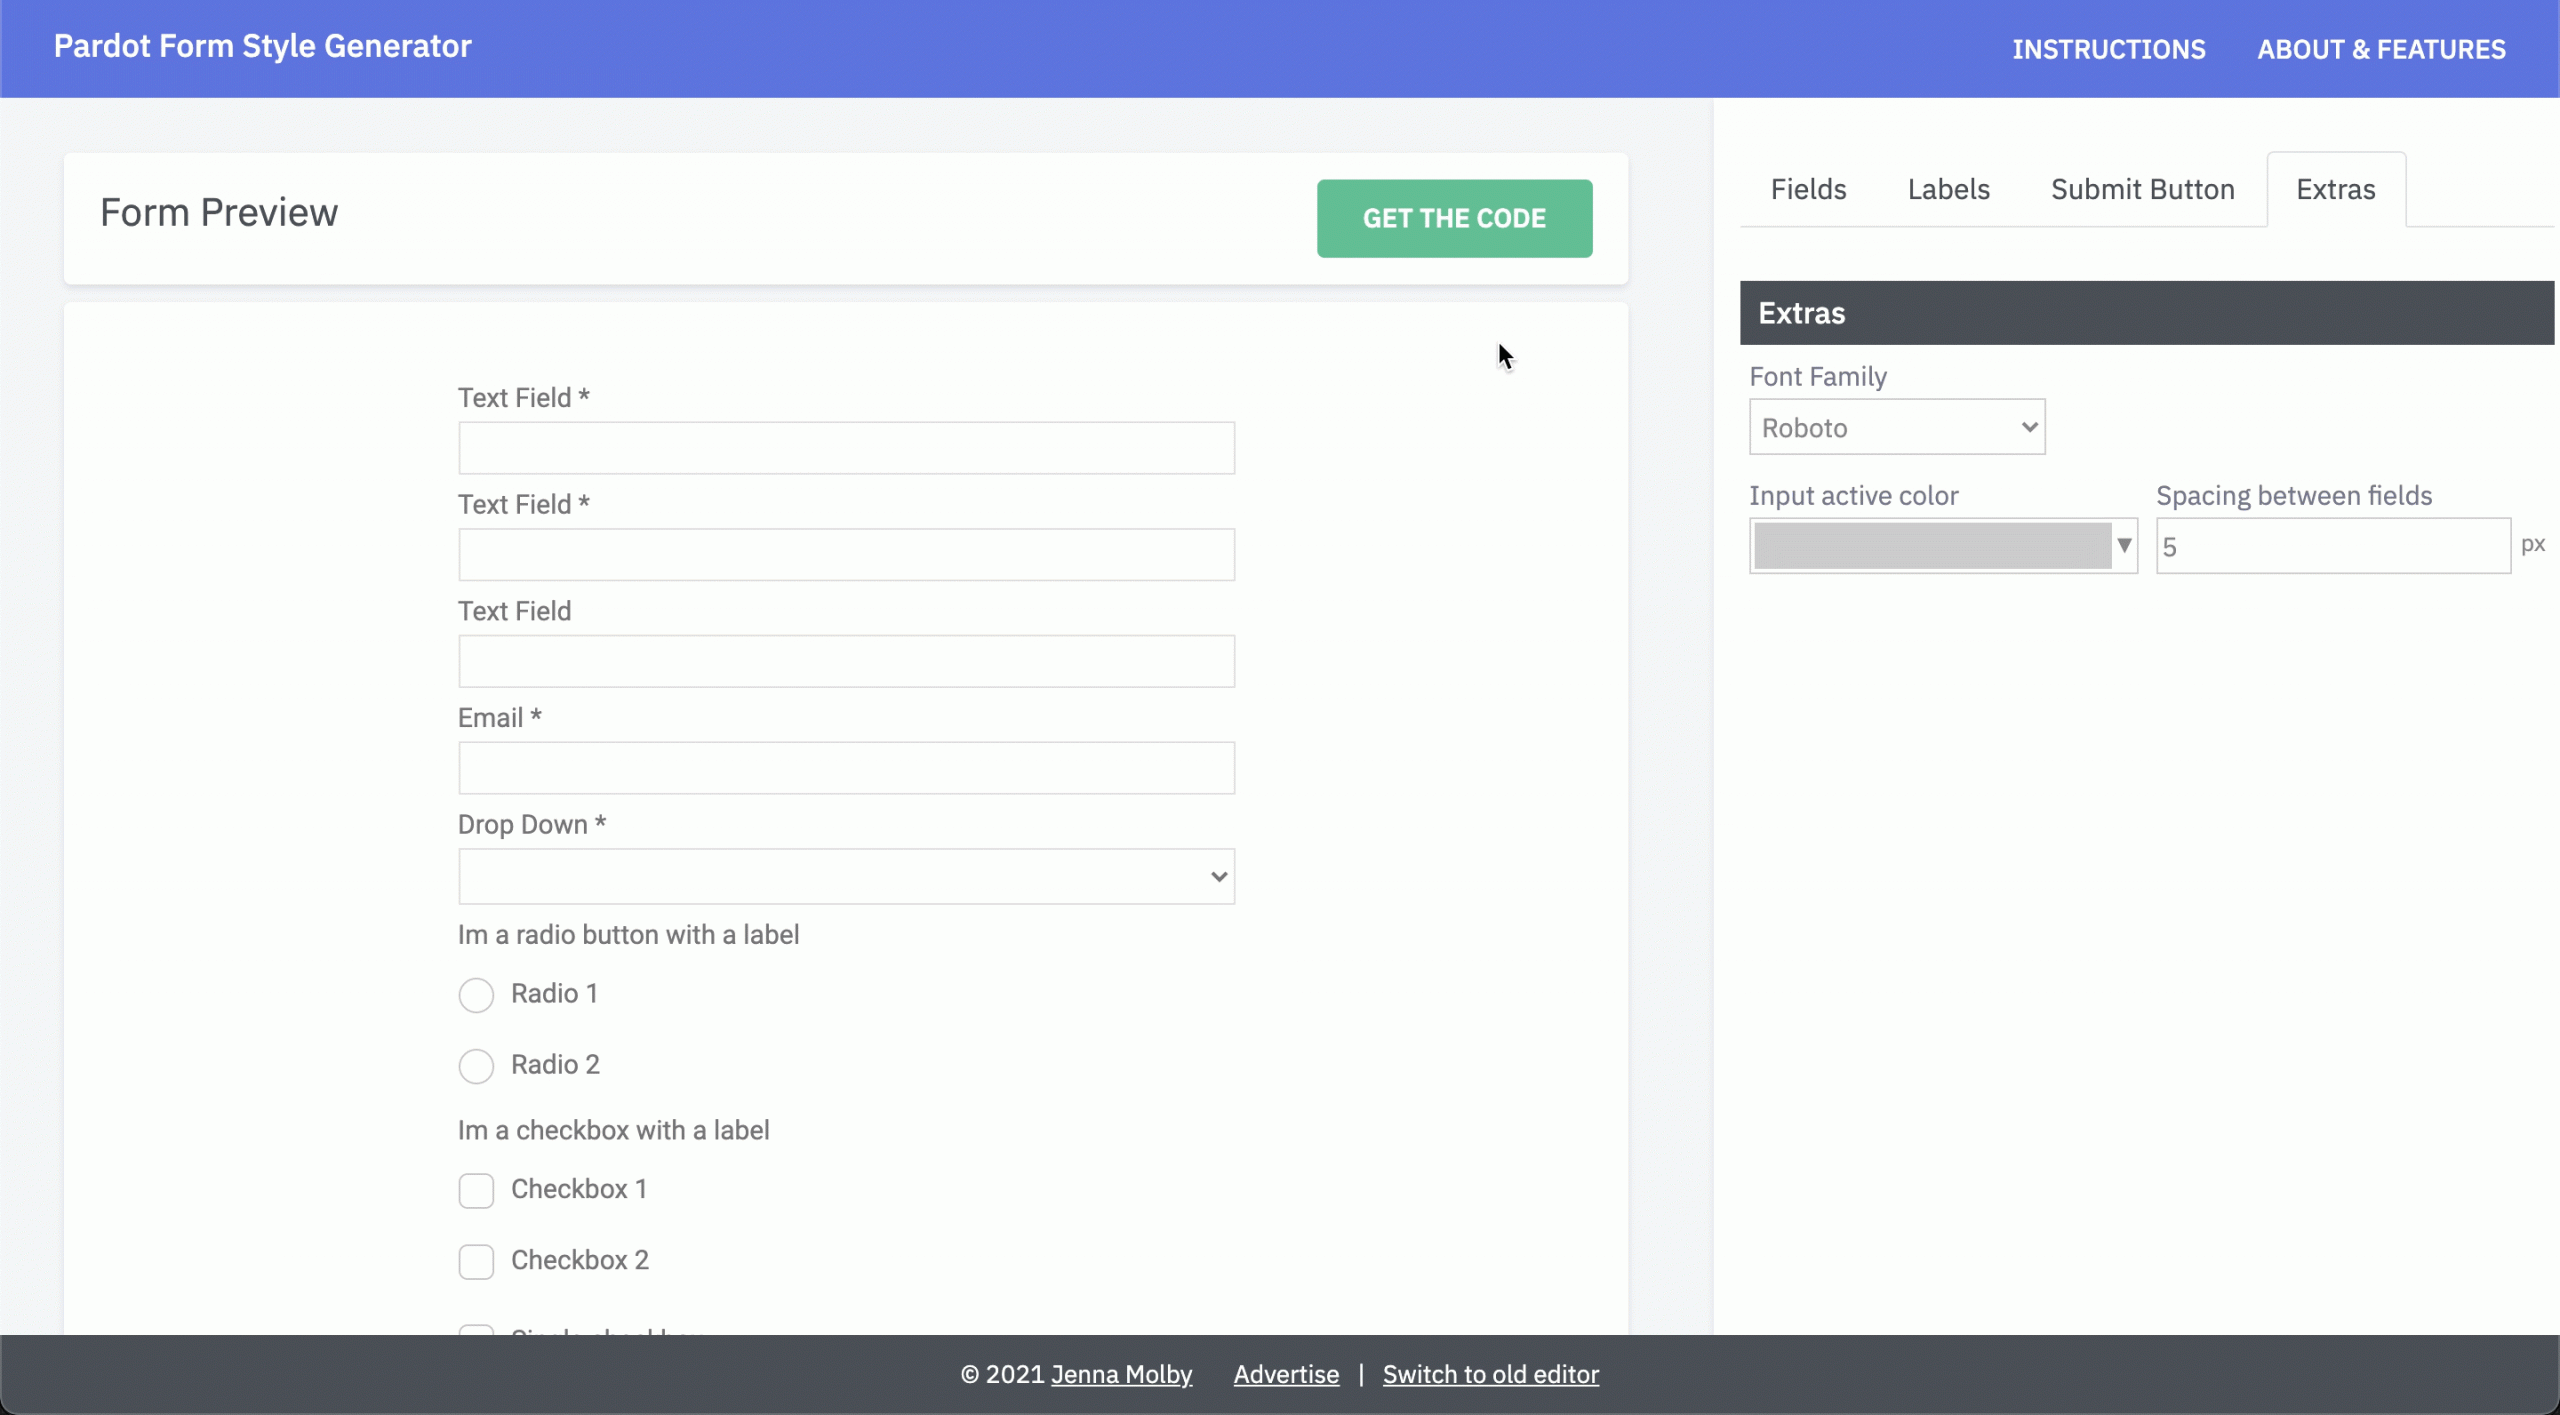
Set a border color for fields on focus
Select a border color that will be displayed when a prospect clicks into a form field.

Create a full-width submit button
Check the box to enable a full-width submit button or select one of the alignment options from the dropdown.
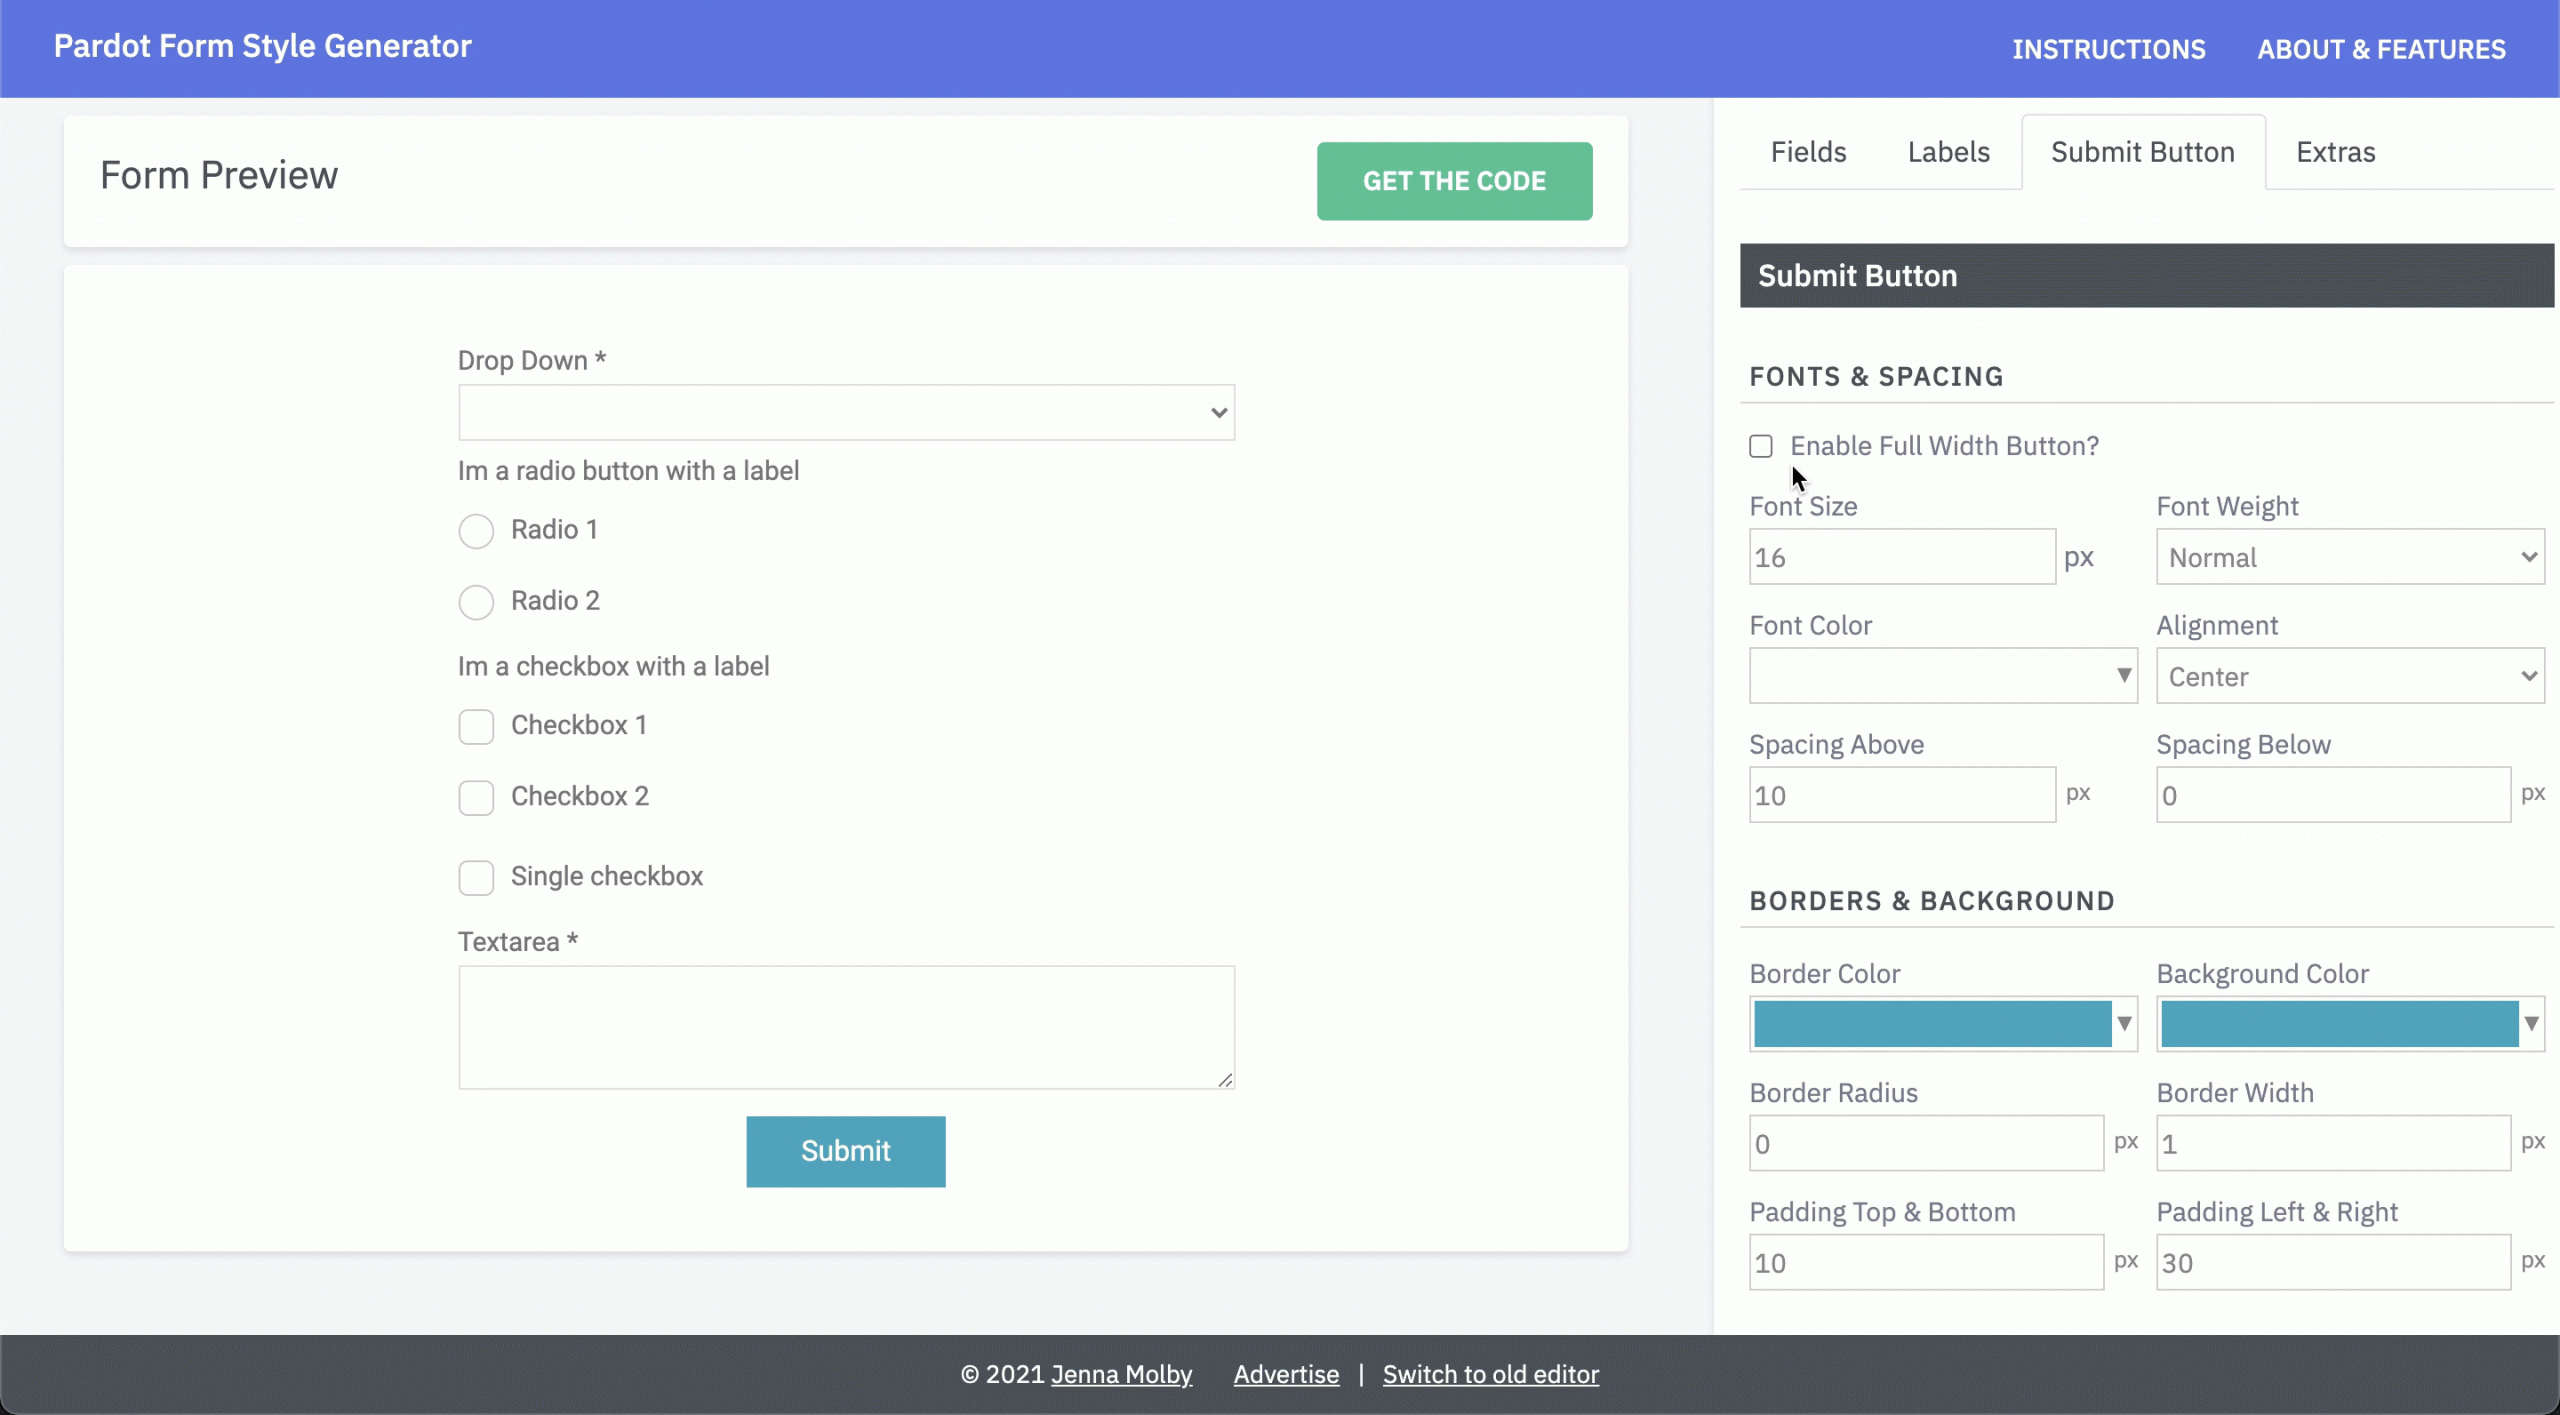
Select hover colors for the submit button
Change the border colour, font color, and background color for the submit button.

Try it yourself
Check out all the new features and send me any questions via Twitter (@jennamolby), or leave a comment below.

60 Comments
Hi Jenna,
Thank you so much for creating this amazing tool!
i have 2 questions though:
1) how do 1 create spacing around the reCaptcha. When I use the tool it put it right underneath the fields with no spacing,
2) when I have mandatory fields, the asterisk is displayed right at the other end (same width of the input value box). How do I make the asterisk to appear right after the label?
Looking forward to your kind advice.
Thank you
Hi Herzin, You’re welcome! You can add padding around the reCaptcha by adding this CSS:
.g-recaptcha {
padding-bottom:20px;
padding-top:20px;
}
You can update the label width to width:auto; for the labels.
Hi oh-ever-helpful-Jenna,
is there a simple way to divide a form into sections, for example
– contact information
– application interests
Thanks
/Mette
Hi Mette, I think adding section headers would do the trick. Check out this post: https://jennamolby.com/6-ways-to-use-javascript-to-enhance-your-pardot-forms/ to learn how to add them.
I love the new form builder! Thank you so much for all you do!
I generated some CSS using the form builder and placed in the Below Form code area in Pardot. I also used your steps to create two-column Pardot forms and placed that code in the Above Form code area. Everything is working well except for the comments field. I have “First Name” and “Last Name” on the first row with “Email Address” and “Phone” on the second. The third row has a “Comments” field, but I can’t seem to figure out how to create space between the bottom of the “Email Address” input area and the “Comments” label.
There is nice spacing between the first and second rows, but the third row is right up against the second. Any ideas? Thank you!
Hi Hayley, Thanks so much 🙂 I think my two-column post was missing a line of code. The .form-col-full line of CSS should look like this (clear:both; was missing.). Hope that helps!
body form.form div.form-col-full {
width: 100%;
padding-right: 0 !important;
padding-left: 0 !important;
margin-right: 0 !important;
margin-left: 0 !important;
padding-bottom:10px;
clear:both;
}
Thanks for creating this tool, it makes life so much easier.
I have a couple of templates that I have created using this tool. I’m also running the below script to insert the form labels into the form fields. On forms with both templates, there is what looks like an extra space before the label in dropdown boxes. Do you have any insight on what might be causing this and how to correct it? I’ve tried a lot of adjustments and so far, I haven’t found a fix.
Any suggestions you have would be appreciated.
var labels = document.querySelectorAll(“p.pd-text label, p.pd-select label, p.pd-textarea label”);
var i = labels.length;
while (i–) {
var label = labels.item(i);
var text = label.textContent;
var nextElement = label.nextElementSibling;
if (nextElement) {
if (nextElement.tagName == ‘SELECT’) {
nextElement.options[0].text = text;
} else {
nextElement.setAttribute(“placeholder”, text);
}
label.parentNode.removeChild(label);
}
}
Hi Kathi, So happy you find the tool useful. DM me the link to your page and I can take a look.
Thanks for the awesome post! I’m new to Pardot but a fairly savvy developer. I took the following steps, but on my test webpage where I’ve added the iframe code, nothing is displayed (on inspect element, there is no content to the body of the form):
1. Customized the form using your tool
2. Generated the code and added it to my Layout Template (Form) tab
3. Created a specific form calling this Layout Template
4. Added the HTML code from that specific form and added it to my external webpage via code embed.
What’s up with this?
Hi Emily, This can happen if the content on the FORM tab of the Layout Template is not formatted correctly. Did you add the CSS and leave the rest as-is?