
Want to be able to restrict the date range of a date picker within your Pardot forms? The default date picker with Pardot does not provide this option, but with a couple of lines of JavaScript, you can enhance the functionality of the date picker. In this tutorial, I’ll show you how to use the jQuery UI date picker within your Pardot form.
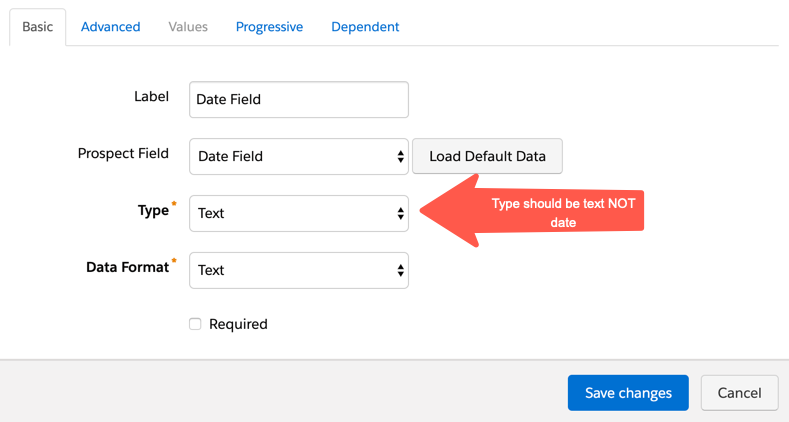
Step 1: Add the field to your form
Add the field to your form. Since we won’t be using the default date picker leave the type as TEXT.
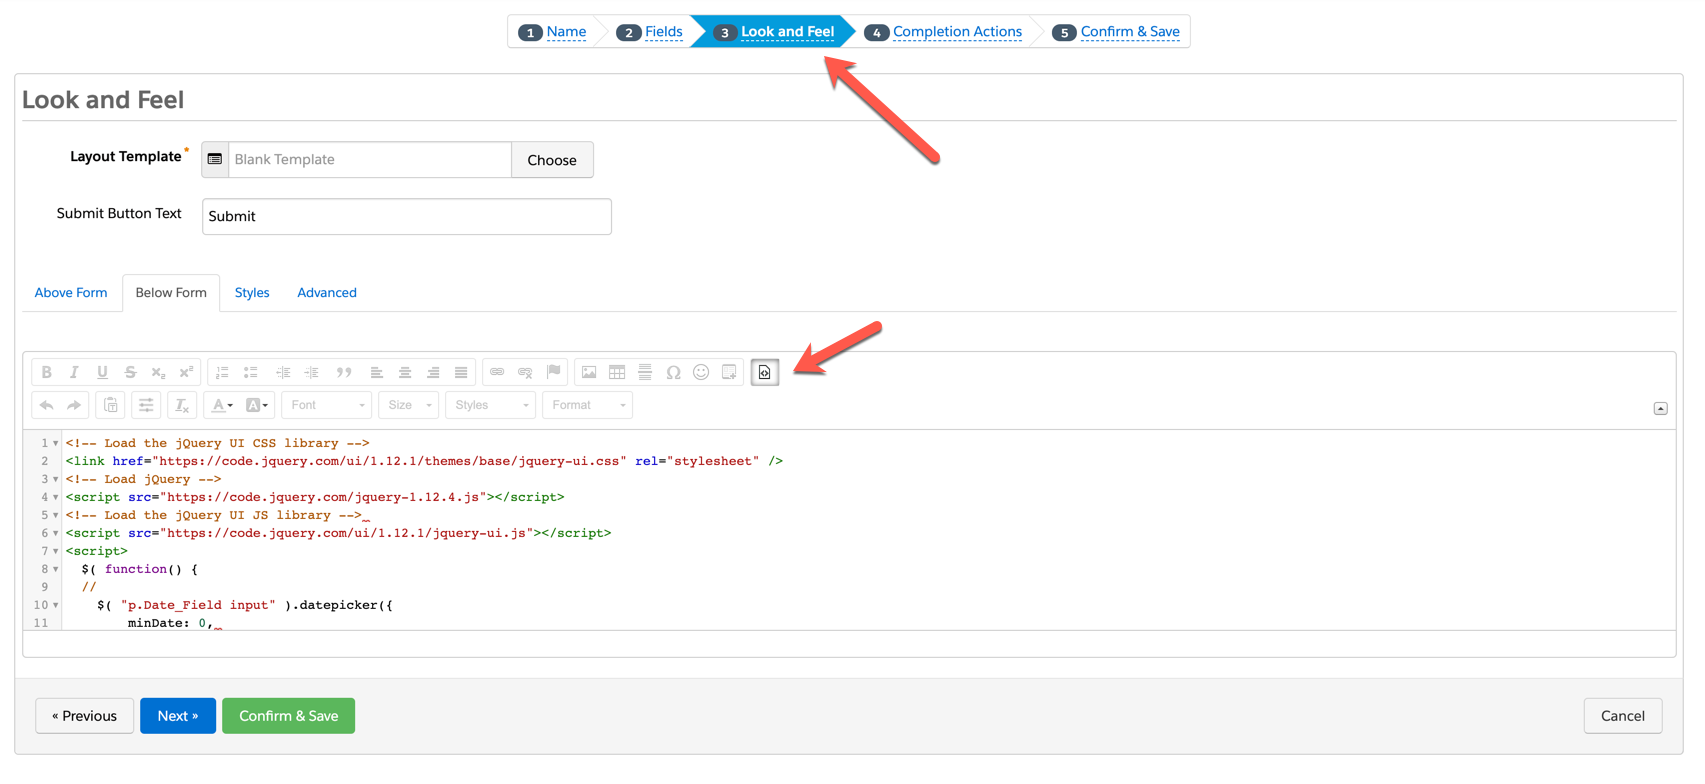
Step 2: Add the JavaScipt to your form
In the form editor, go to step #3 – look & feel and click on the below form section. Copy & paste this JavaScript in the HTML editor.
Step 3: Edit the script
There are a couple of changes you need to make to the script in order for it to work with your form:
- Update YOURDATEFIELDNAME with the name of your Pardot field that should launch the date picker.
- Update minDate with the number of days in the past the user should be able to see and select. For example “0” would not show any dates in the past. “-20” would allow the user to select up to 20 days in the past.
- Update maxDate with the number of days in the future the user should be able to select. For example, “+1M” would allow the user to select a date that is 1 month in the future.
Step 4:
Save and test! Your date picker should look like the one below and if you fill out the form the date should populate within Pardot in the yyyy-mm-dd format.
Questions?
Send me a tweet @jennamolby, leave a comment below, or book a Peer Chat.
19 Comments
Hi Jenna, thank you so much for creating these instructions. I’ve followed all the steps, but neither my form or my landing page with my form (which is in an iframe) shows the date picker. Does this work within iframed Pardot forms?
Hi Abby, Yes, this will work with iFramed forms. DM me the link to your page and I can help troubleshoot.
Hi Jenna,
This is wonderful and like Allie, I followed your steps above and my form displays the date picker as intended, but it doesn’t transfer over to my landing page that uses that form. I’m not sure how to DM you the LP link.
Thanks!
Hi Jenna,
Loving your resources and tutorials!
I followed your steps above and my form displays the date picker as intended (yay!), but it doesn’t transfer over to my landing page that uses that form (just displays as an empty textbox with no date picker showing up on landing page). Any ideas what I need to fix?
Thanks!
Hi Allie, Hmm.. there might be some code on the landing page that is preventing the javascript from running. DM me the link to your page and I can help troubleshoot.
This is a much better date picker than the Pardot default! However, we need people who are 40-80 years old to select their birthdate. Is there a way to change the year besides clicking the arrow 12 times for each year?
Hi Sherry, Yes, you can add changeYear: true to your function like this
$( function() {
// update YOURDATEFIELDNAME with the name of your date field
$( “p.YOURDATEFIELDNAME input” ).datepicker({
// Update minDate with how far back the date picker should go
minDate: 0,
// Update maxDate with how far in the future the date picker should go
maxDate: “+1M”,
// This formats the date so it’s valid within Salesforce/Pardot
dateFormat: “yy-mm-dd”,
// Allow year to be selected
changeYear: true
});
});
That will add a year dropdown to the datepicker like this: https://jqueryui.com/datepicker/#dropdown-month-year
Exactly what do we put in the place where you have YOURDATEFIELDNAME? I tried the field’s Pardot label and the “name” listed in the HTML for my page, and neither one worked. Also, could you clarify on what to do with any spaces within the name – do we replace them with dots like we do in CSS? Thanks.
Hi David, You would replace YOURDATEFIELDNAME with the Field ID of your field. This can be found in Pardot under Admin > Configure Fields > Prospect Fields.