


Refreshed and republished on June 23, 2020
This post was originally published on March 3, 2016 and has been revamped and updated for accuracy and comprehensiveness.Pardot form handlers allow you to use your forms to post your data to Pardot. A Form handler is a great alternative to use instead of Pardot iFrame forms. They allow you to fully customize the look of your form and submit data to more than one database. In this tutorial, you will learn how to create a form handler from scratch.
Create a new form handler in Pardot
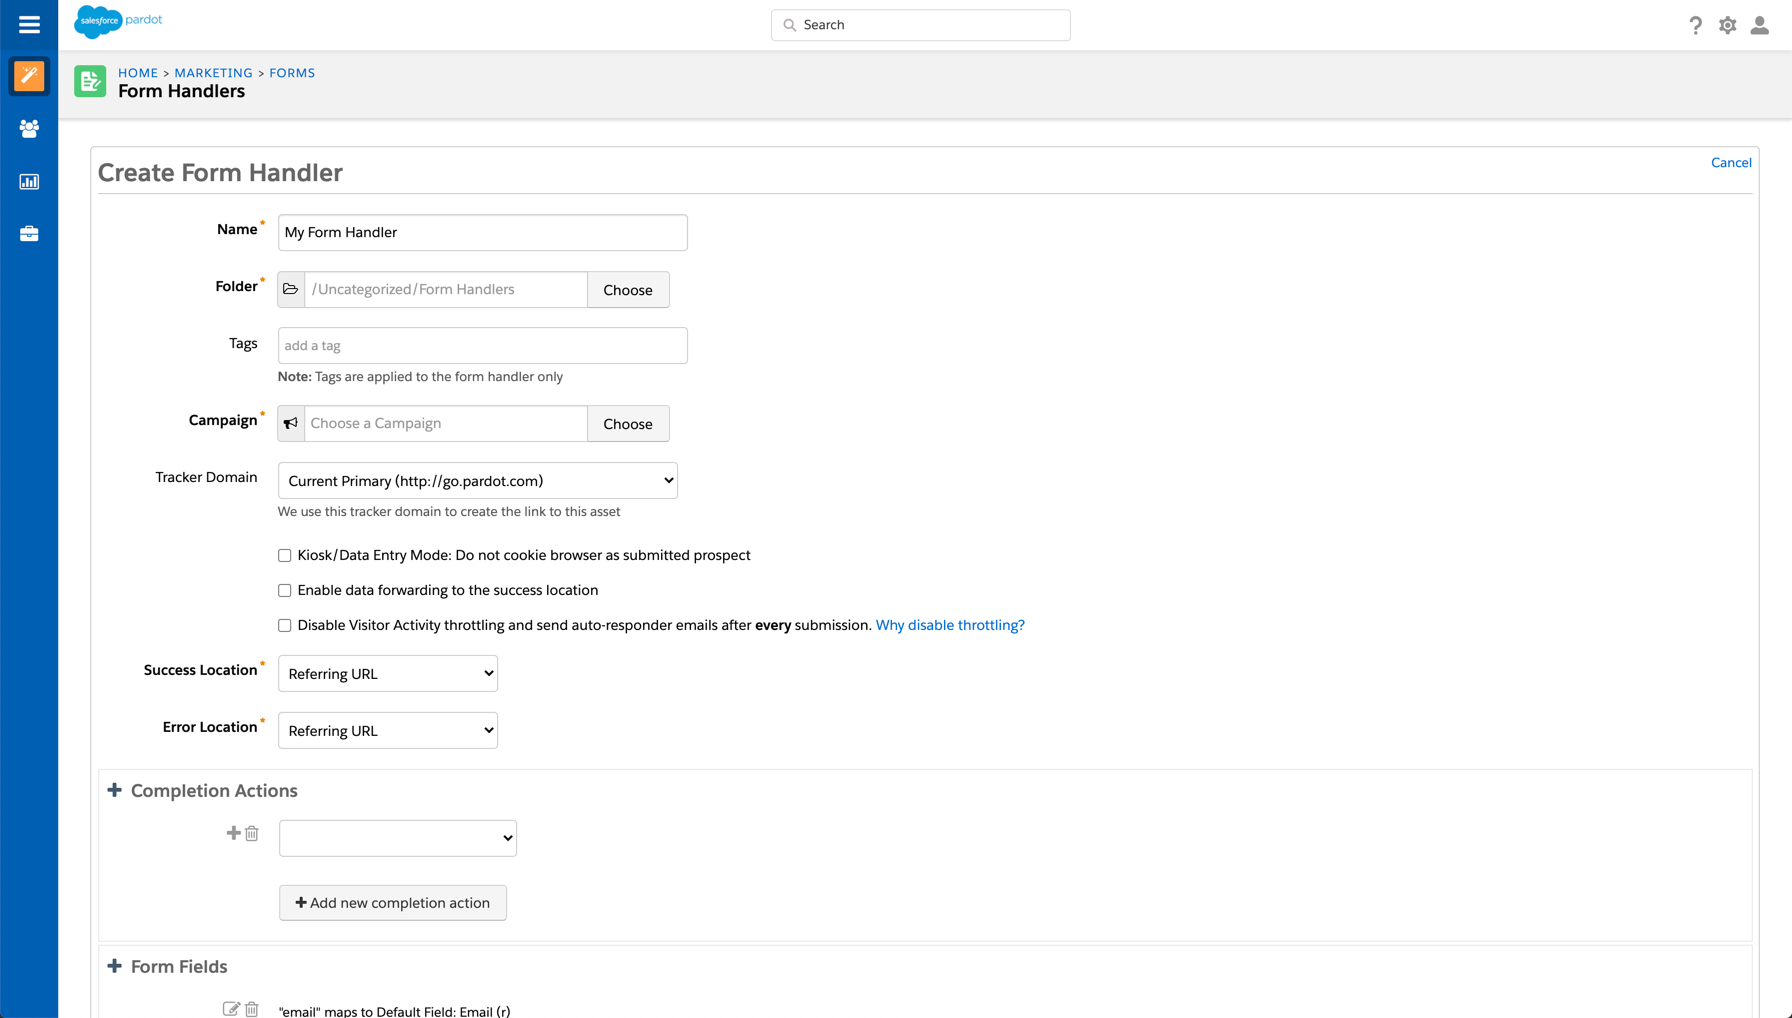
First you need to create a new form handler in Pardot under Marketing > Forms > Form Handlers.
Add the all the standard Pardot required information.
- Give the form handler a name
- Select a folder and add tags
- Choose your campaign
Choose your other custom settings.
- Kiosk/Data Entry Mode: Do you want the prospect to be cookied when they fill out the form?
- Enable data forwarding to the success location: Does you data need to submit to another database other than Pardot?
- Disable Visitor Activity throttling: Do you want to disable Pardot’s spam protection and generate a distinct visitor activity and auto-responder email for all form handler submissions?
- Success & Error Location: Choose an Error page and a Thank you page URL.
- Completion Actions: Add the any actions that should happen when a prospect fills out the form.
Here are the settings I have selected for this tutorial:
Add form fields
Add any fields you want to capture through your Pardot form handler.
TIP: Name the external field name the same as your prospect field name, but without the spaces, to avoid confusion in the next steps.
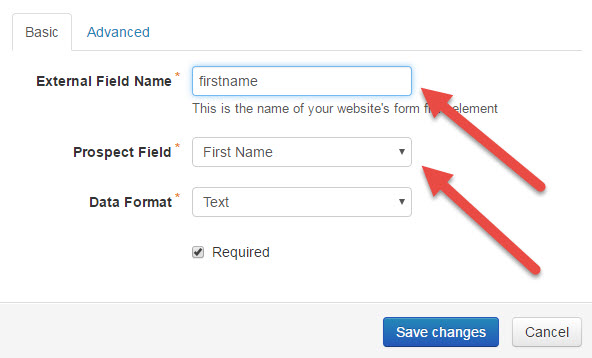
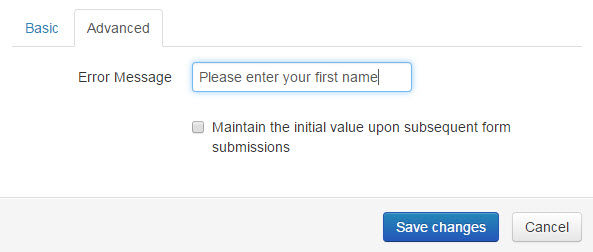
Optionally, you can add custom error message text under the advanced tab
Create the form HTML
Now that the form handler is created, the form HTML needs to be created to embed it on your website. In this tutorial, I will be going over basic markup. Feel free to add your own styling/structure that matches your website.
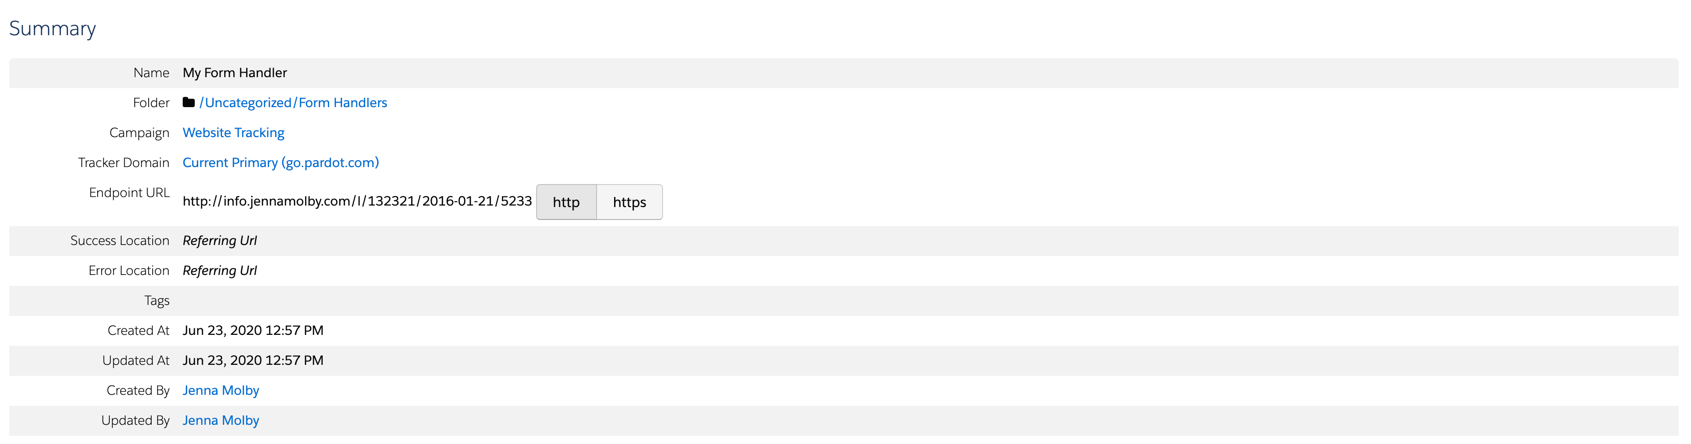
Copy the endpoint URL
Navigate to your Pardot form handler summary page and copy the endpoint URL.
Basic HTML structure
Here’s the basic structure to create a Pardot form using a Pardot form handler.
- Action: Must be the endpoint url for your Pardot form handler.
- Method: Must = POST
- Input: Add all the form fields you mapped while creating you Pardot form handler.
- Name: Must equal the external field name you specified when you created the Pardot form handler.
- Type: Specify the type (text, email, etc) to help with field validation.
Add Field Validation (Optional)
Optionally, you can add some front-end validation to your form. If you marked the fields as “required” when creating your form handler, Pardot would create some form validation to direct a user to another page. If you don’t want the prospect to leave the page, follow these instructions.
Add required=”required” to each of your required form fields. These should match what you specified in Pardot to avoid confusion.
Troubleshooting tips
Is your data not making its way into Pardot? Here are some troubleshooting tips to help you diagnose the issue.
- Try submitting the form with just email address required. If the prospect is created in Pardot without any issues, you might have a field type or a field mapping incorrect within your form handler.
- Check Enable data forwarding to the success location. Try checking or unchecking the option for “Enable data forwarding to the success location” within your Pardot form handler settings. Depending on how you are connecting your form handler to your web form, this may or may not need to be enabled.
- Double-check your field names are correct. The external field name you set within your form handler needs to be the EXACT SAME as what is in your HTML. Double-check that the HTML for your form fields is using the right name and remember, the name is different than an ID or CLASS.
- Use the HTTPS endpoint if your website is HTTPS. Using an HTTP endpoint for your form handler when your website is HTTPS will cause the browser to give security warnings. Update the form handler endpoint to HTTPS to resolve the issue.
Pardot Form Handlers + WordPress
There are many different ways to use Pardot Form Handlers with WordPress. Here are some resources to help you get started with using Pardot Form Handlers with WordPress:
- How to Integrate Gravity Forms With Pardot
- 5 Ways to Include Pardot Forms on Your WordPress Website
- How to Integrate Your Blog With Pardot: Tips, Tricks & Tools
Questions?
Send me a tweet @jennamolby, leave a comment below, or book a Peer Chat.

76 Comments
Hi Jenna,
Can a form handler push data to a dropdown custom field in Pardot or do I have to change the type field to text in Pardot?
Hi Isabelle, Yes, it can push data to a drop-down. You would add the field to the form handler as a TEXT field.
Thank you for all this great information! Would it be possible to add a Form Handler to a public VisualForce page that’s running an embedded flow? I can’t seem to be able to get the fields to sync back to Pardot
Hi Trent, I’ve never tried it myself, but I think that would be possible.
Hi Jenna,
This is great, thank you. I have the same form handler on multiple product pages on my website, do you know a trick for when a visitor submits the form that I’m able to see which URL they submitted it from?
Hi Rachel, You would add a field in Pardot and then map that field within your form handler. Your web developer should be able to populate the field within your form.
Hi Jenna,
Can form handlers be use on .Net forms? I was told because of how it integrates with forms (changing the action is not possible on .net). I can’t find any information on this topic.
Hi Sharyn, I don’t have any experience implementing form handlers with .NET forms, sorry!
Hi there! Thanks so much for this article. This article and the UTM article were both really helpful for setting up my form handlers.
I do have one final obstacle though. We want to require business email addresses, or at least not allow any free email addresses to pass through.
So in the Form Handlers I set the email to “Email not from ISPs and free mail providers.” Unfortunately it isn’t working as expected. When I submit a test lead the form would direct me to the home page upon form submission instead of the thank you page and the lead wouldn’t go through at all. So it errored out on me with that setting.
My work-a-round was to add some type of script to the form on the landing page itself so when a free-mail email address is entered it gives the user a message that says “Please use a business email address.” Basically client-side validation. I haven’t found any code that works, and I don’t even know if that is the best solution. (I use WordPress, Elementor, and the Marketing Pardot plugin for the form – but I am playing around with an HTML form too that I could test out.)
Do you know a better way to do this? Thanks again for your article! Extremely helpful.
Hi Kat, You’re welcome! I haven’t done this myself with a Pardot form handler, but using a script on your webpage should work.