
Hold up! There’s a newer post on this topic
There have been new features and capabilities added to Salesforce Flow since this post was published on May 26, 2020. You can now achieve lead to account matching in Salesforce using Flow only. Check out the updated post.Establishing a connection between leads and accounts can give you insight into what customers are coming in as leads and tighten sales and marketing alignment. Salesforce Flow and Process builder can be used to automatically match leads to existing accounts based on different criteria. In this post, I’ll show you how to match leads to accounts based on domain a well as company/account name.
The lead to account matching process
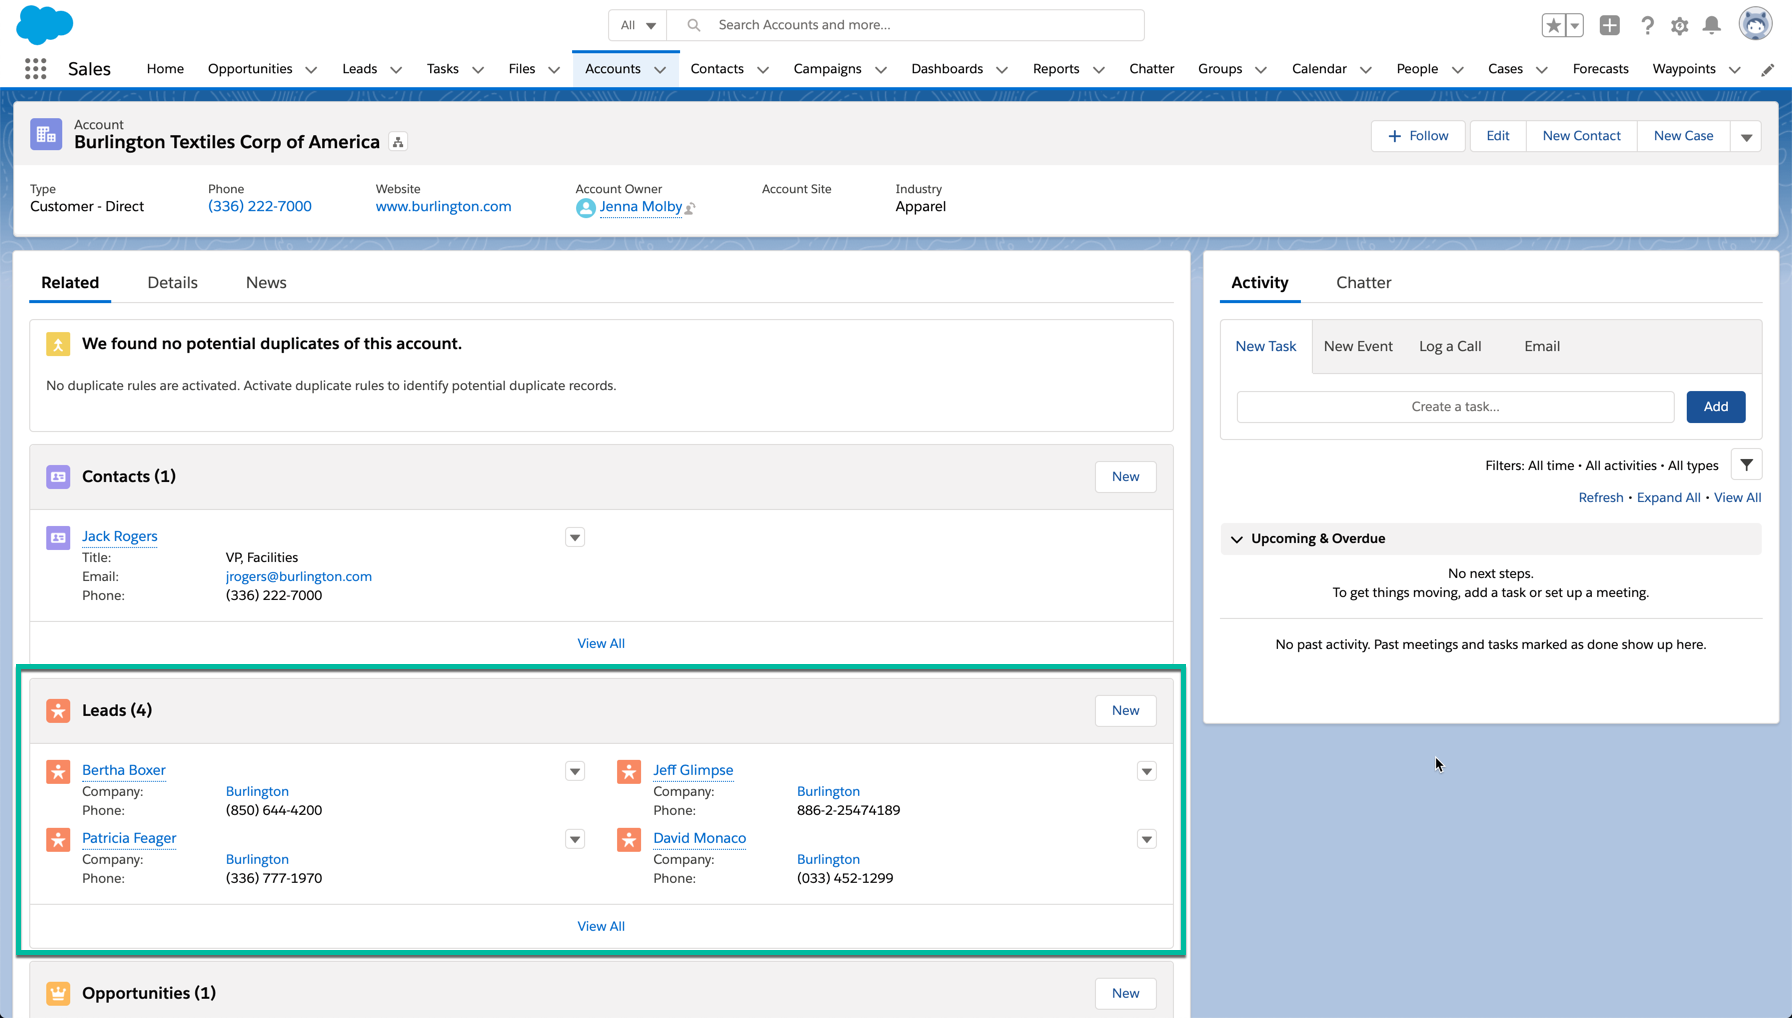
The goal is to populate a related list on the accounts with the matched leads.
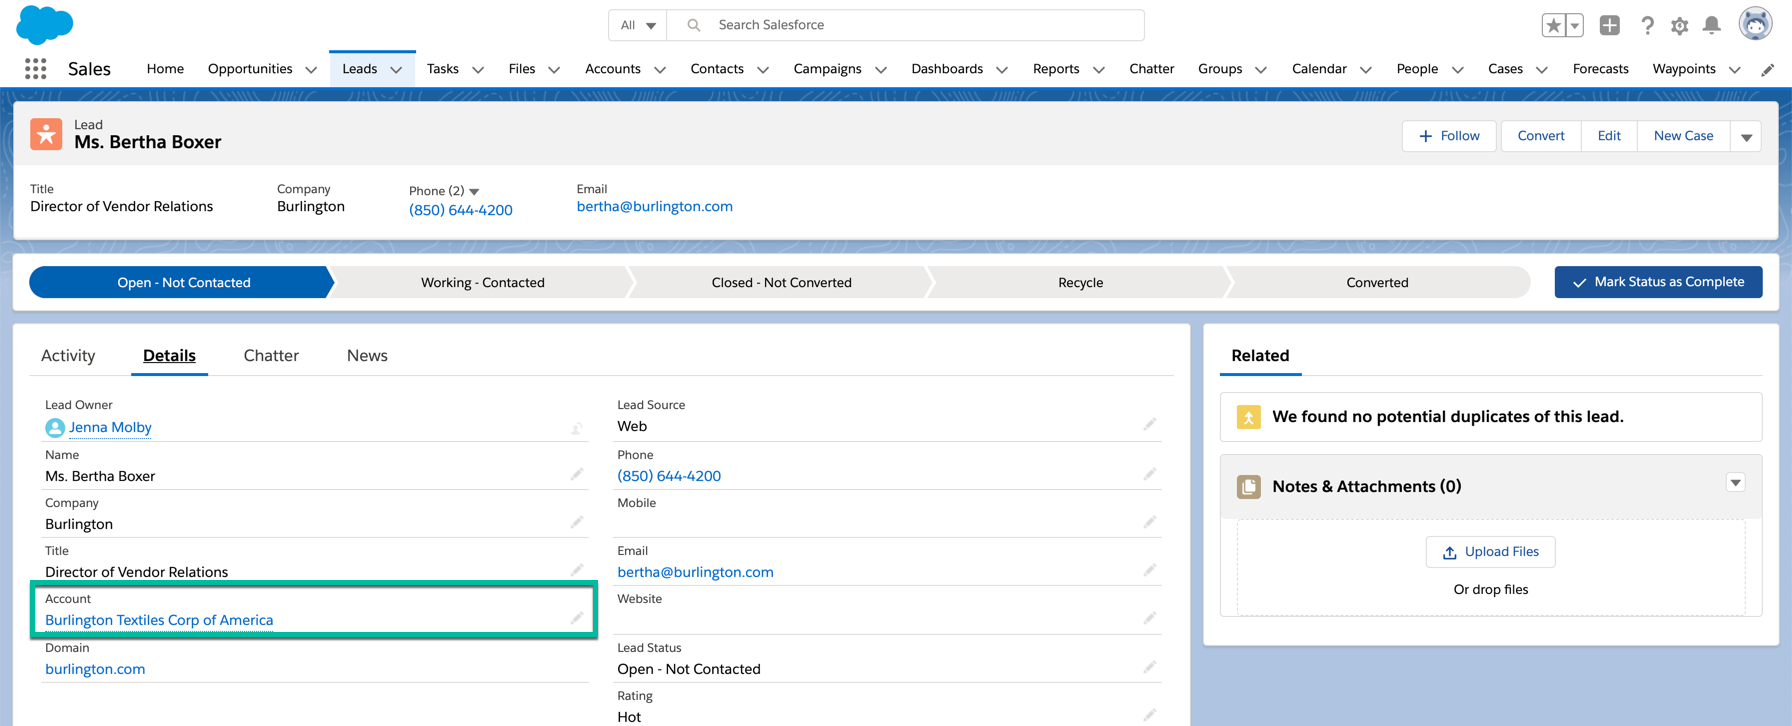
The matched account will also be shown as a lookup field on the lead.
Here’s a high-level look at what needs to happen to setup lead to account matching:
- Lead is matched to an account based on email domain.
- If the lead email domain does not match an account email domain, the match will be based on lead company = account name.
- A Flow is used to identfy the matched leads and update them accordingly.
- A Process Builder is used to trigger the Flow and set the Flow variables.
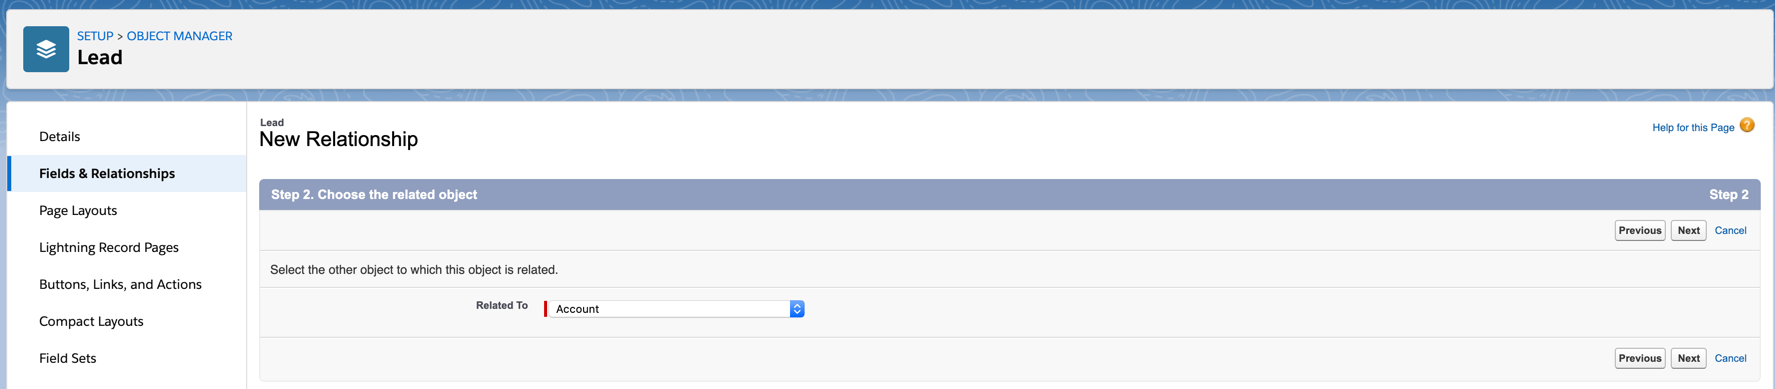
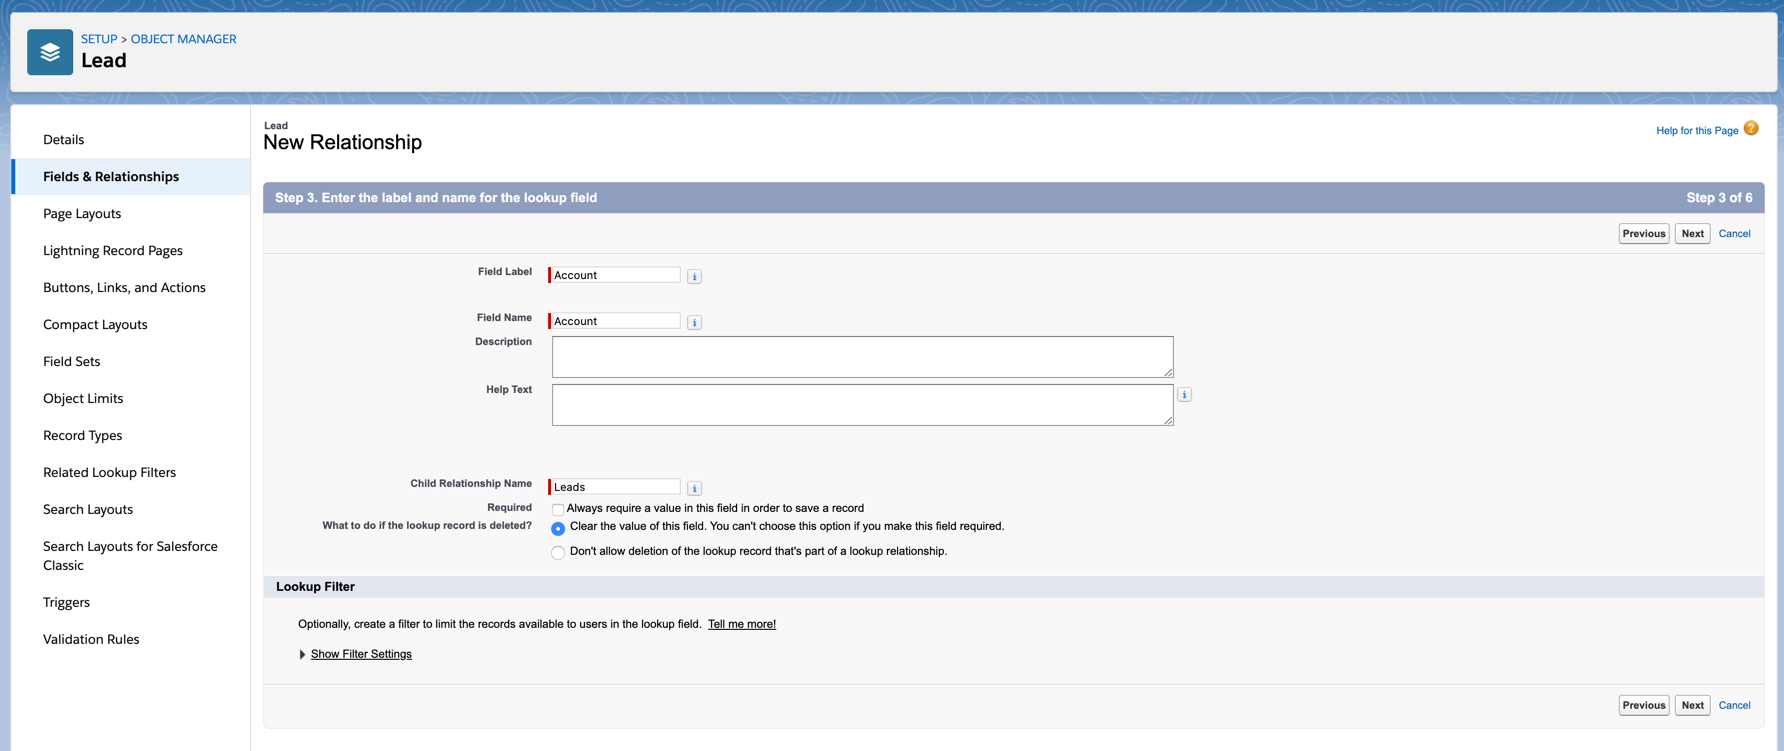
Create lead fields
Create a new lookup field on the lead to the account called “Account”.
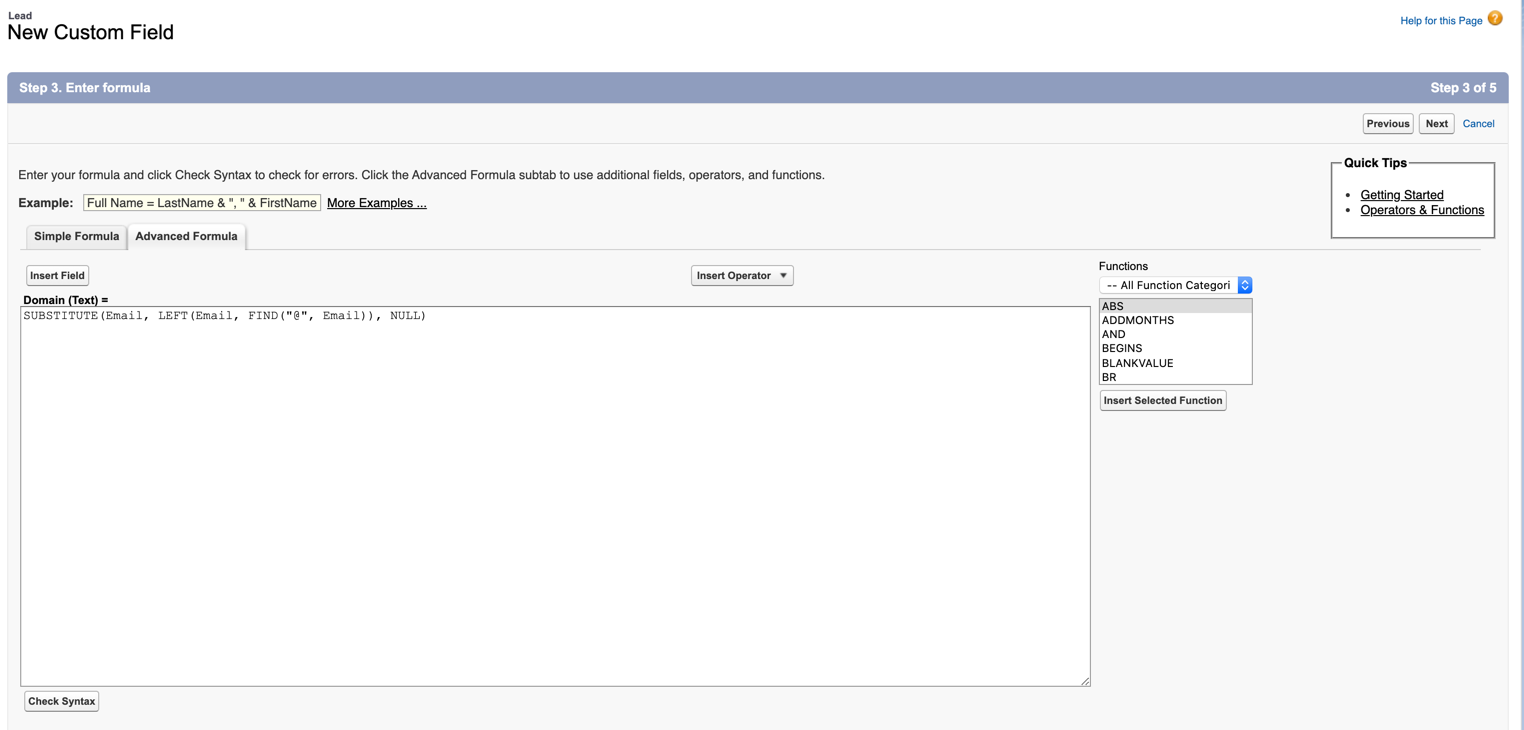
Create a new formula field on the lead called “domain”, using the following formula:
SUBSTITUTE(Email, LEFT(Email, FIND("@", Email)), NULL)

Create account field
Create a text field on the account called “domain”. This is the field we will use to match the account domain to the lead domain. You will need to populate the account with the domain. This tutorial will not cover how to populate the domain on the account level.
Create the flow
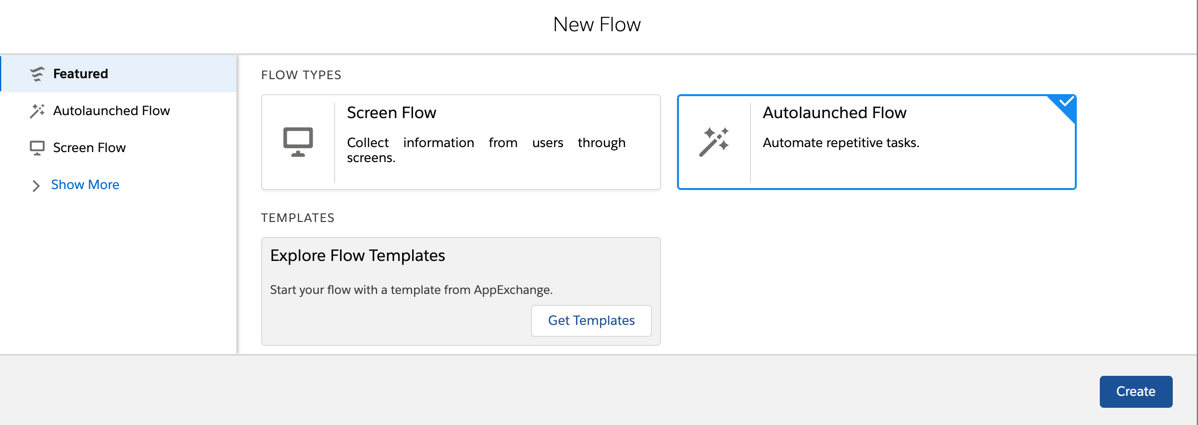
Navigate to Setup > Process Automation > Flows and select new flow. Select AutoLaunched Flow from the wizard.
Create variables
5 variables need to be created for this flow:
- Account
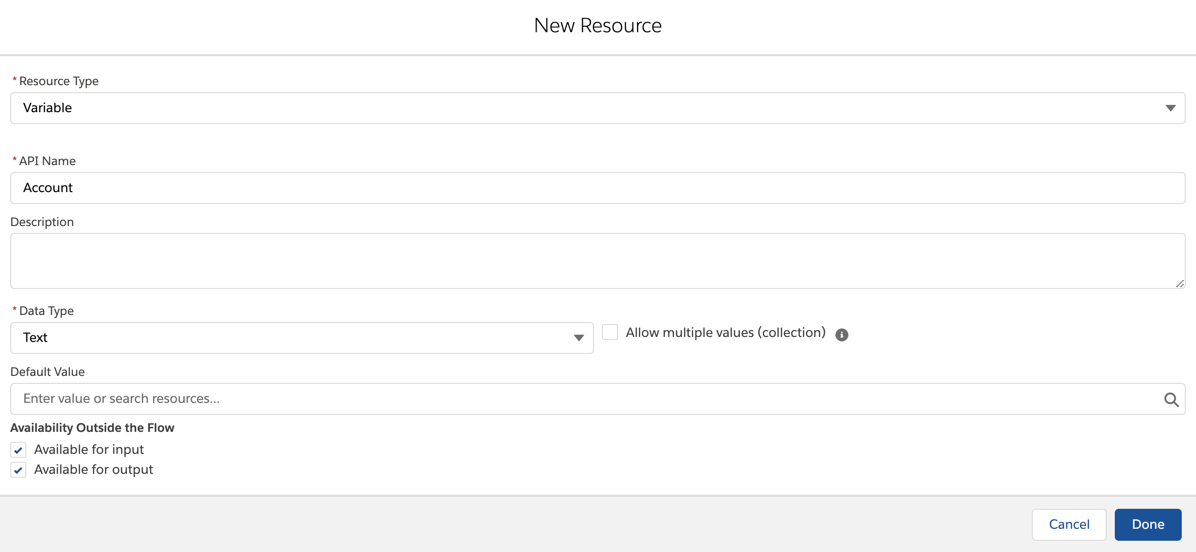
- AccountDomain

- AccountId
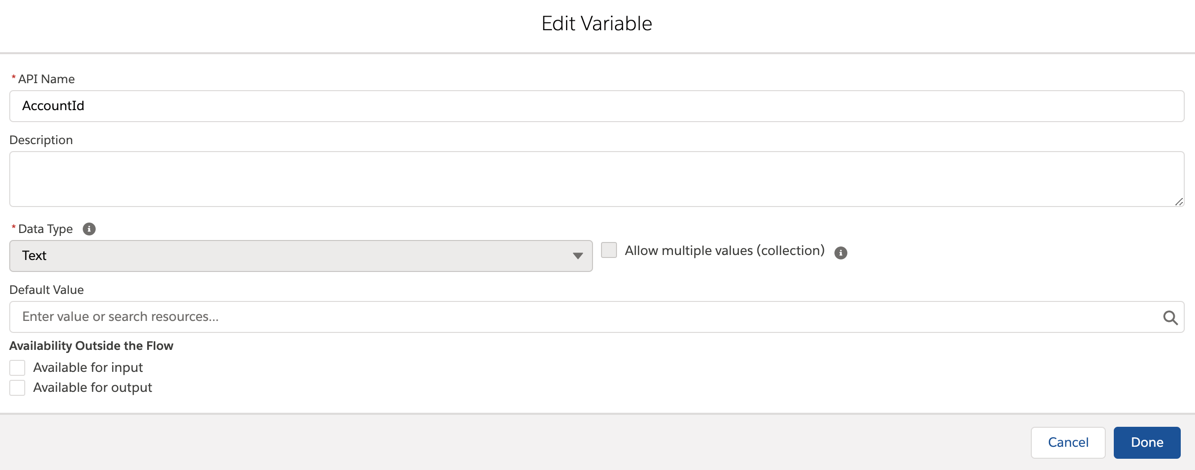
- AccountName
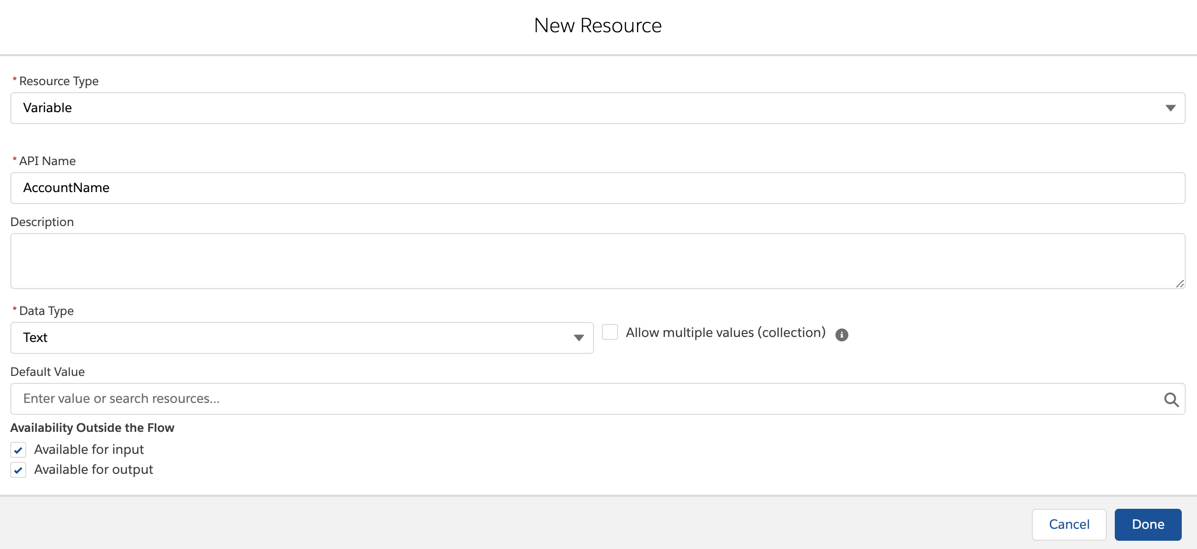
- LeadId

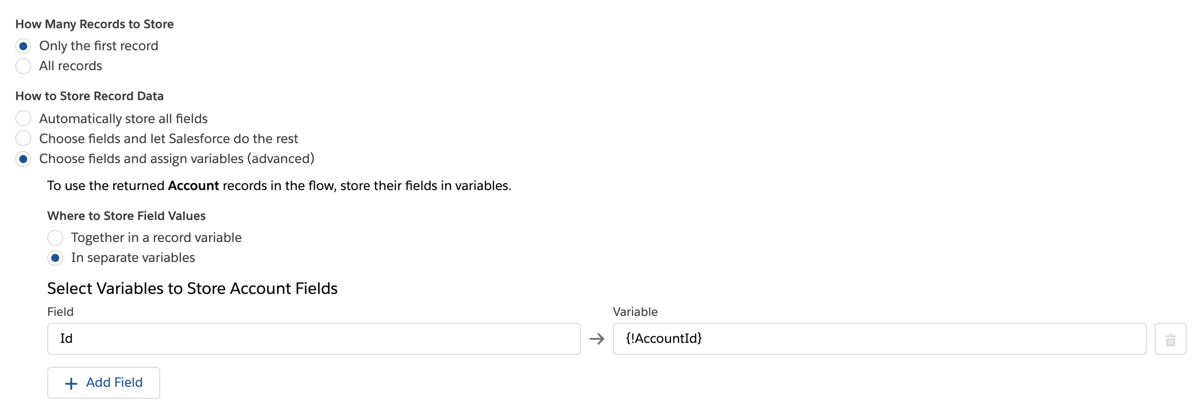
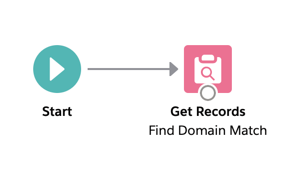
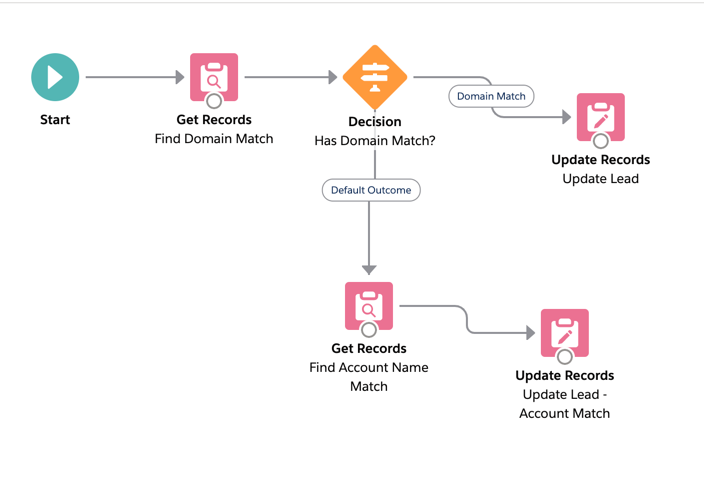
Add a Get Records element to the flow
Drag and drop a Get Records element to the page. This element will look for a domain match based on the domain on the account and the domain on the lead.
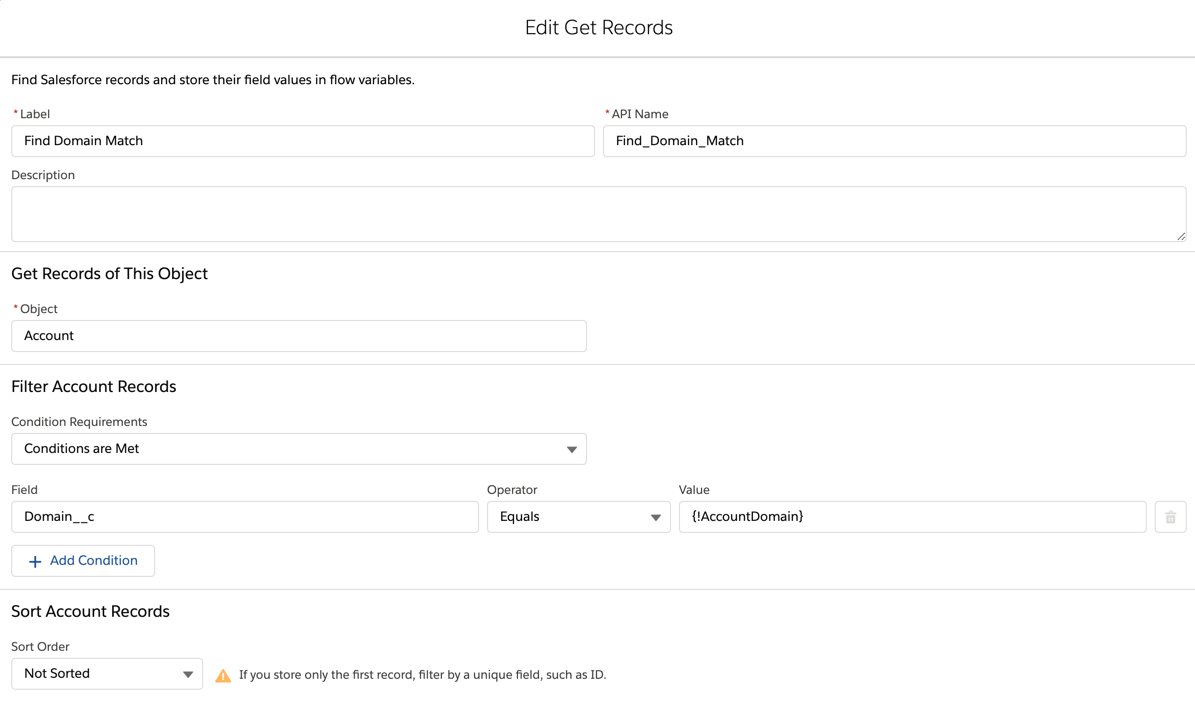
Connect the start of the flow to the new element.
Add a Decision element to the flow
Drag and drop a decision element on to the page. This will check to see if there is a domain match or not.
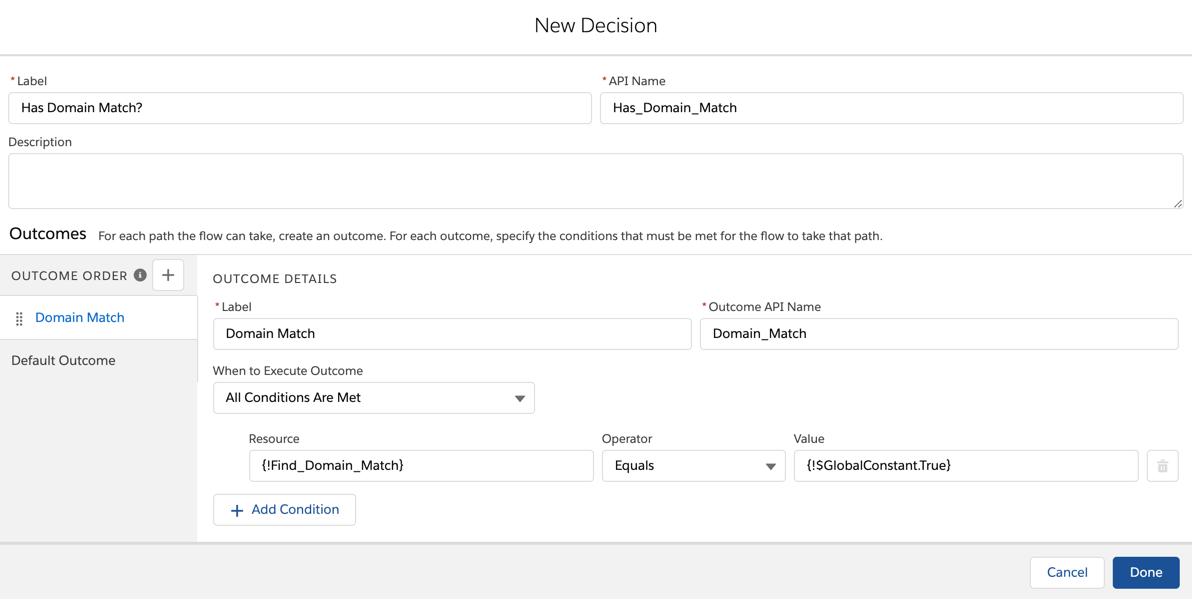
The default outcome should just be left empty.
Save and connect the get records element to the decision element.

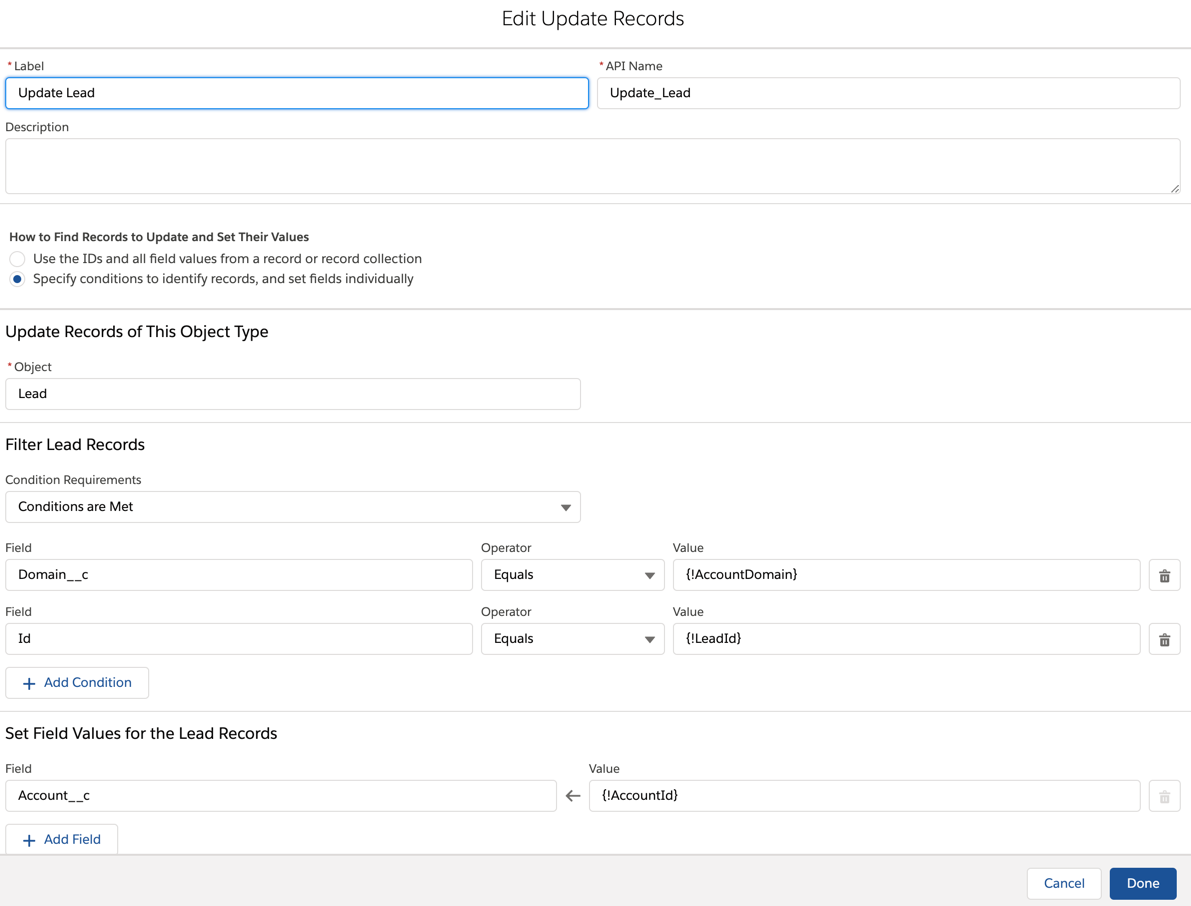
Add a Update Records element to the flow
Now add an update records element to the flow. This will update the matched Account lookup on the lead if there is a domain match.
Connect the new element to the decision element. Now your flow should look like this:

Add a Get Records element to the flow
Next, add another get records element to the flow to check to see if there is a company/account match.
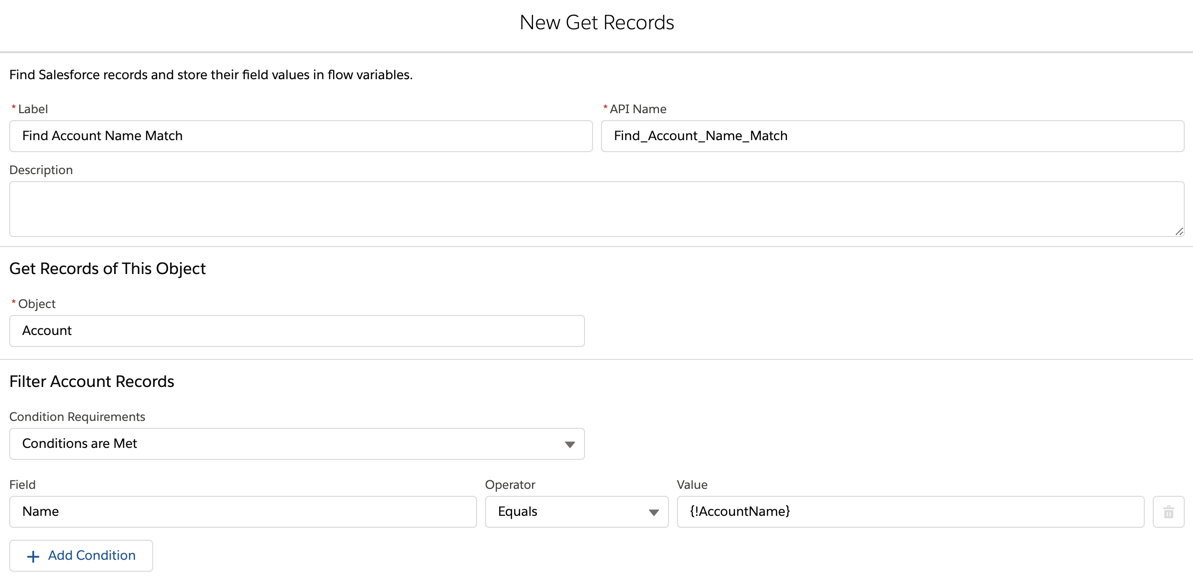

Save and connect the element to the decision element (default outcome).

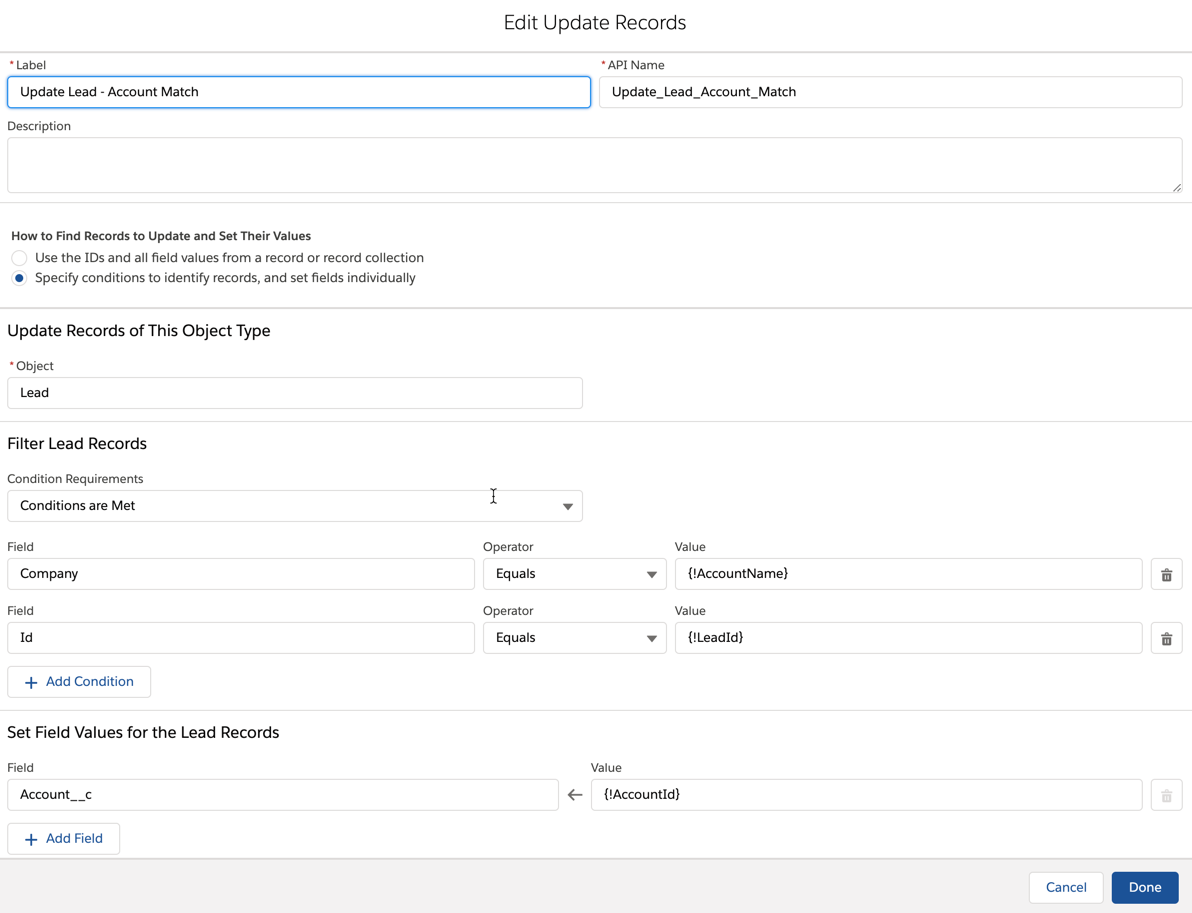
Add an update records element to the flow
Lastly, add another update records element to the flow to update the account lookup on the lead if there is a company name -> account name match.
Save and connect the last element to the flow. Your final flow should look something like this:
Activate the flow
Save and activate the flow. Note: the flow will need to be activated in order to create the process builder.
Create process builder
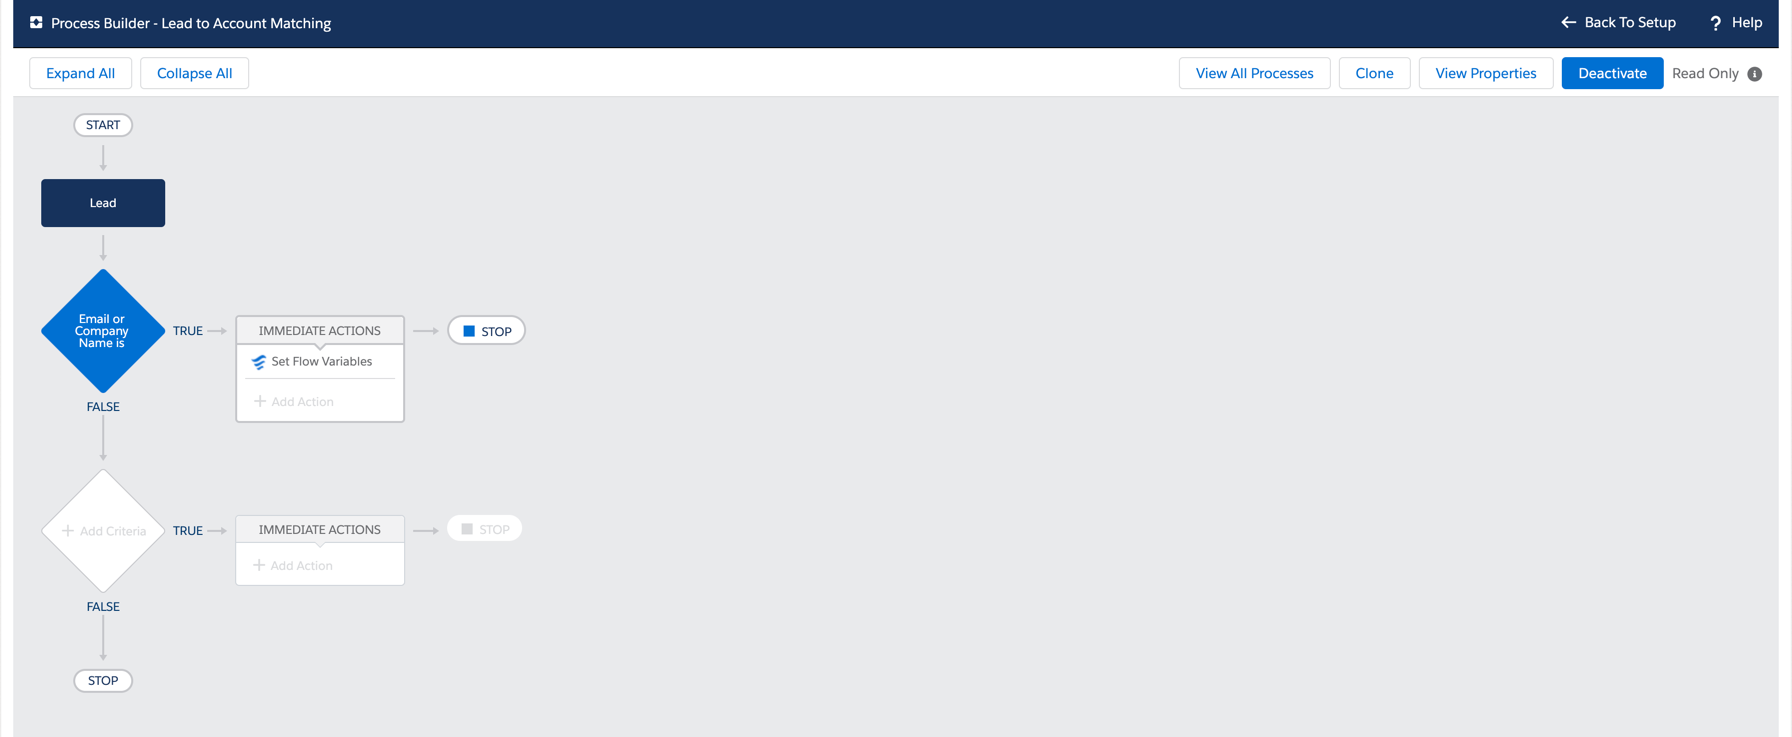
Navigate to Process Builder (Setup > Process Automation > Process Builder), create a new process builder and choose when “a record changes” to start the process.
Select the lead object from the dropdown to start the process. You can select either “only when a record is created” or “when a record is created or edited” to start the process. I set up mine to trigger “only when a record is created” since company names and email addresses are required when a lead is created and don’t often change. Depending on your business requirements, you might want to change it to “when a record is created or edited”.

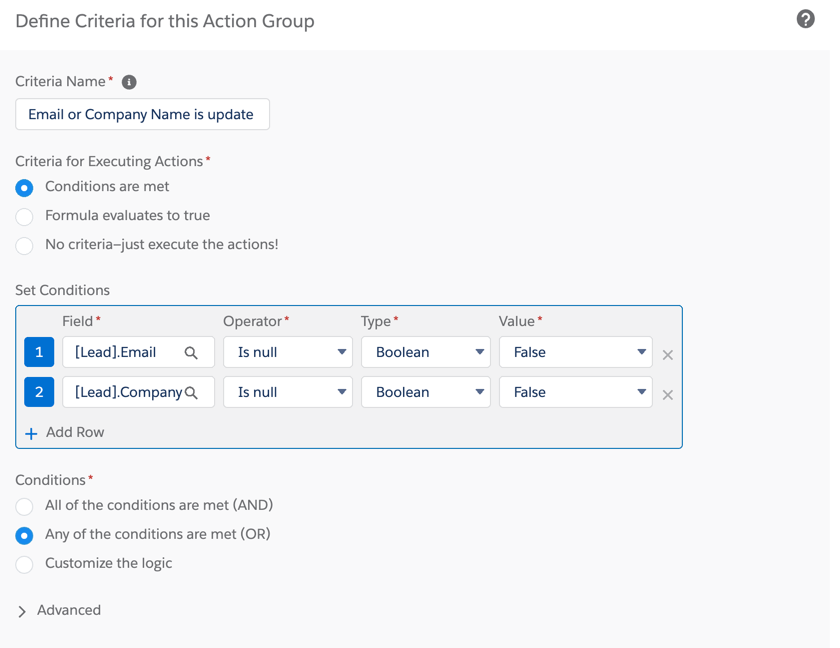
Next set up the filters that will allow the actions to trigger. Again, these filters may be different based on your business requirements. I have set mine up to make sure company name is not null and email address is not null. You might want to add other filters to exclude certain companies, email domains, etc, from running through.
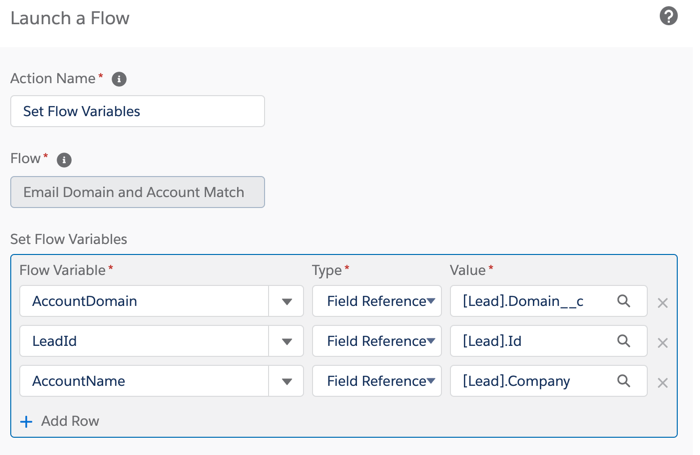
Add an action for a flow and select your flow from the list. Add and set your flow variables.
Save and activate your flow!
Test, test, test
Make sure you test! Here is what my testing process looks like:
- Make sure all the new fields are added to the page layout (at least for now)
- Find an account to use to test (ex. Burlington Textiles Corp of America)
- Populate the domain field on the account (ex. burlington.com)
- Create a new lead using that domain as part the email address (ex. [email protected])
- Ensure the domain field on the lead is populated with the correct domain from the email address you entered (ex. burlington.com)
- Look at the lead to see if the account lookup is populated with the correct account
- Look at the account to ensure the lead is populating in the related list
- Create a new lead where the company name = the account name from your test account (ex. Burlington Textiles Corp of America). The email address for the lead should use a invalid domain name (ex. [email protected])
- Look at the lead to see if the account lookup is populated with the correct account
- Look at the account to ensure the lead is populating in the related list
If you have it set up so your process will run when a lead is created and updated, repeat the steps to test an updated lead. You will also want to test different lead scenarios based on the filters you specified in your process builder. For example, if you have a filter to exclude all @gmail.com email addresses, try updating or creating a lead with an @gmail.com email address to ensure the lead updates as expected.
Questions?
Send me a tweet @jennamolby, leave a comment below, or book a Peer Chat.
20 Comments
I want to try this but I have a question: How did you add the leads to the related list under the account object? I don’t think you mentioned it in the guide (maybe I missed it?)
Hi Jimmy, The leads related list should be available to add the page layout for the account object. See the screenshot here:
https://jennamolby.com/wp-content/uploads/2020/12/Account-lead-related-list.png.
Will this work if multiple Accounts have the same domain? Our accounts tend to be large enterprises with multiple divisions, there is a lot of overlap in the domain name for those companies.
This is fantastic btw! Thank you so much for posting.
Hi Brian, Yes, it will work with Accounts that have the same domain. It’s unclear in my testing how it determines which account to associate the lead to, though. Maybe you could add additional filters within your decision element to determine which account should take precedence?
This is really helpful Jenna and works perfectly.
Hi Jenna, this is my first comment here, since I am preparing for Pardot consultant exam and found your blog very valuable!
Regarding this tutorial, which I very appreciate, you skipped the crucial point which is retrieving an “account domain”. Could you describe briefly how you recommend to pull it from various contacts related to each account?
Many thanks in advance!
Paweł
Hi Pawel, Thank you! There are a couple of ways to populate the domain on the account. 1) use a data enrichment tool to populate the domain. 2) Populate the domain on the account manually. 3) Create a process to update the domain on the account when a contact is associated to the account. Hope that helps! Cheers, Jenna
Thanks for the article. What would it look like if I’d want to add a filter for country data? Would I add another ‘Get Records’ step and where?
Hi Nikita, Yes, you would add another ‘get records’ step and add another decision step. The placement depends on when you want to evaluate the country match. Do you want the country to get evaluated after the domain and company name match? If so, then place it after the last step. Hope that helps! Cheers, Jenna