
Hold up! There’s a newer post on this topic
There have been new features and capabilities added to Salesforce Flow since this post was published on May 26, 2020. You can now achieve lead to account matching in Salesforce using Flow only. Check out the updated post.Establishing a connection between leads and accounts can give you insight into what customers are coming in as leads and tighten sales and marketing alignment. Salesforce Flow and Process builder can be used to automatically match leads to existing accounts based on different criteria. In this post, I’ll show you how to match leads to accounts based on domain a well as company/account name.
The lead to account matching process
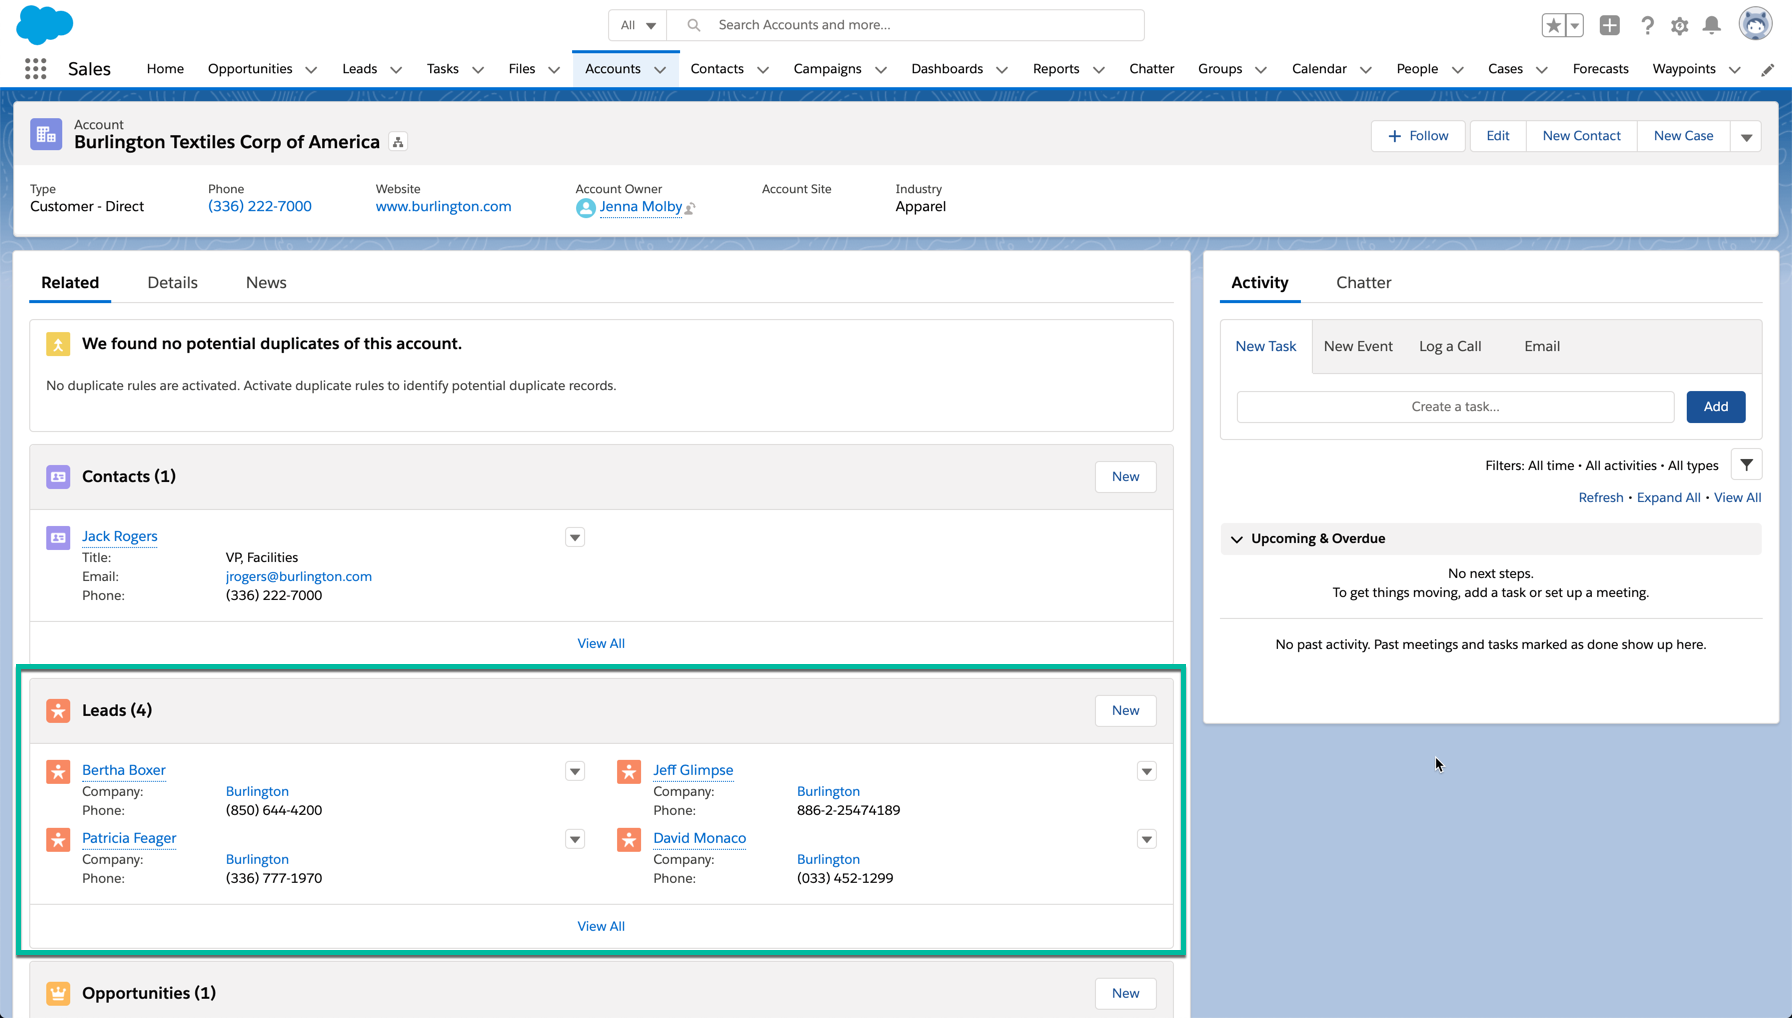
The goal is to populate a related list on the accounts with the matched leads.
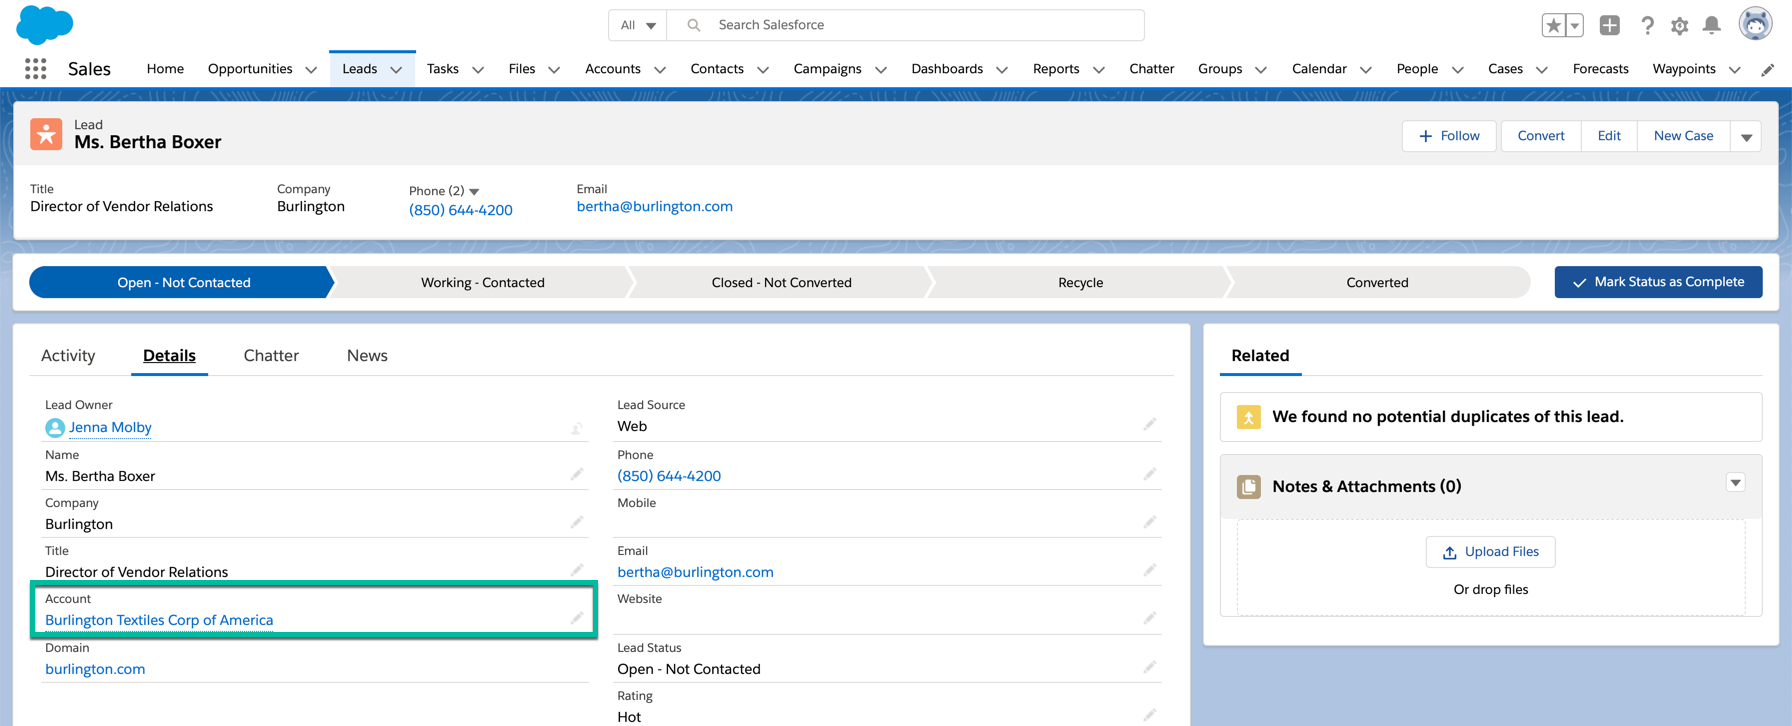
The matched account will also be shown as a lookup field on the lead.
Here’s a high-level look at what needs to happen to setup lead to account matching:
- Lead is matched to an account based on email domain.
- If the lead email domain does not match an account email domain, the match will be based on lead company = account name.
- A Flow is used to identfy the matched leads and update them accordingly.
- A Process Builder is used to trigger the Flow and set the Flow variables.
Create lead fields
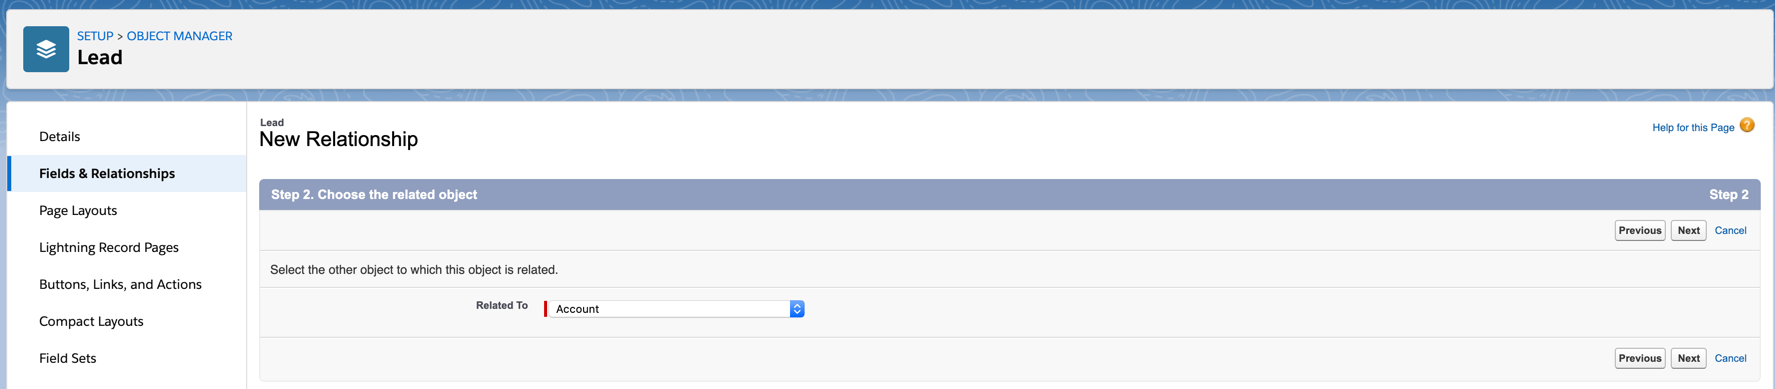
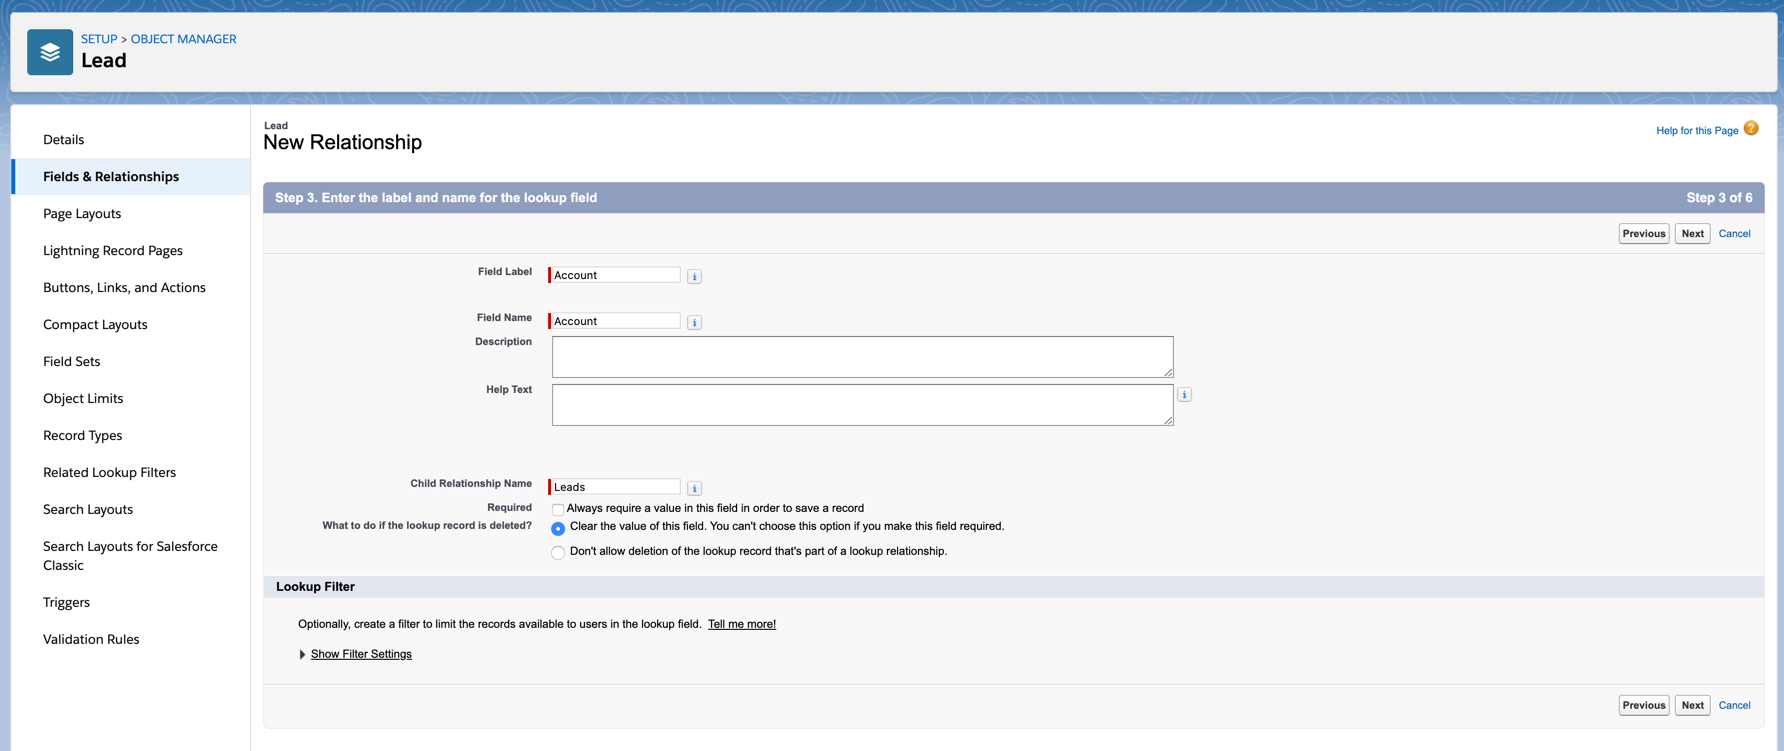
Create a new lookup field on the lead to the account called “Account”.
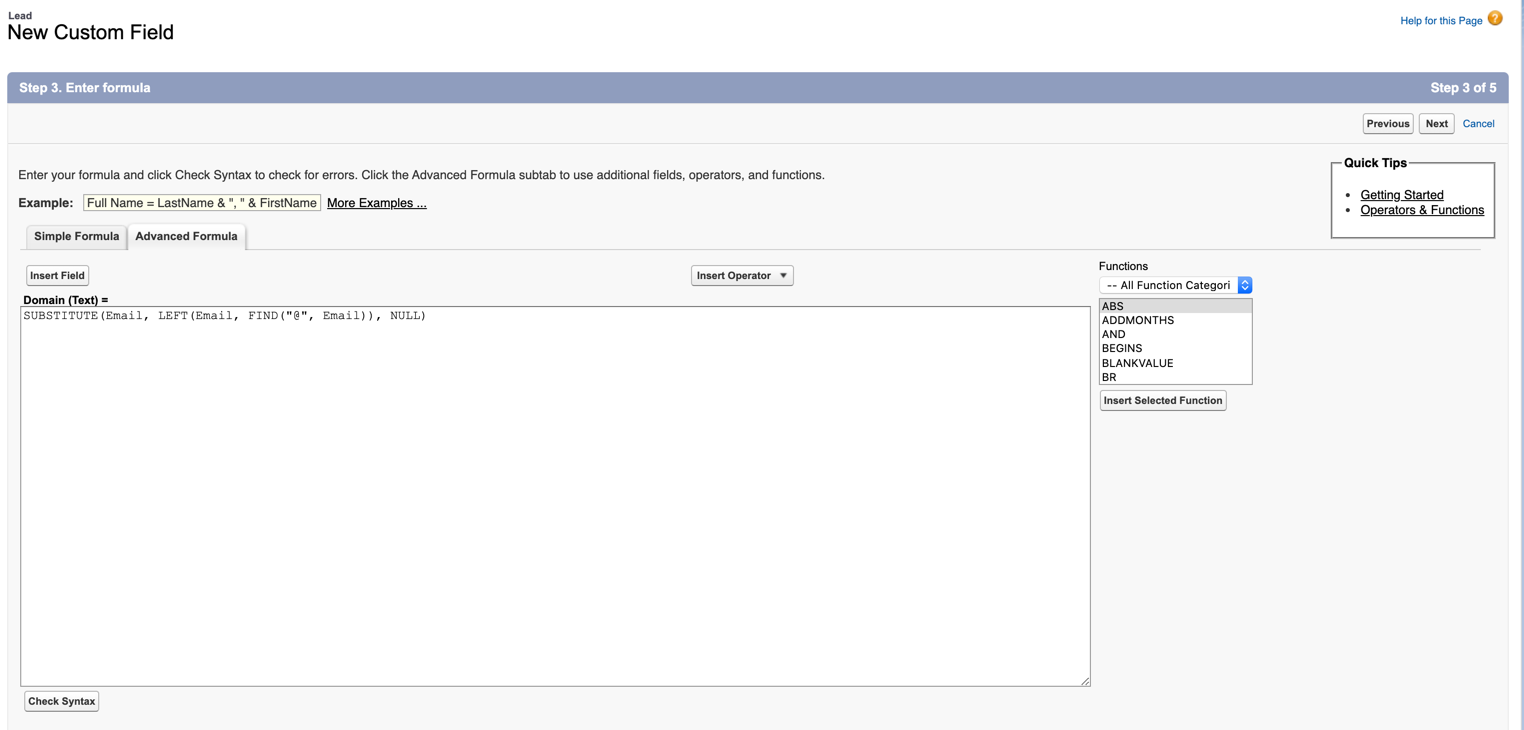
Create a new formula field on the lead called “domain”, using the following formula:
SUBSTITUTE(Email, LEFT(Email, FIND("@", Email)), NULL)

Create account field
Create a text field on the account called “domain”. This is the field we will use to match the account domain to the lead domain. You will need to populate the account with the domain. This tutorial will not cover how to populate the domain on the account level.
Create the flow
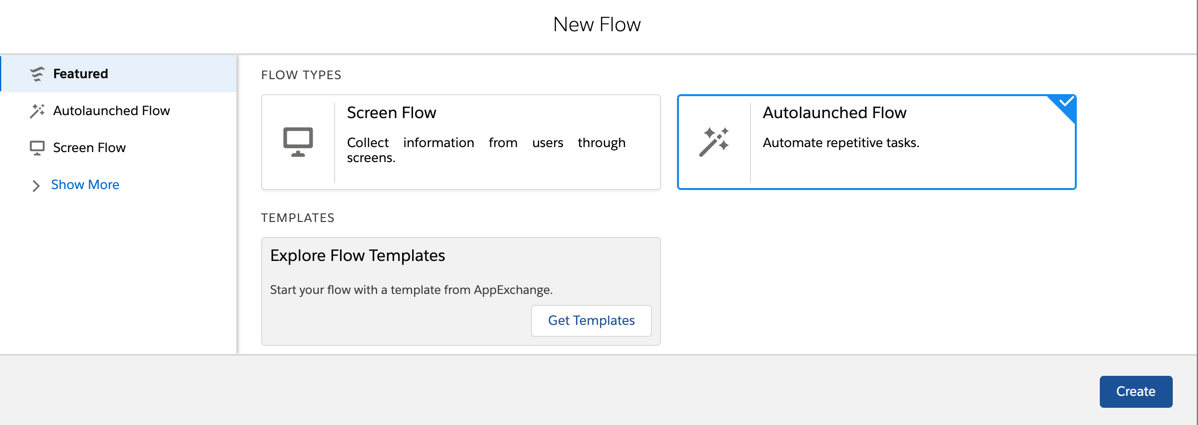
Navigate to Setup > Process Automation > Flows and select new flow. Select AutoLaunched Flow from the wizard.
Create variables
5 variables need to be created for this flow:
- Account
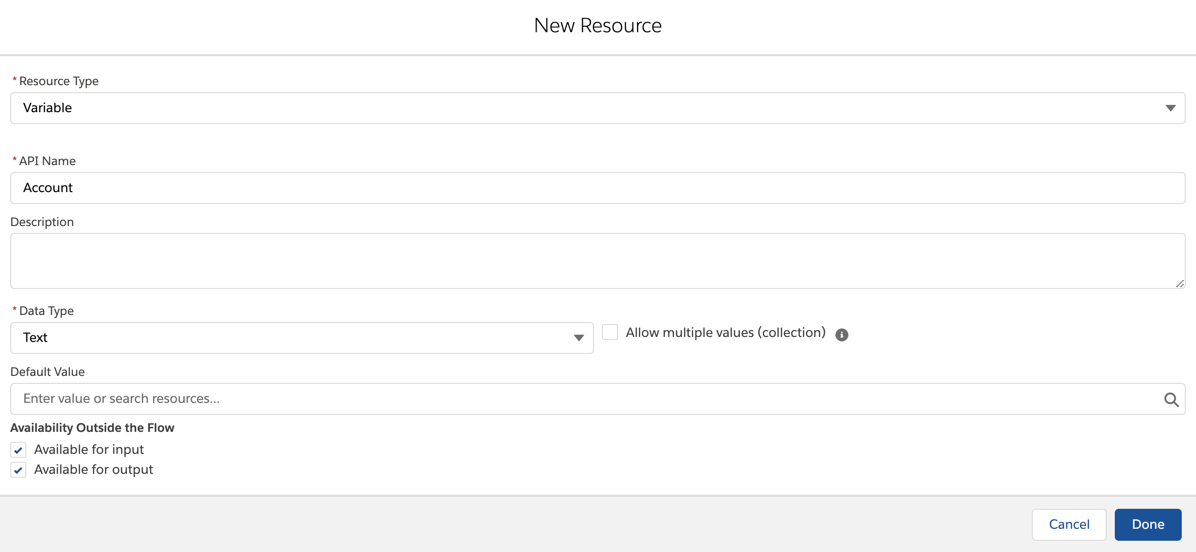
- AccountDomain

- AccountId
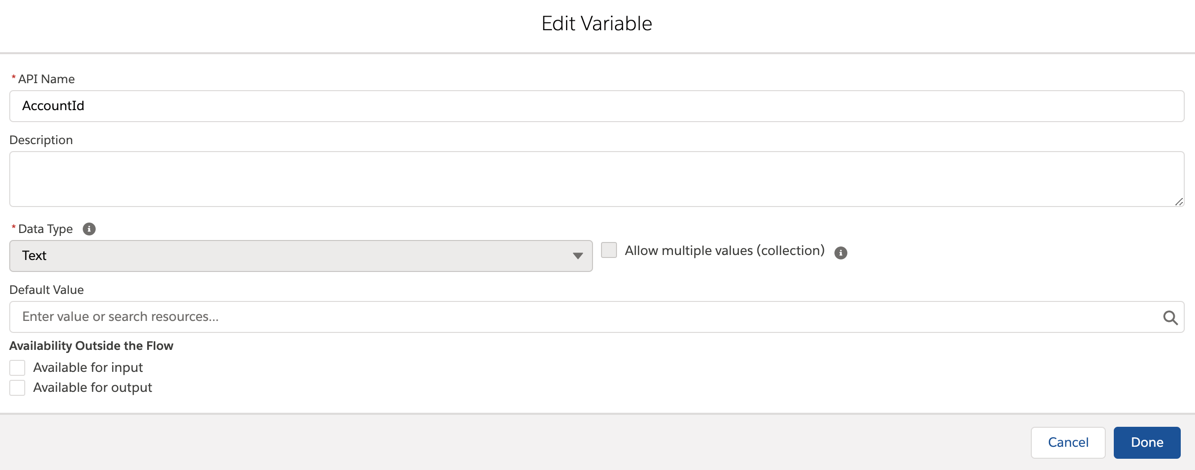
- AccountName
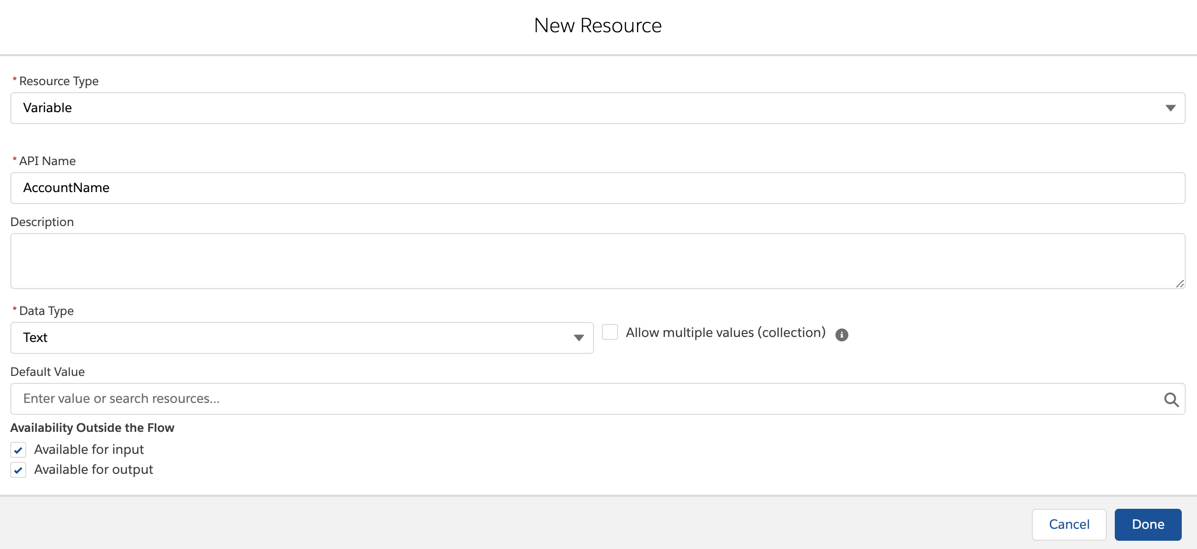
- LeadId

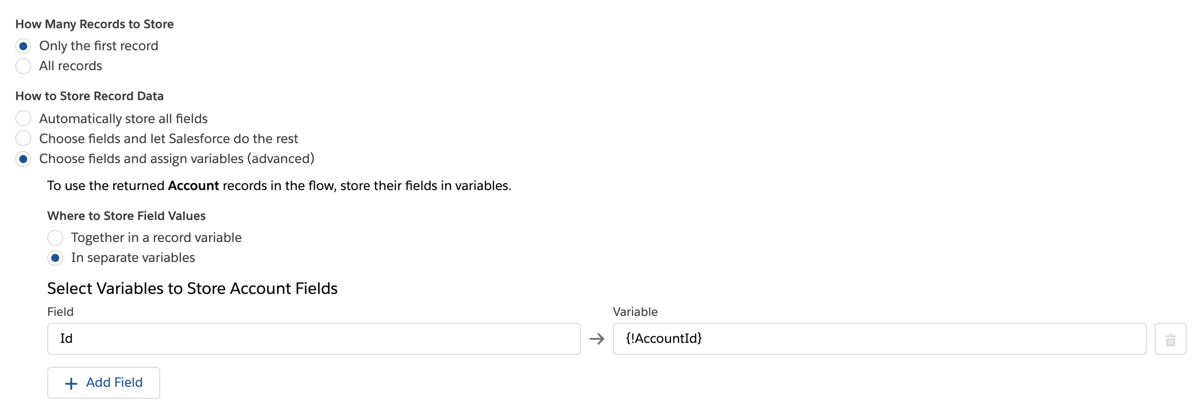
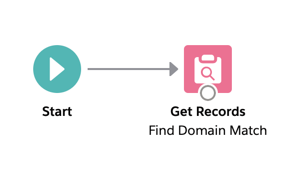
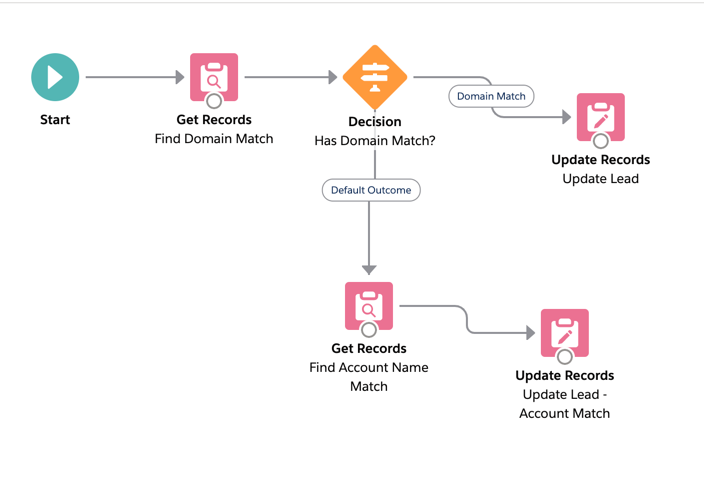
Add a Get Records element to the flow
Drag and drop a Get Records element to the page. This element will look for a domain match based on the domain on the account and the domain on the lead.
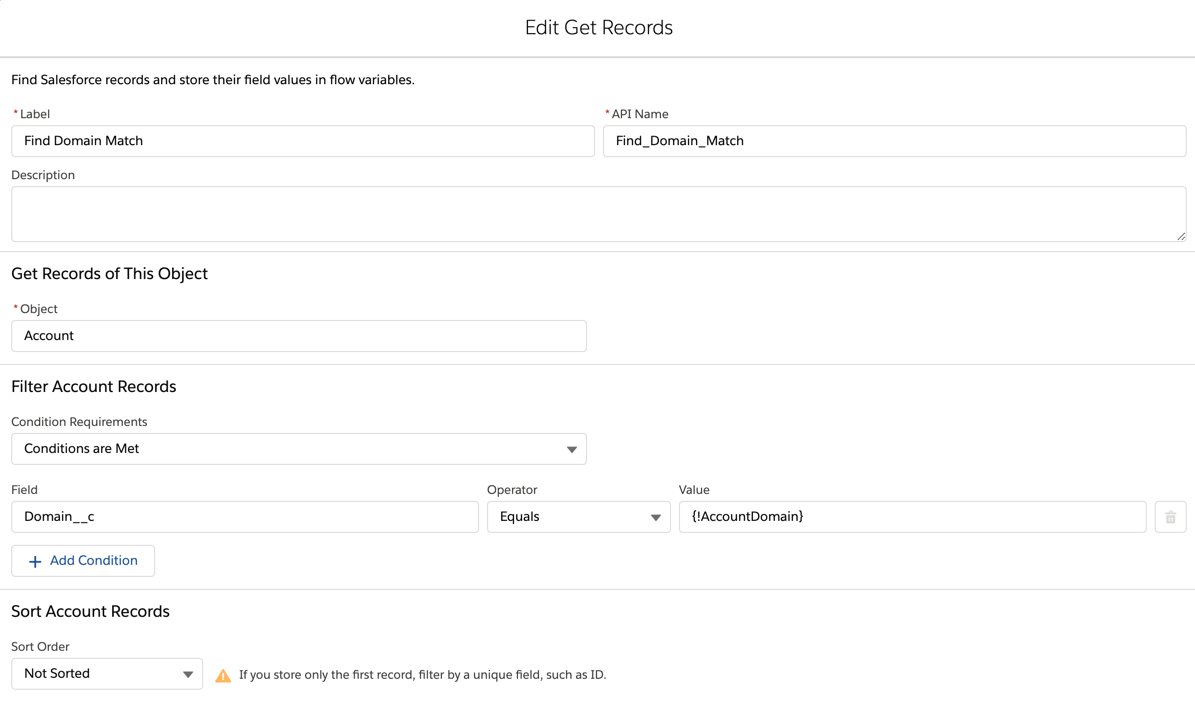
Connect the start of the flow to the new element.
Add a Decision element to the flow
Drag and drop a decision element on to the page. This will check to see if there is a domain match or not.
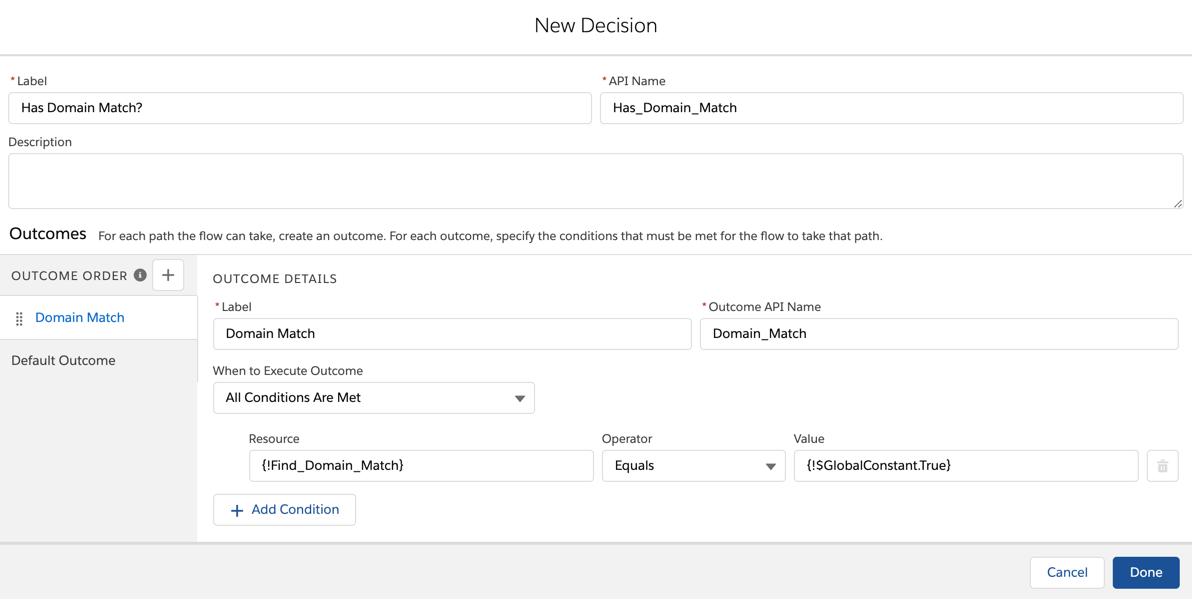
The default outcome should just be left empty.
Save and connect the get records element to the decision element.

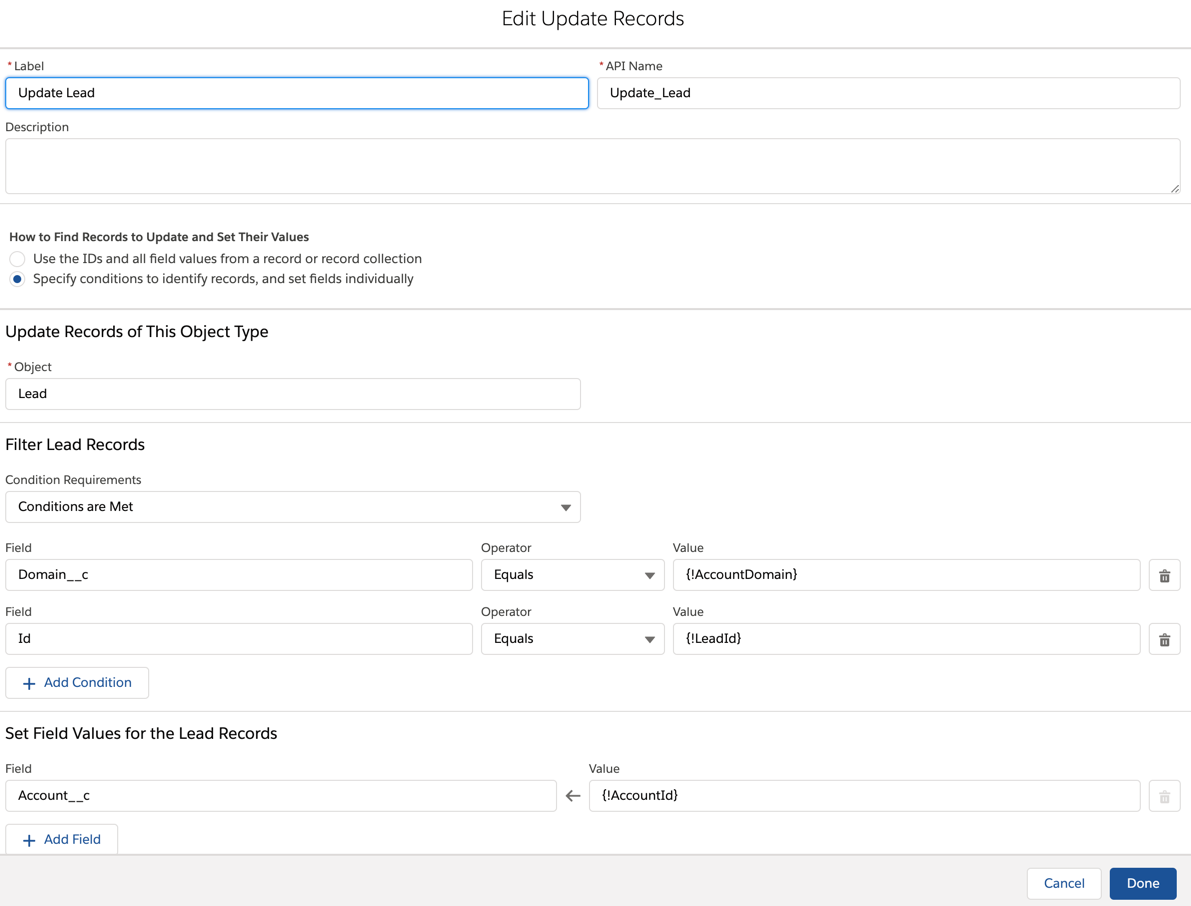
Add a Update Records element to the flow
Now add an update records element to the flow. This will update the matched Account lookup on the lead if there is a domain match.
Connect the new element to the decision element. Now your flow should look like this:

Add a Get Records element to the flow
Next, add another get records element to the flow to check to see if there is a company/account match.
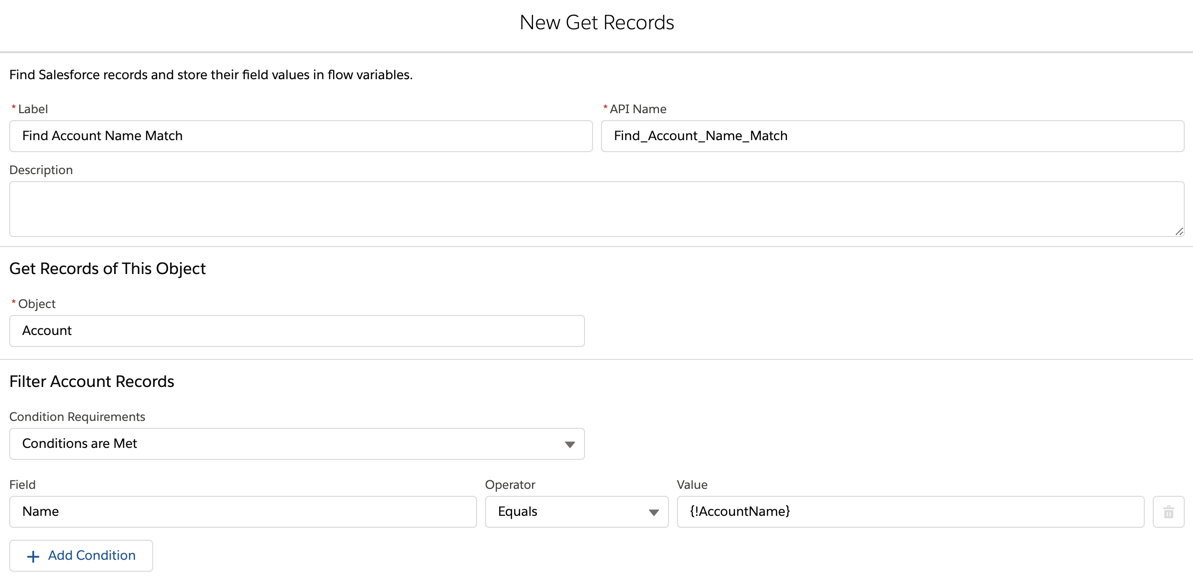

Save and connect the element to the decision element (default outcome).

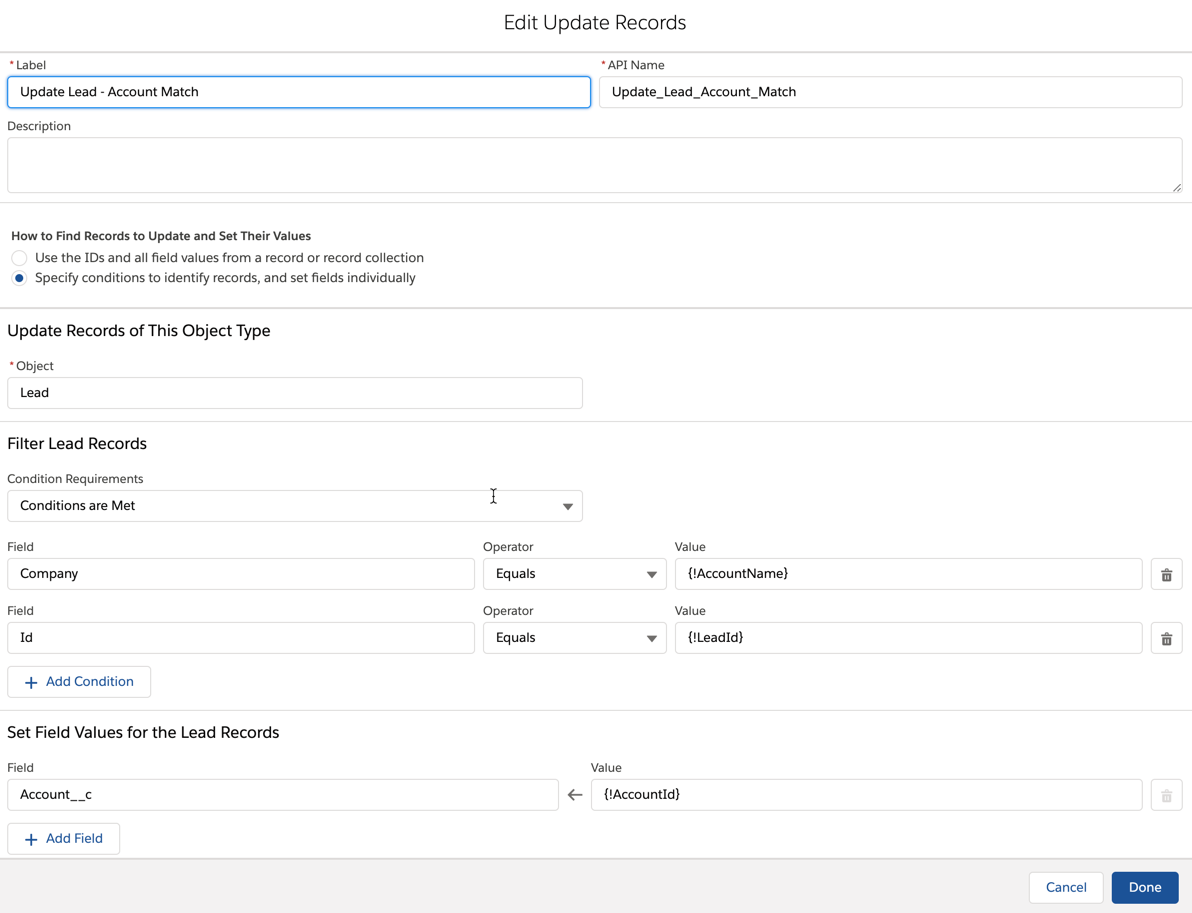
Add an update records element to the flow
Lastly, add another update records element to the flow to update the account lookup on the lead if there is a company name -> account name match.
Save and connect the last element to the flow. Your final flow should look something like this:
Activate the flow
Save and activate the flow. Note: the flow will need to be activated in order to create the process builder.
Create process builder
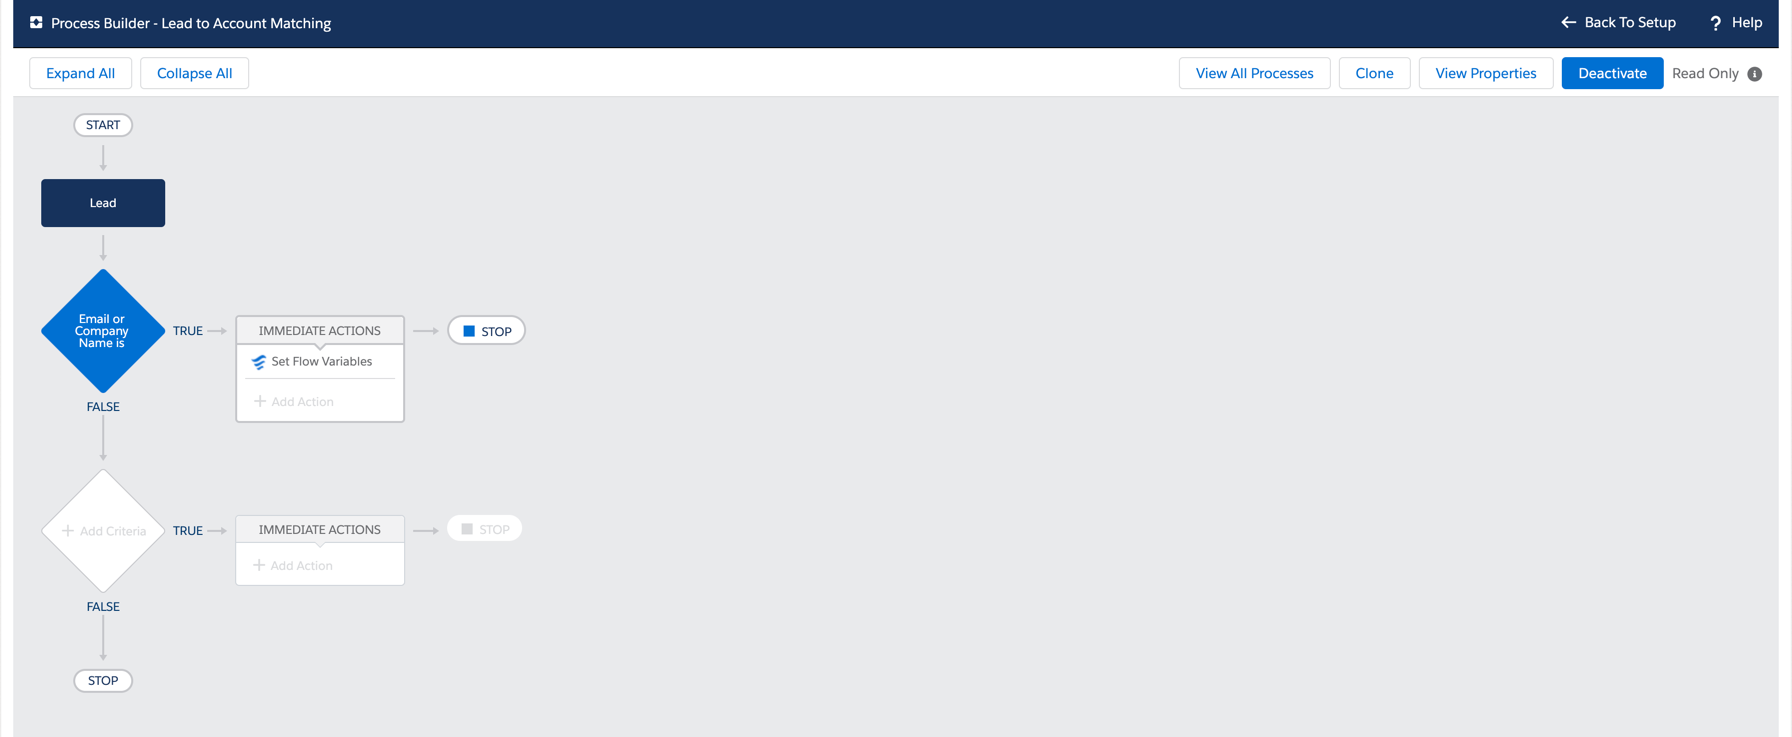
Navigate to Process Builder (Setup > Process Automation > Process Builder), create a new process builder and choose when “a record changes” to start the process.
Select the lead object from the dropdown to start the process. You can select either “only when a record is created” or “when a record is created or edited” to start the process. I set up mine to trigger “only when a record is created” since company names and email addresses are required when a lead is created and don’t often change. Depending on your business requirements, you might want to change it to “when a record is created or edited”.

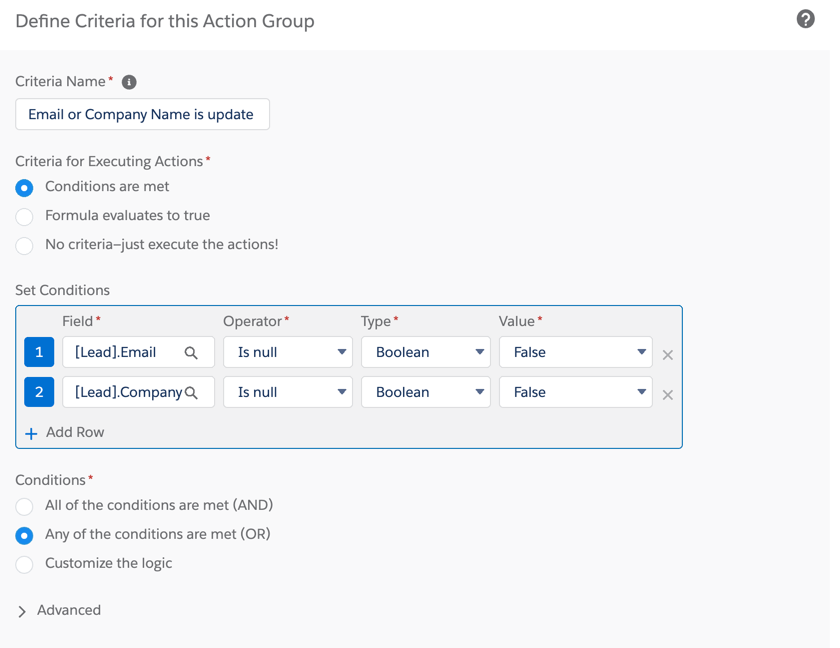
Next set up the filters that will allow the actions to trigger. Again, these filters may be different based on your business requirements. I have set mine up to make sure company name is not null and email address is not null. You might want to add other filters to exclude certain companies, email domains, etc, from running through.
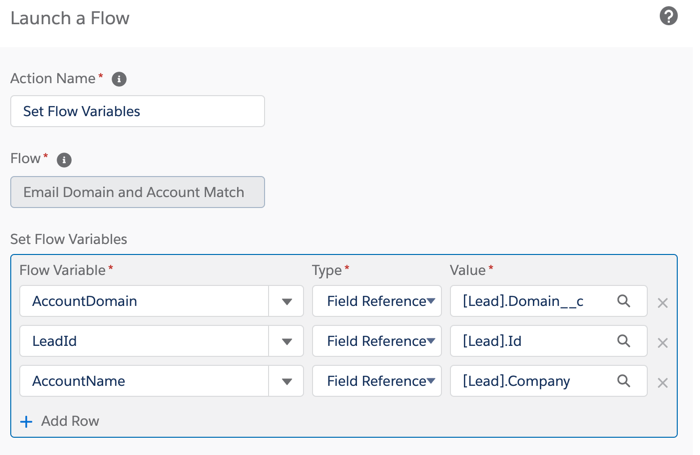
Add an action for a flow and select your flow from the list. Add and set your flow variables.
Save and activate your flow!
Test, test, test
Make sure you test! Here is what my testing process looks like:
- Make sure all the new fields are added to the page layout (at least for now)
- Find an account to use to test (ex. Burlington Textiles Corp of America)
- Populate the domain field on the account (ex. burlington.com)
- Create a new lead using that domain as part the email address (ex. [email protected])
- Ensure the domain field on the lead is populated with the correct domain from the email address you entered (ex. burlington.com)
- Look at the lead to see if the account lookup is populated with the correct account
- Look at the account to ensure the lead is populating in the related list
- Create a new lead where the company name = the account name from your test account (ex. Burlington Textiles Corp of America). The email address for the lead should use a invalid domain name (ex. [email protected])
- Look at the lead to see if the account lookup is populated with the correct account
- Look at the account to ensure the lead is populating in the related list
If you have it set up so your process will run when a lead is created and updated, repeat the steps to test an updated lead. You will also want to test different lead scenarios based on the filters you specified in your process builder. For example, if you have a filter to exclude all @gmail.com email addresses, try updating or creating a lead with an @gmail.com email address to ensure the lead updates as expected.
Questions?
Send me a tweet @jennamolby, leave a comment below, or book a Peer Chat.
20 Comments
Hi Jenna,
Question, why couldn’t you use a Record Triggered Flow to accomplish this to eliminate the need for PB. I’m looking to use this to look up if a lead is an existing contact (due to company policy everything must be uploaded as a lead). I’m also trying to make this as future proof as possible, and with PB going away I’m trying not to create any more. Thank you so much!
Hi Ashleigh, This post was created before the record triggered flow feature existed in Salesforce. I have an updated post here: https://jennamolby.com/how-to-setup-lead-to-account-matching-in-salesforce-using-flow/ on how to do this without process builder.
Thanks so much for taking the time to put these steps together!