
Salesforce Surveys is now available with the Spring ’18 release! This new feature allows you to create easy-to-use forms for collecting feedback and data by using a simple editor. All the survey data you collect is stored within your org. You can then use Salesforce to view survey data, create reports and dashboards, and share insights with your company. I’m going to walk through how to enable, customize and activate your first Salesforce Survey.
Availability
Salesforce Surveys is available by default in: Developer, Enterprise, Performance, and Unlimited Editions with Health Cloud. If you have Developer, Enterprise, Performance, and Unlimited Editions without Health Cloud, you can still create a one survey for no additional cost. However, if you want to create multiple surveys, there’s an additional fee.
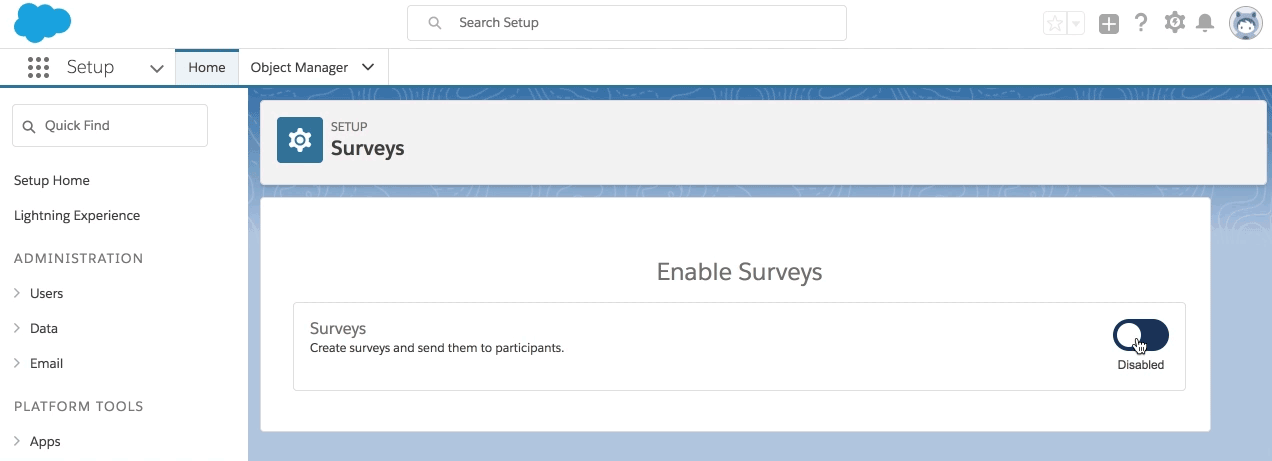
1. Enable Surveys within your Org
Navigate to Setup > Feature Settings > Survey > Survey Settings and toggle the setting to Enabled
2. Give users permission to create surveys
Now that you have enabled Surveys within your org, you will need to give users permissions to create surveys. According to the Salesforce documentation, there should be a permission set called Survey Creator, which you can clone. In my testing, I haven’t seen this permission set available. So, you will need to create your own permission set and give users Read, Create, Edit, Delete permissions to the Surveys and Survey Invitation objects.
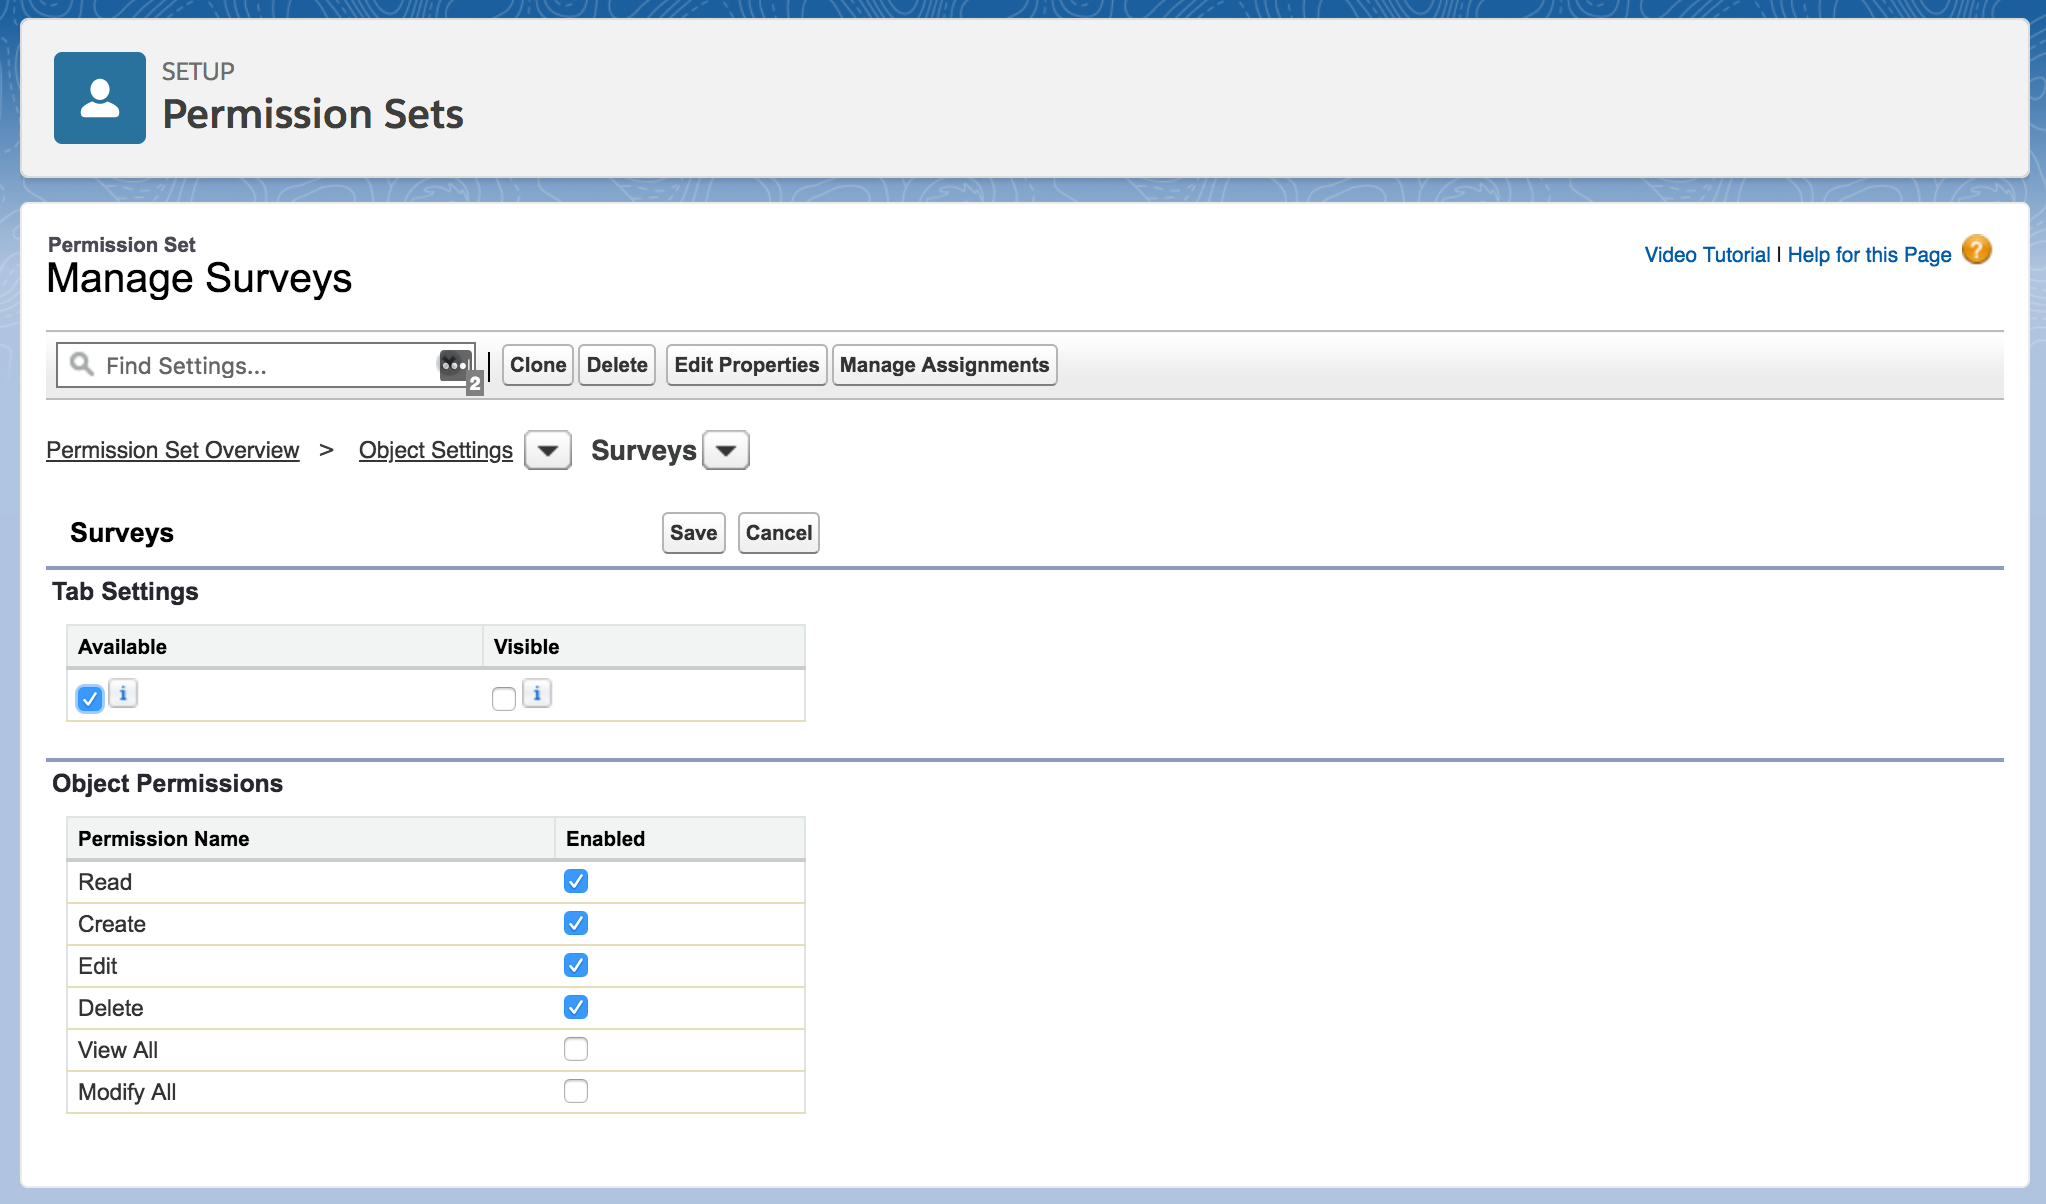

Assign the new permission set to the users who will create surveys.
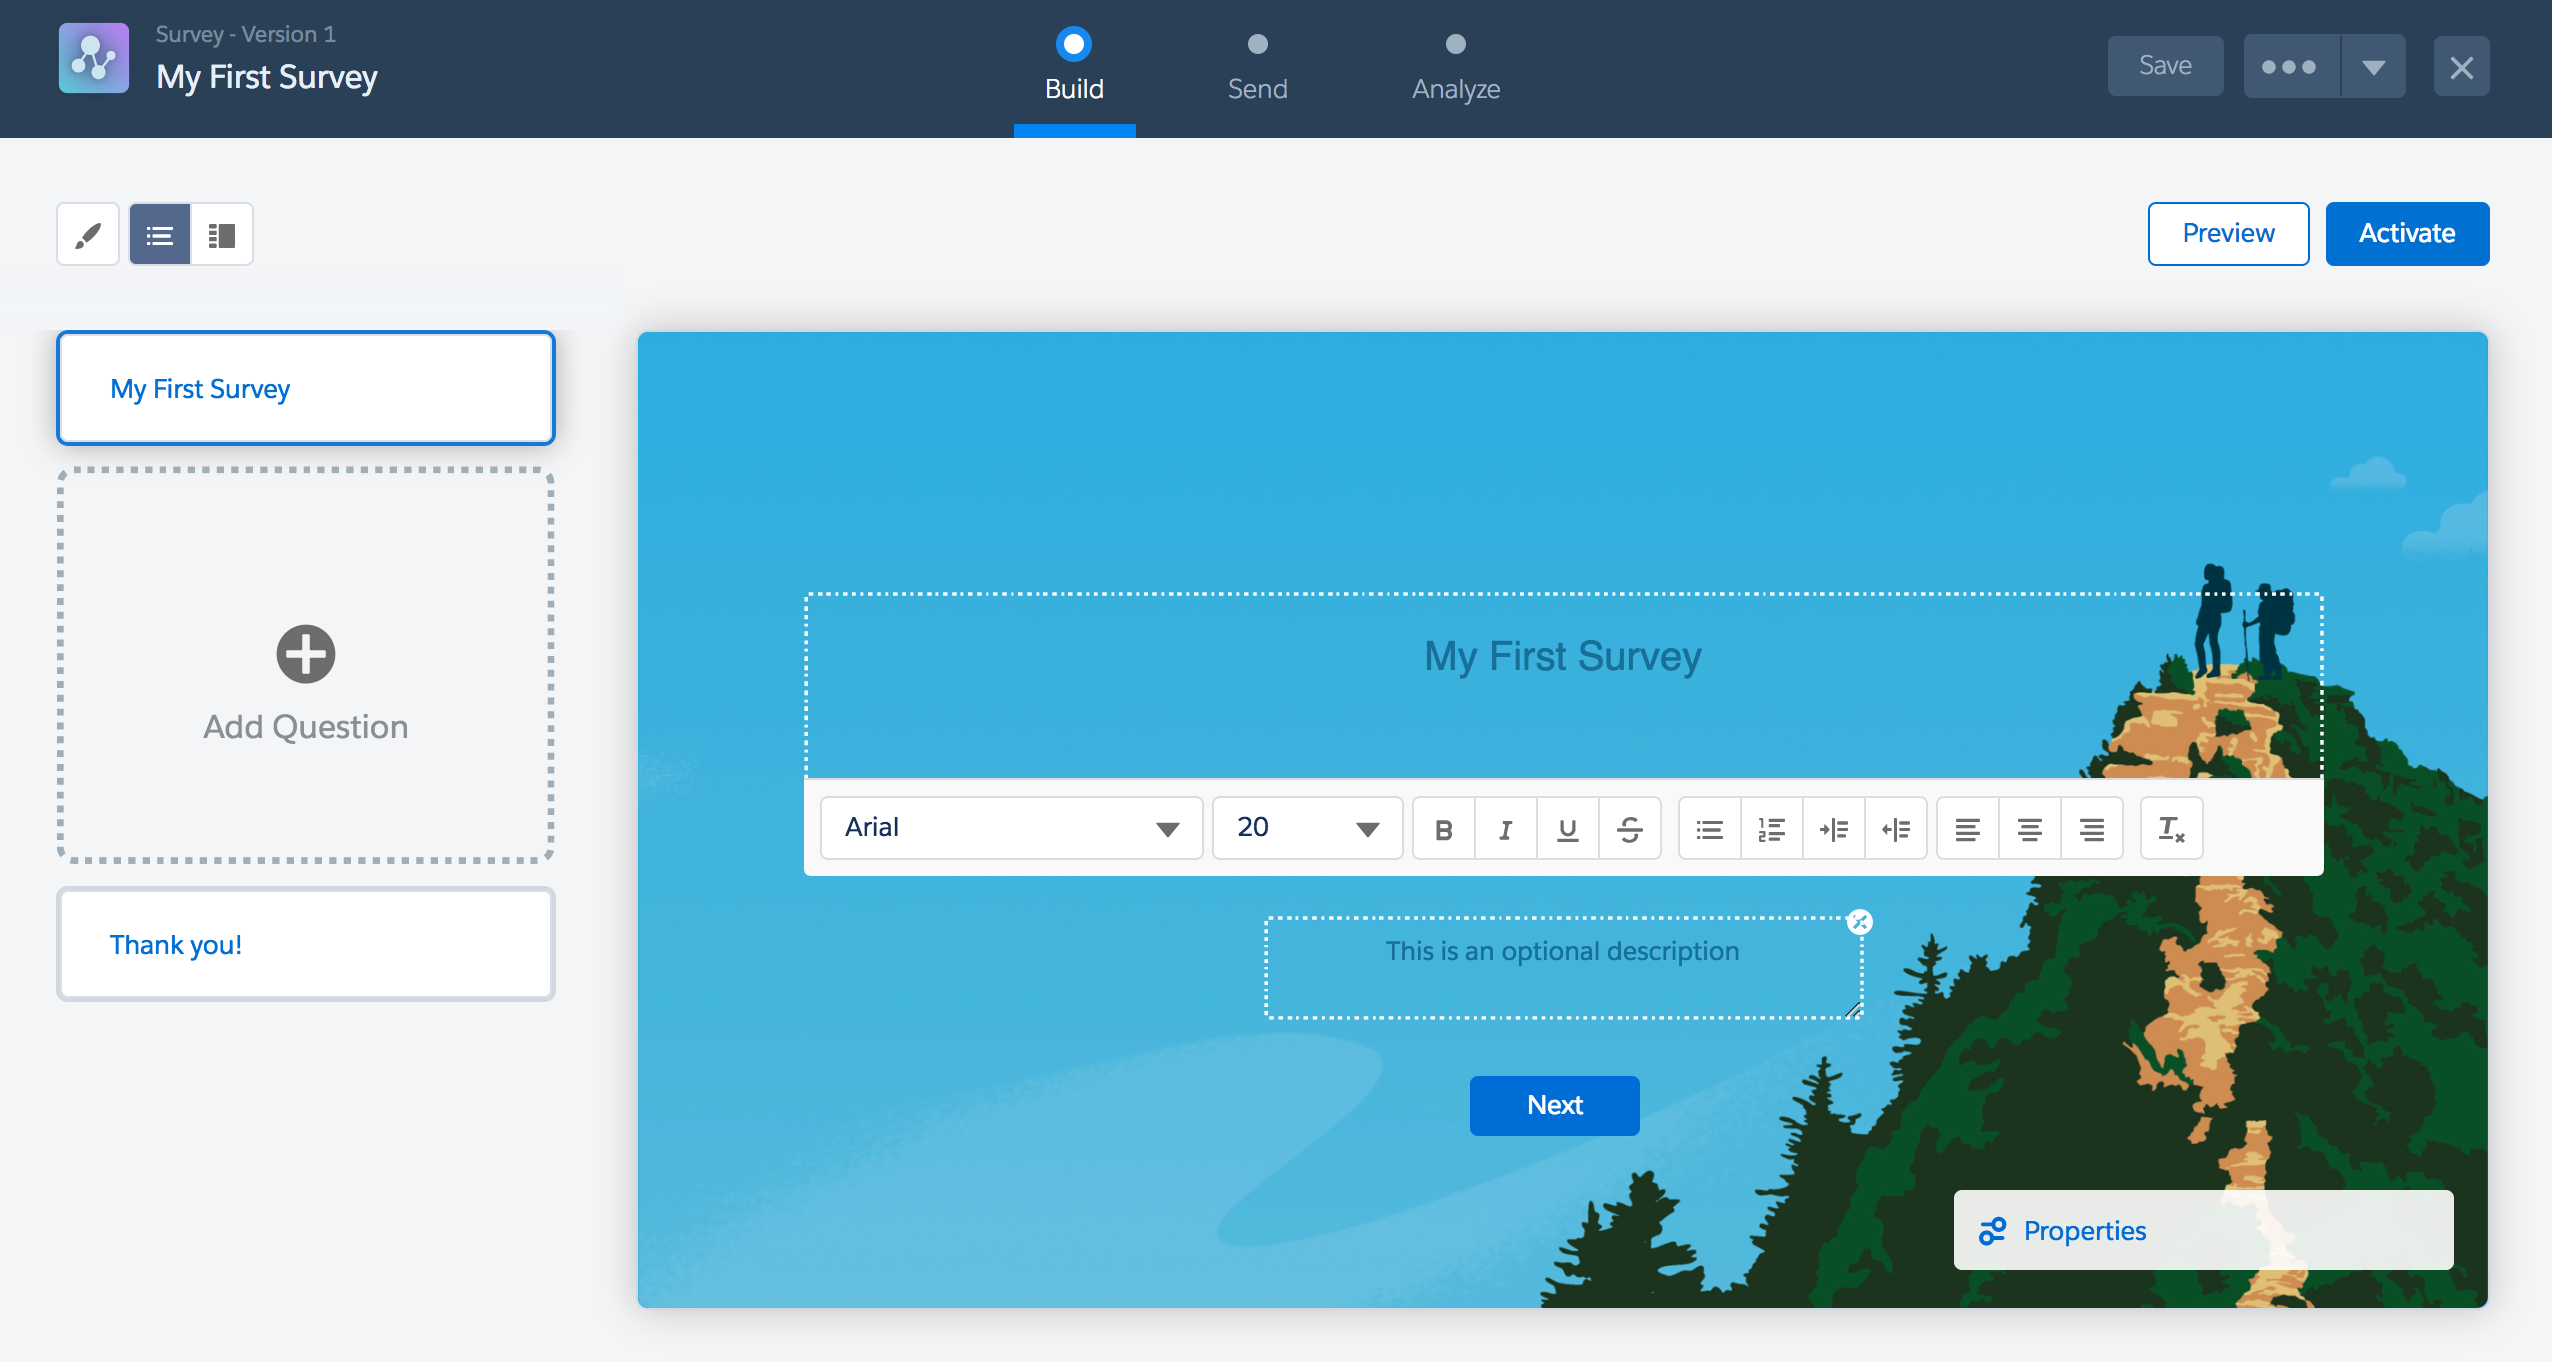
3. Customize your start page
When you create a survey the first page that appears in the start page. This will be the first thing your respondents see when clicking on the survey link. You can add some header text and a description for your survey.
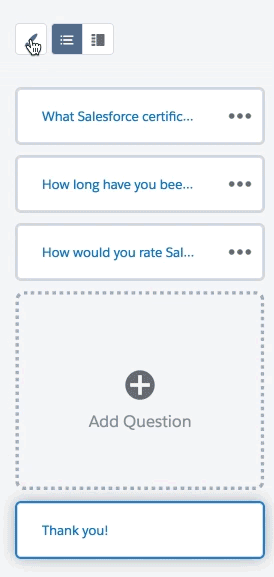
4. Add your Questions
You can choose from 5 different question types when creating a survey:
- Radio: Only one answer can be selected
- Multiple: Multiple answers can be selected
- Text: a free-form text response
- Rating: a custom rating from a scale
- Date: a date from a calendar
To add a question, click the add a question button and select your question type. You will be prompted to enter your question, an optional description, and any values depending on the field type you selected.

You can turn off the description by click the “x” in the top right corner of the description box or by clicking on properties and unchecking description. The properties box is also where you can mark the field as required. By default none of the questions are marked as required.
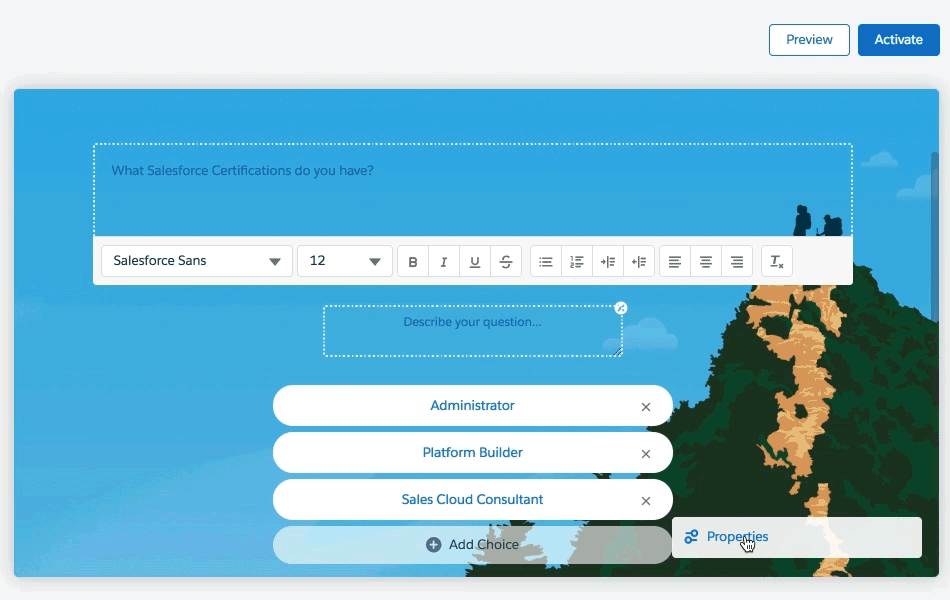
Questions are listed down the left sidebar. You can also click on a question within the sidebar to copy or delete the question.
6. Update the ‘Thank You’ Page
Click on the last card in the sidebar to customize your ‘thank you’ message.

5. Customize the survey to match your brand
Click on the paint brush icon to update font colors, button colors, background images and colors. If you choose to upload a background image the image size cannot be more than 750KB.

Font sizes and font families must be updated using the WYSIWYG editor provided for each question, thank you page and start page.
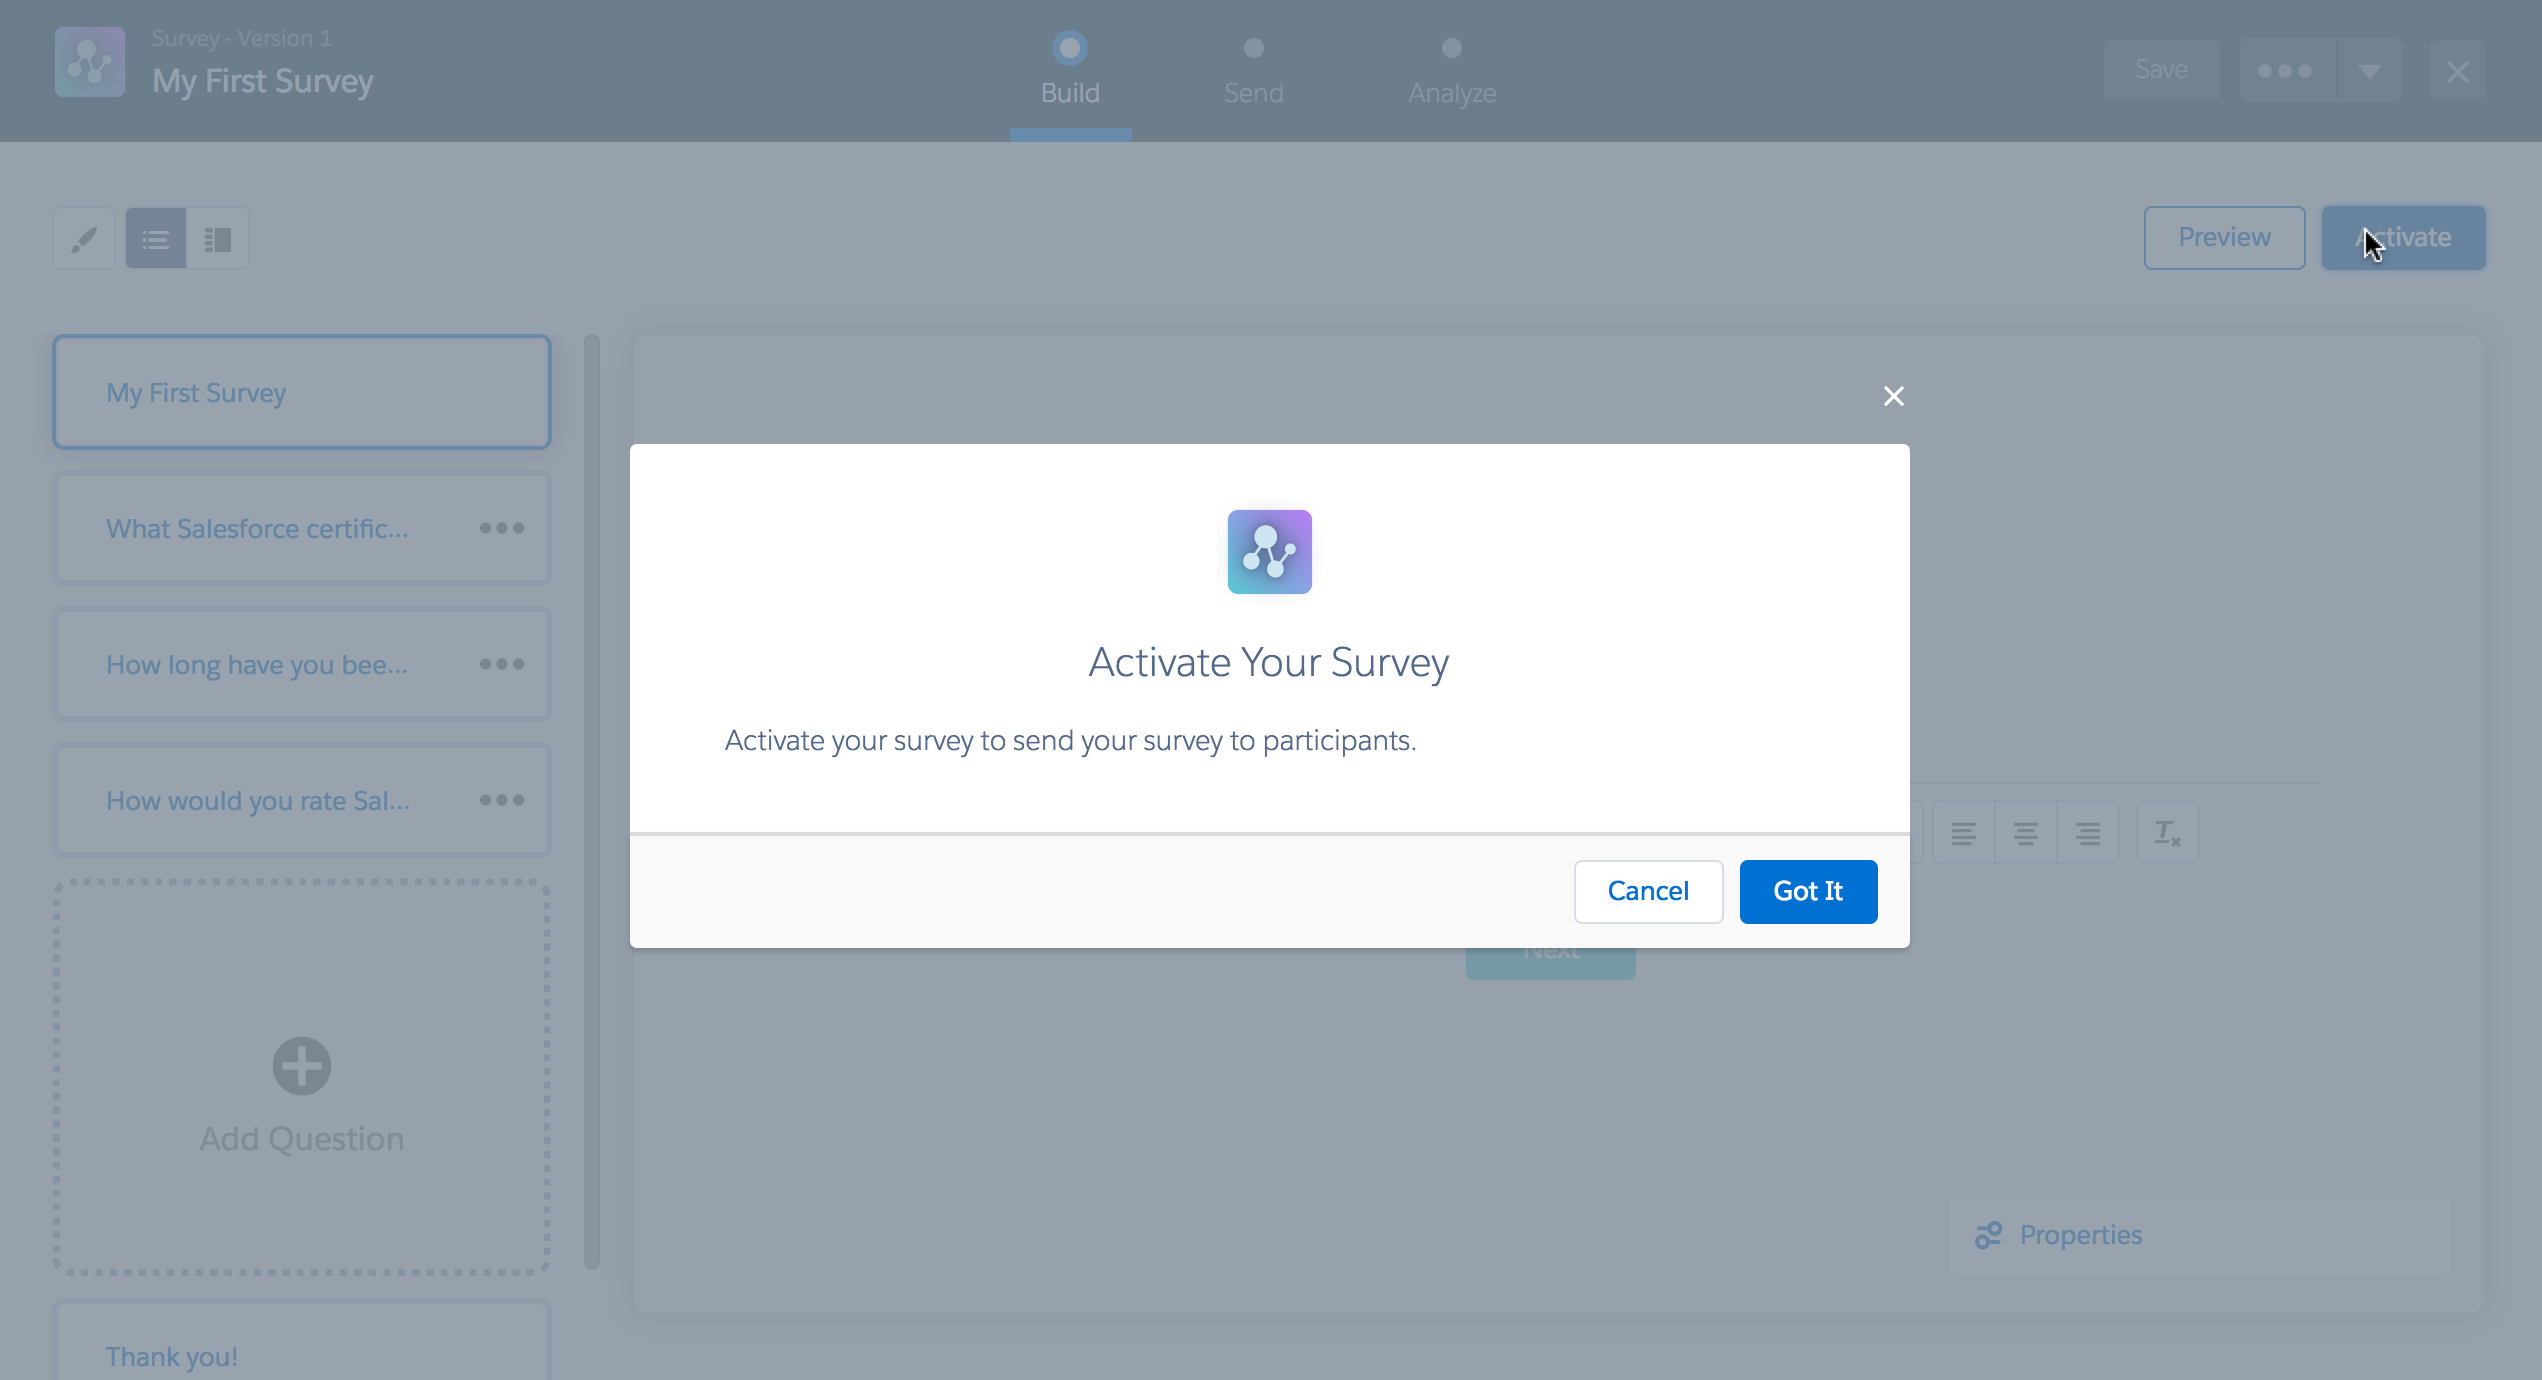
6. Activate it!
When you’re happy with your Survey or if you want to test it, click the activate button in the top right corner of the page.
7. Get your link and send out your Survey
Click on the Send tab to get the link of your new Survey. Select whether you want to send your survey to participants within your company or outside your company. To enable participants to take the survey without logging in, make sure that you have Communities are enabled in your org and public access is enabled for the community.
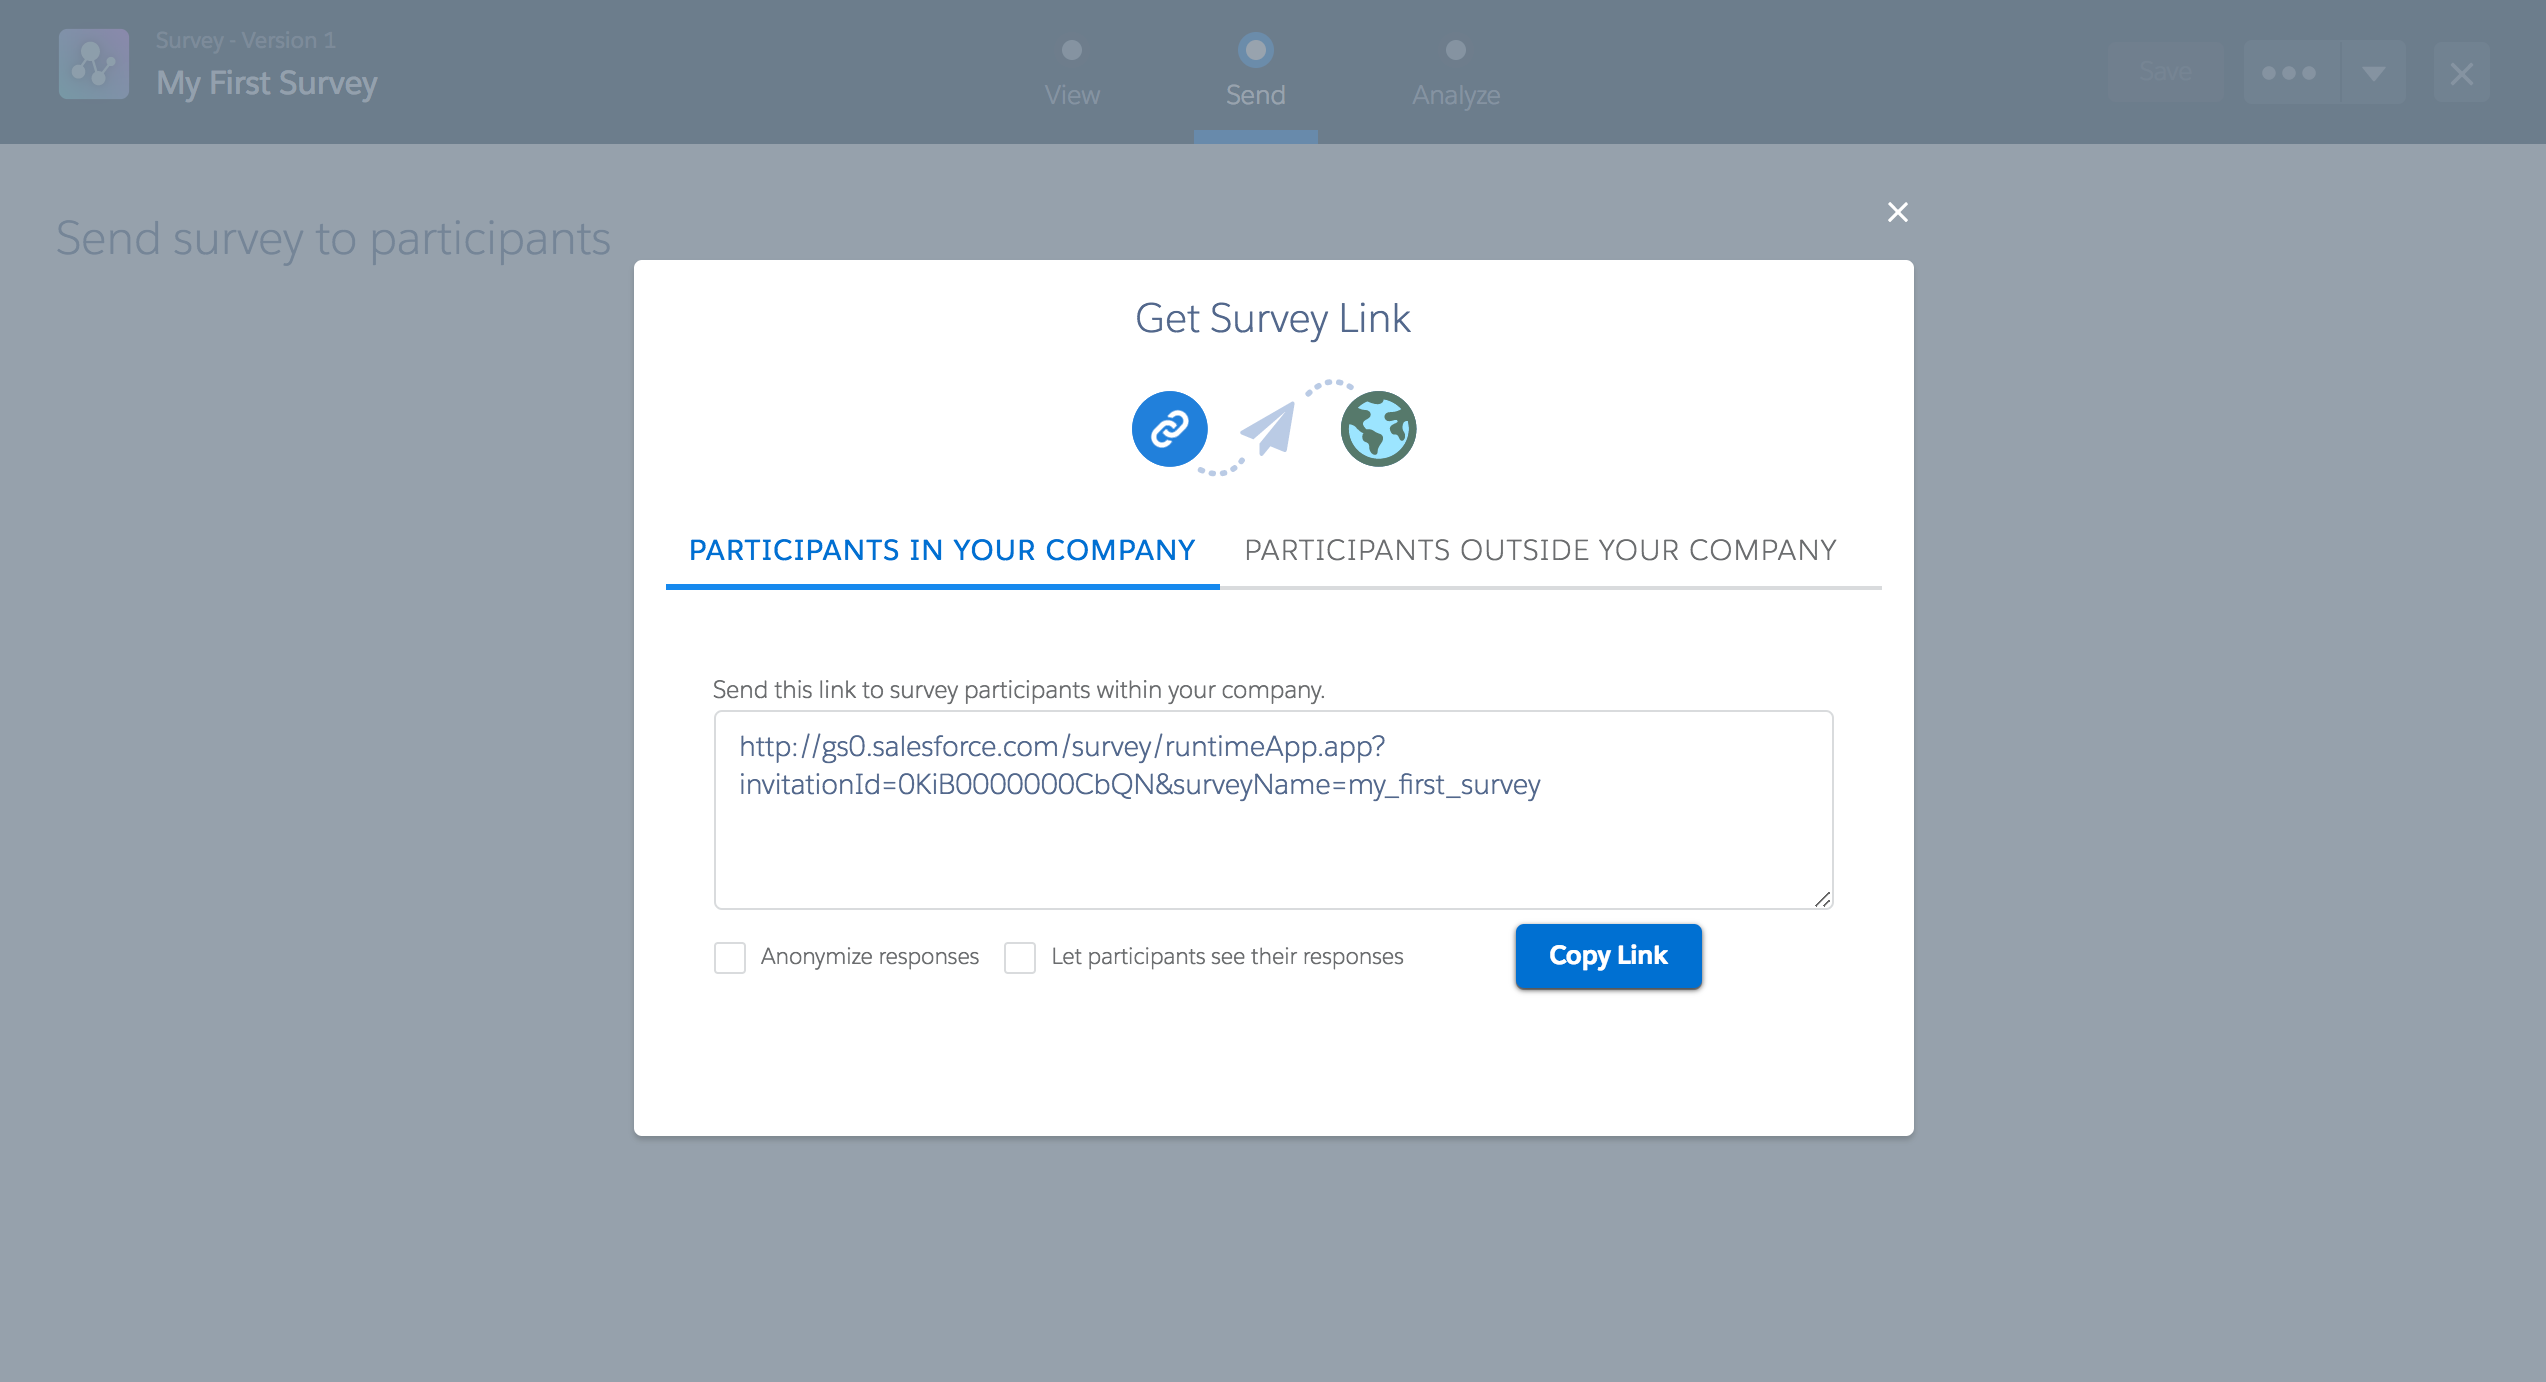
Select anonymize responses if you want to participants to take the survey without revealing their name or other identifying information.
Select let participants see their responses if you want to allow participants with Salesforce accounts in your org to access their response records after completing the survey.
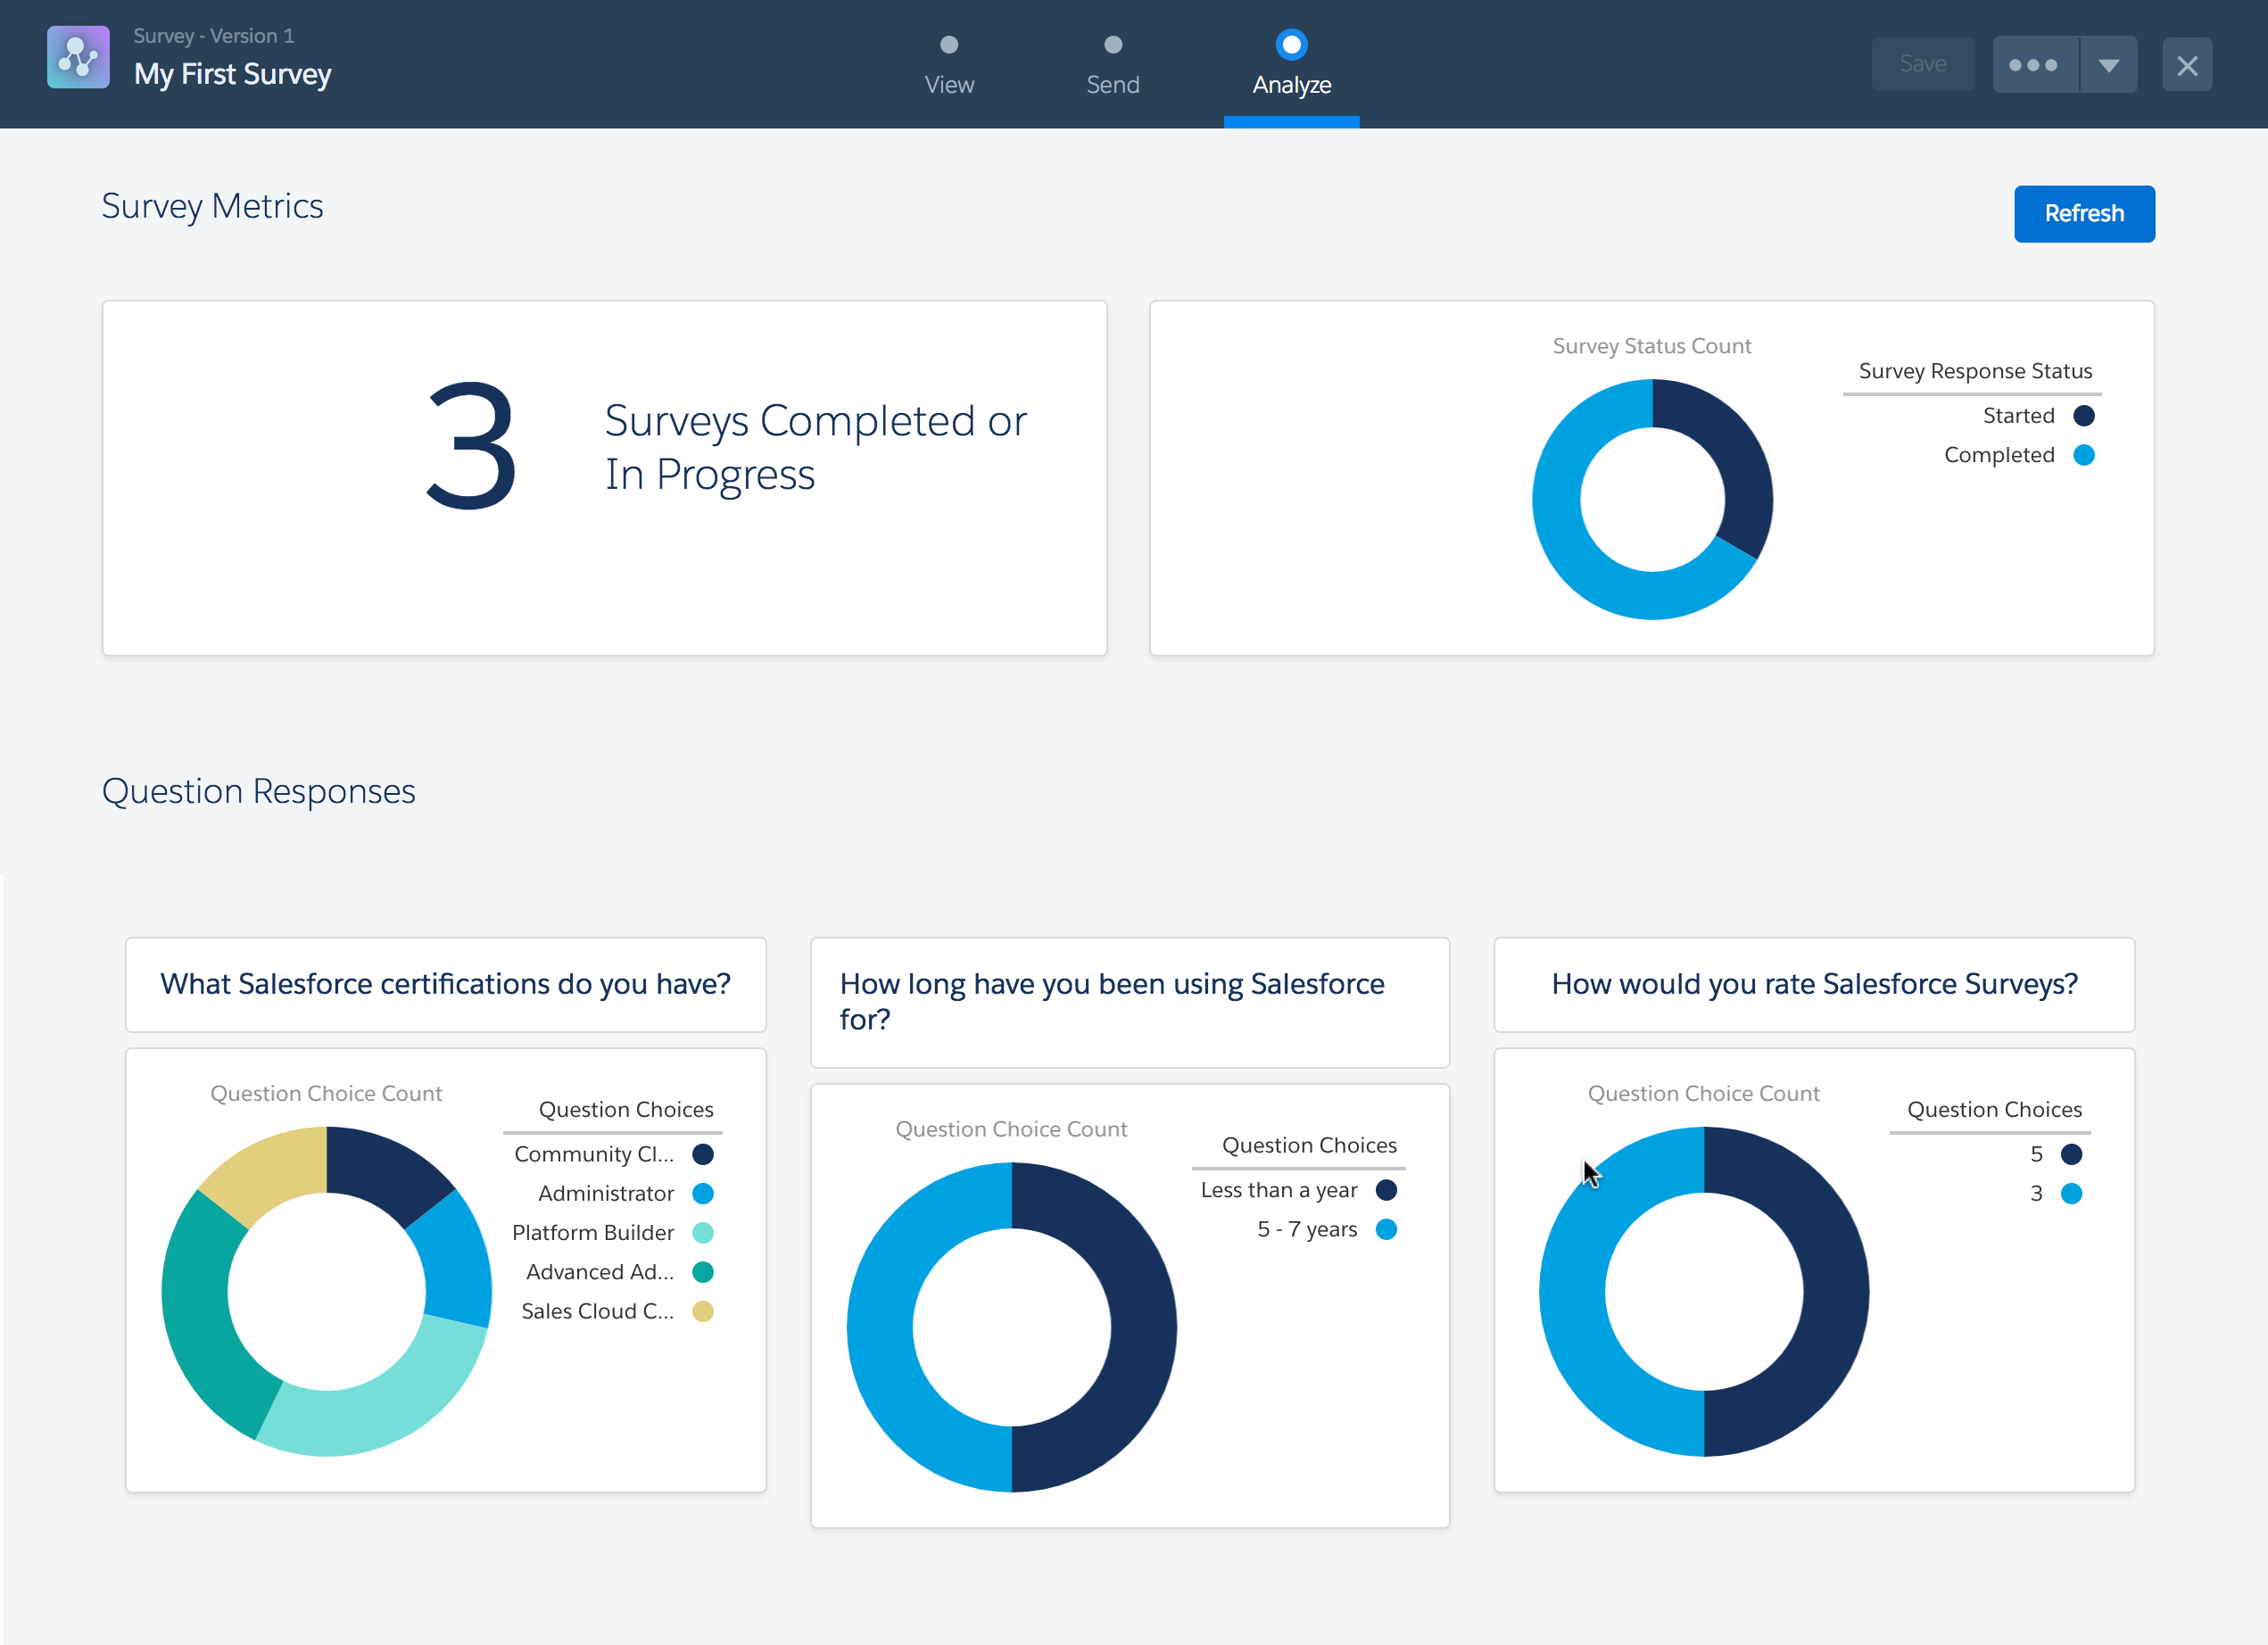
8. View the responses
Survey responses can be viewed by clicking on the analyze tab within the survey builder.
If the Analyze page in the Survey Builder doesn’t give you the information that you need, you can create a custom report type for survey responses.
Questions?
Send them to me via email, send me a tweet @jennamolby, or leave a comment
21 Comments
Can we avoid the Welcome or Title Page and directly get to the question?
Is there a specific license type that need to be given to user to be able to create new surveys ? Or this is something controlled from Profiles with a regular Salesforce license ?
Hi Jenna,
It is a very interesting tool.
Can it be used with WordPress as a plugin?
Hi Boyd, No, I don’t think it can be used with a WordPress plugin, but I haven’t tried it.
Hi Jenna, I have created a sample survey and tested it for participants in and out of company. I want to create invitations for individual Opportunities (I ll create a lookup on Invitation object). For testing I cloned the invitation created by Salesforce and got the invitation link by querying the new invitation record, also gave the read only(also tried with read/write) sharing manually to that record(to access it without authentication).
When I open the link in the browser I get “The flow failed to start because the provided values were not valid: This survey is available only for authenticated users.” message.
PS: I don’t have a Survey license. I am using the trial Survey enabled by Salesforce
If we add custom field to the Survey Invitation, can we somehow use it in the Survey? Like “We want your feedback regarding your case XXXX”?