In this tutorial, you will learn how to turn any landing page into a Pardot Layout Template that can be used across all your Pardot marketing campaigns. You can use an existing landing page, a free template, a paid template from a marketplace like ThemeForest, or an existing page on your website.
Step 1: Create a new layout template in Pardot
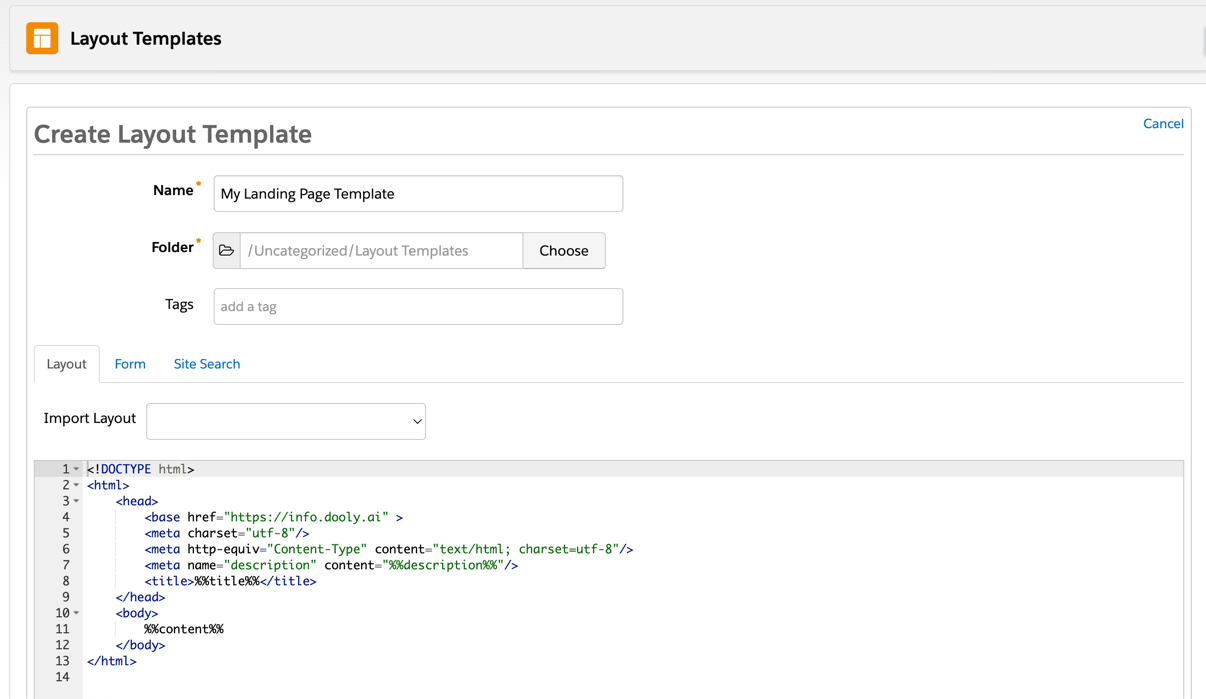
Create a new layout template in Pardot (Marketing > Landing Pages > Layout Template > Add Layout Template). Give your layout template a descriptive name and add your desired tags.
Step 2: Import Your Own Landing Page
For this tutorial I will be using this landing page as an example, but you can follow along with whatever landing page you want.
There are 2 ways you can import your landing page into Pardot
- Copy & pasting the HTML source code directly into the editor
- Using the Import layout from URL option that Pardot offers
Both ways are pretty similar. Let’s break down the 2 ways.
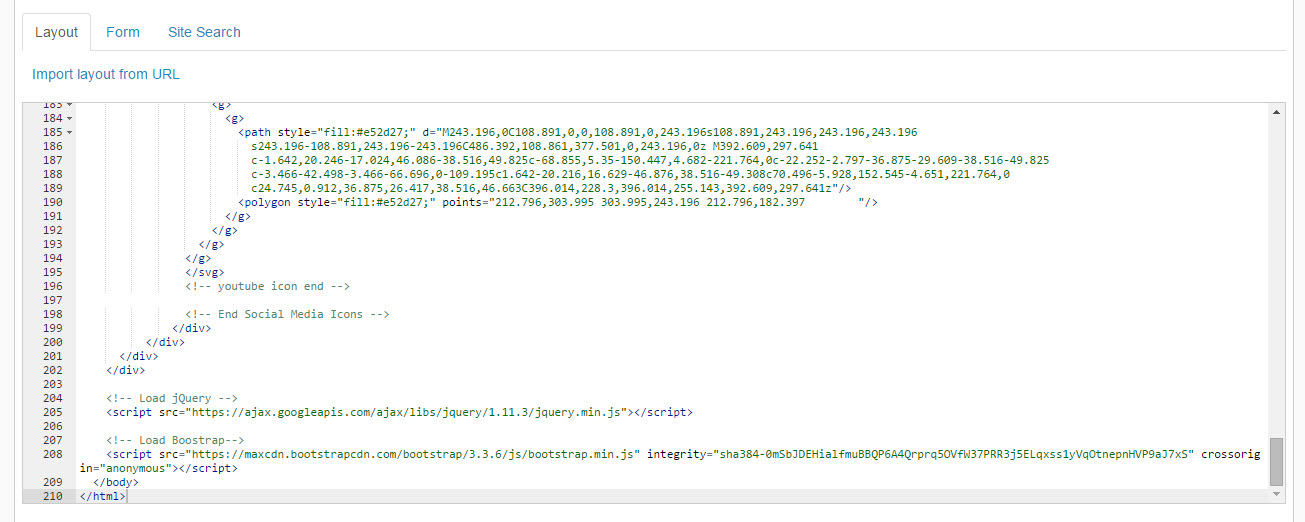
1. Copy & pasting the HTML source code directly into the editor
You can view the source code of the landing page in Chrome by navigating your landing page > right click > view page source. Copy all the code that is there and paste it into your layout template editor.
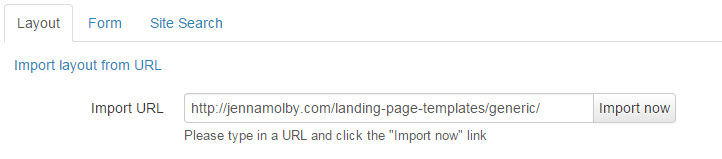
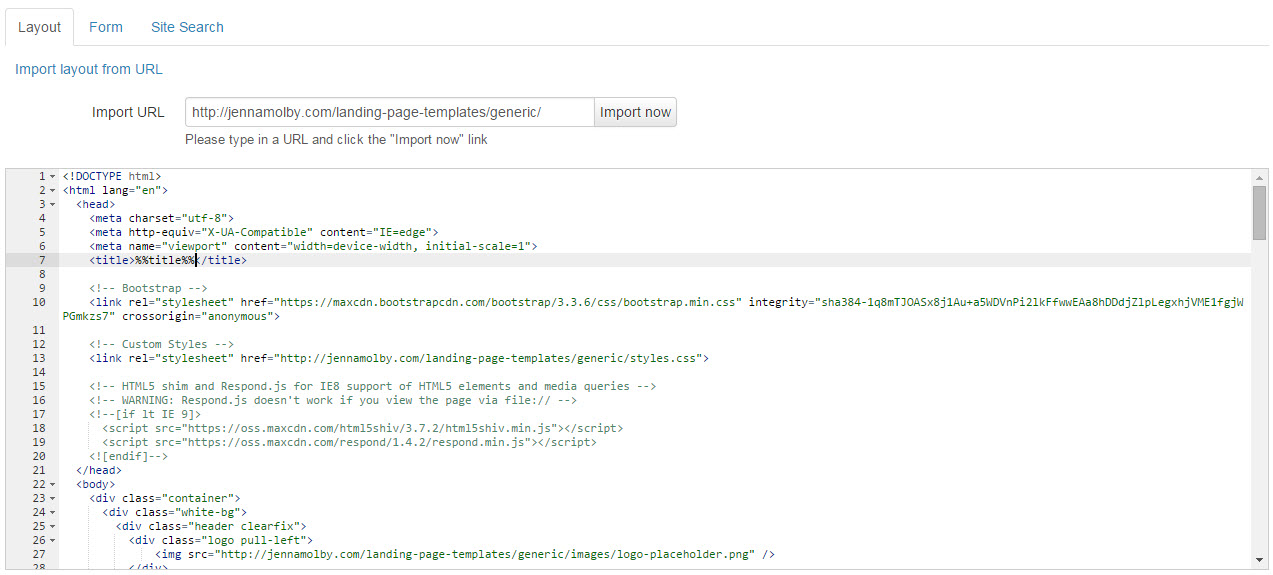
2. Using the Import layout from URL option that Pardot offers
Copy your landing page URL, then navigate to your Pardot layout template. Click on import layout from URL and paste in the landing page URL.
Both ways will give you the same result.
Step 3: Upload Your Images and Files
Now that all the landing page HTML is loaded into Pardot, the images and files linked on the page are not imported yet.
There are a couple different types of files that will need to be imported into Pardot
- All images (.jpg, .gif, .png, etc)
- All CSS files (.css)
- All Javascript files (.js)
In my landing page template there are 3 files that I need to download.
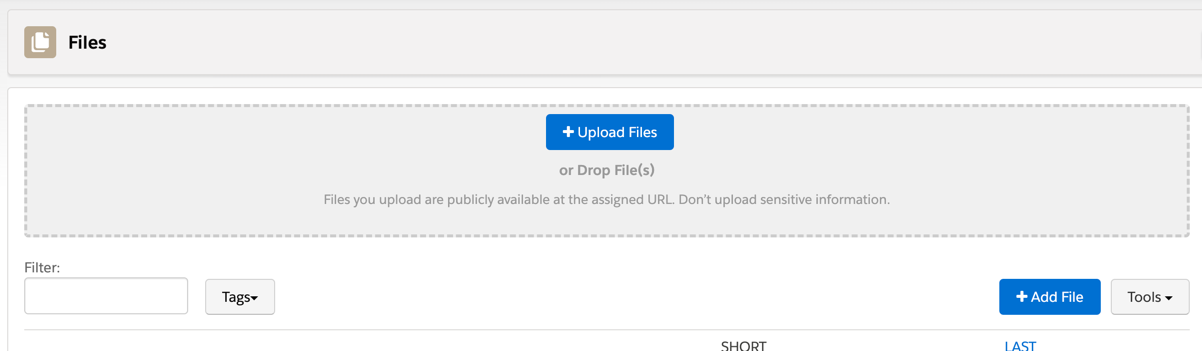
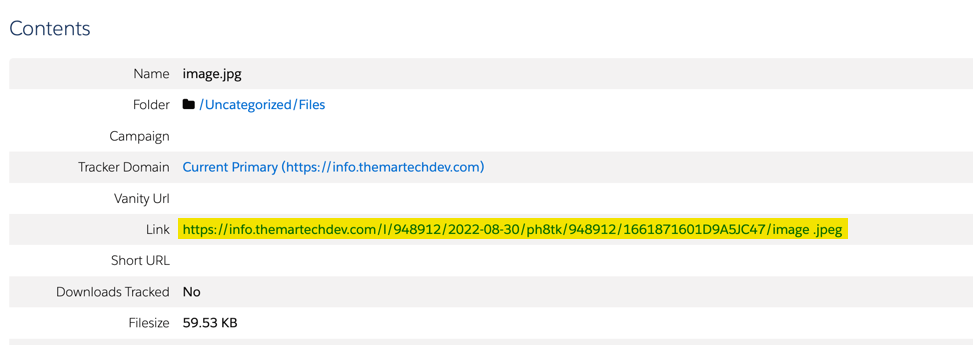
Download these files, if you haven’t already, and save them on your computer. Upload them into Pardot under Marketing > Content > Files
Replace the URL to the old files in your page template by copy and pasting the URL that Pardot generates when you upload the files
Repeat this process until all your images and files are in Pardot.
Step 4: Create editable Text
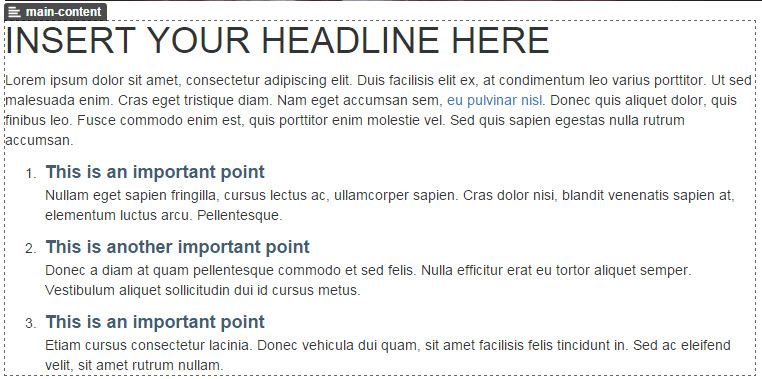
The next step is where you choose what content should be editable within the Pardot landing page editor. You can create as many editable sections as you want, but I recommend limiting it so your layout and branding is consistent across all Pardot landing pages. For this example, I’m going to make the main content area editable and the call-to-action title editable as shown below in yellow.
To create an editable section, wrap a DIV around the content like this
1 2 3 4 5 |
<!-- Start Pardot Editable Section --> <div pardot-region="pardot"> <!-- Your Content will Go here --> </div> <!-- Start Pardot Editable Section --> |
For my example, I’m left with this HTML for my main content section
1 2 3 4 5 6 7 8 9 10 11 12 13 14 15 16 17 18 19 20 |
<!-- Start Pardot Editable Section --> <div pardot-region="main-content"> <h1>INSERT YOUR HEADLINE HERE</h1> <p>Lorem ipsum dolor sit amet, consectetur adipiscing elit. Duis facilisis elit ex, at condimentum leo varius porttitor. Ut sed malesuada enim. Cras eget tristique diam. Nam eget accumsan sem, <a href="#">eu pulvinar nisl</a>. Donec quis aliquet dolor, quis finibus leo. Fusce commodo enim est, quis porttitor enim molestie vel. Sed quis sapien egestas nulla rutrum accumsan.</p> <ol class="custom-counter"> <li> <span style="font-size:18px;color:#435c71;font-weight:bold;">This is an important point</span> <p>Nullam eget sapien fringilla, cursus lectus ac, ullamcorper sapien. Cras dolor nisi, blandit venenatis sapien at, elementum luctus arcu. Pellentesque.</p> </li> <li> <span style="font-size:18px;color:#435c71;font-weight:bold;">This is another important point</span> <p>Donec a diam at quam pellentesque commodo et sed felis. Nulla efficitur erat eu tortor aliquet semper. Vestibulum aliquet sollicitudin dui id cursus metus.</p> </li> <li> <span style="font-size:18px;color:#435c71;font-weight:bold;">This is an important point</span> <p>Etiam cursus consectetur lacinia. Donec vehicula dui quam, sit amet facilisis felis tincidunt in. Sed ac eleifend velit, sit amet rutrum nullam.</p> </li> </ol> </div> <!-- Start Pardot Editable Section --> |
And my call-to-action title looks like this
1 2 3 |
<div pardot-region="cta-title"> <h3>CALL TO ACTION TITLE</h3> </div> |
Repeat this process for all the sections you want to make editable.
Step 5: Add the Form
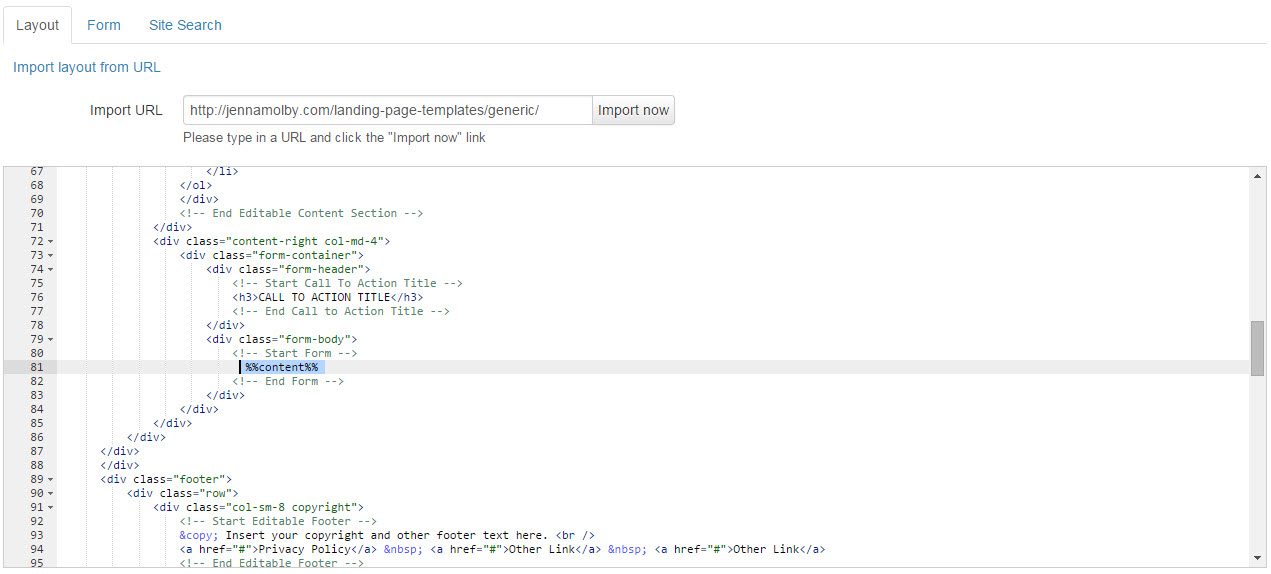
If you want to have the ability to add a Pardot form on the page, you will need to add this tag to your page where you want the form to go.
1 |
%%content%% |
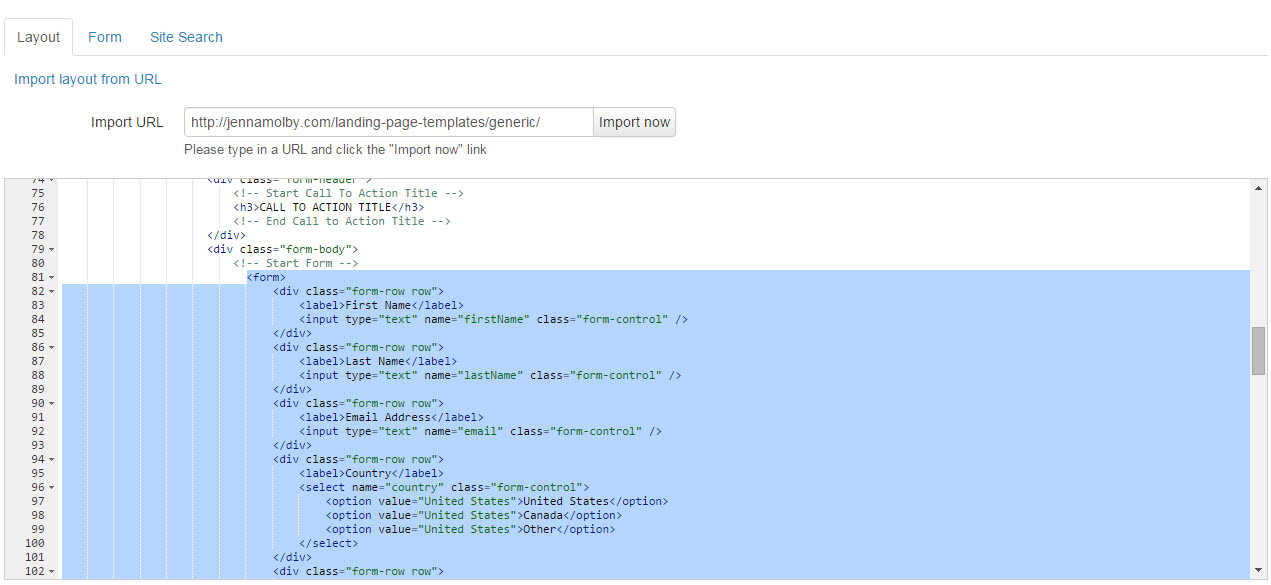
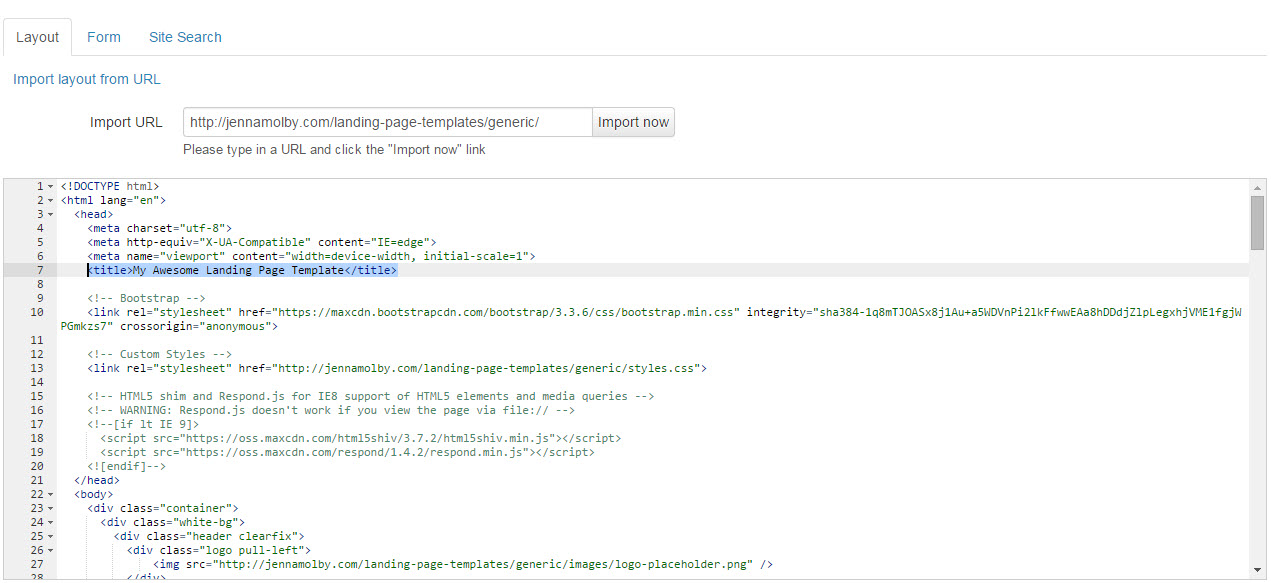
Step 6: Edit the Title
Lastly, replace the title in the HTML of your template to this to dynamically display the name of the landing page in the browser.
1 |
<title>%%title%%</title> |
Testing
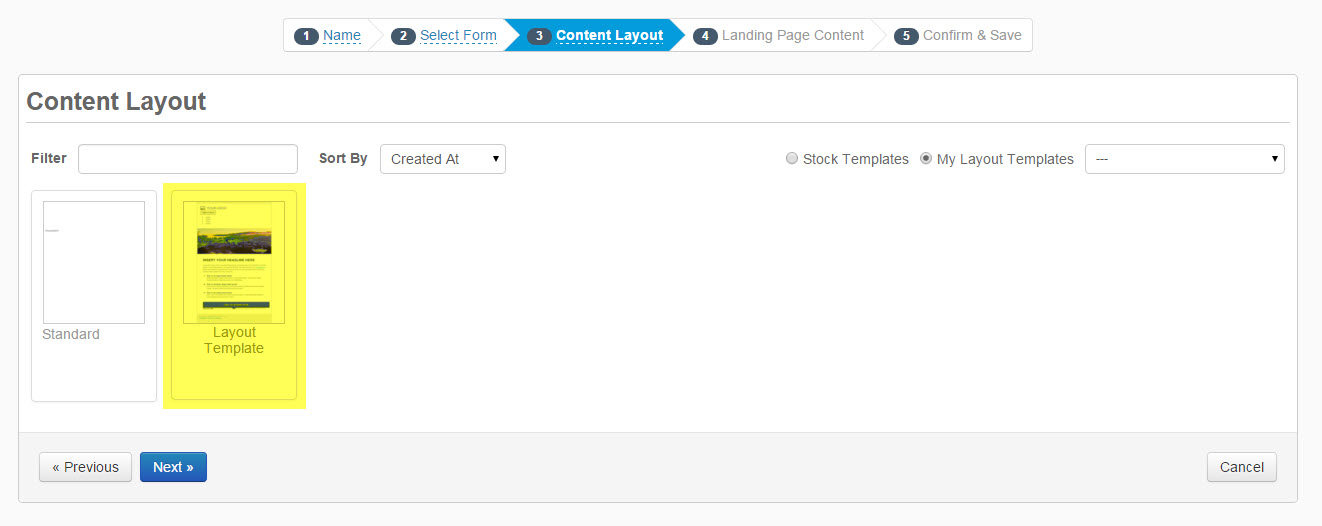
Create a landing page to test your new Pardot layout template by going to Marketing > Landing Page > New Landing Page and select the new page template.
If you have setup the Pardot editable regions correctly, you should see a dotted box around everything that is editable.
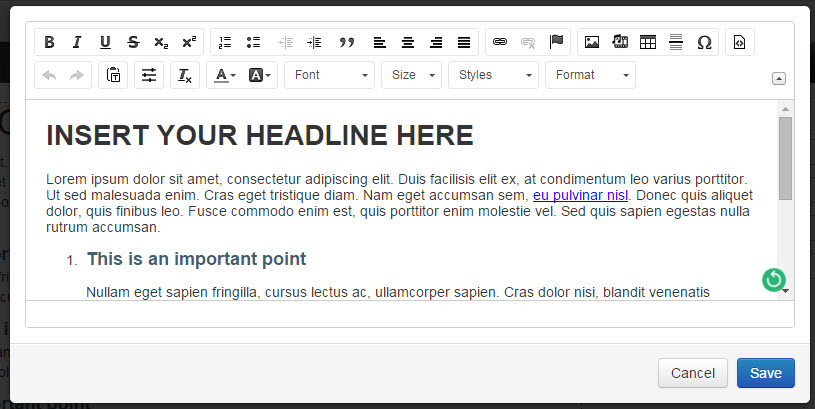
If you double-click into the editable section to make sure the WYSIWYG editor pops up.
My Final Code
Here’s a peak at my final code after turning my sample landing page into a Pardot layout template.
1 2 3 4 5 6 7 8 9 10 11 12 13 14 15 16 17 18 19 20 21 22 23 24 25 26 27 28 29 30 31 32 33 34 35 36 37 38 39 40 41 42 43 44 45 46 47 48 49 50 51 52 53 54 55 56 57 58 59 60 61 62 63 64 65 66 67 68 69 70 71 72 73 74 75 76 77 78 79 80 81 82 83 84 85 86 87 88 89 90 91 92 93 94 95 96 97 98 99 100 101 102 103 104 105 106 107 108 109 110 111 112 113 114 115 116 117 118 119 120 121 122 123 124 125 126 127 128 129 130 131 132 133 134 135 136 137 138 139 140 141 142 143 144 145 146 147 148 149 150 151 152 153 154 155 156 157 158 159 160 161 162 163 164 165 166 167 168 169 170 171 172 173 174 175 176 177 178 179 180 181 182 183 184 185 186 |
<!DOCTYPE html> <html lang="en"> <head> <meta charset="utf-8"> <meta http-equiv="X-UA-Compatible" content="IE=edge"> <meta name="viewport" content="width=device-width, initial-scale=1"> <title>%%title%%</title> <!-- Bootstrap --> <link rel="stylesheet" href="https://maxcdn.bootstrapcdn.com/bootstrap/3.3.6/css/bootstrap.min.css" integrity="sha384-1q8mTJOASx8j1Au+a5WDVnPi2lkFfwwEAa8hDDdjZlpLegxhjVME1fgjWPGmkzs7" crossorigin="anonymous"> <!-- Custom Styles --> <link rel="stylesheet" href="http://go.pardot.com/my/path/styles.css"> <!-- HTML5 shim and Respond.js for IE8 support of HTML5 elements and media queries --> <!-- WARNING: Respond.js doesn't work if you view the page via file:// --> <!--[if lt IE 9]> <script src="https://oss.maxcdn.com/html5shiv/3.7.2/html5shiv.min.js"></script> <script src="https://oss.maxcdn.com/respond/1.4.2/respond.min.js"></script> <![endif]--> </head> <body> <div class="container"> <div class="white-bg"> <div class="header clearfix"> <div class="logo pull-left"> <img src="http://go.pardot.com/my/path/logo_placeholder.png" /> </div> <button type="button" class="navbar-toggle collapsed pull-right" data-toggle="collapse" data-target="#navbar" aria-expanded="false" aria-controls="navbar"> <span class="sr-only">Toggle navigation</span> <span class="icon-bar"></span> <span class="icon-bar"></span> <span class="icon-bar"></span> </button> <div id="navbar" class="navbar-collapse collapse pull-right"> <ul class="nav navbar-nav"> <li><a href="#">Link 1</a></li> <li><a href="#">Link 2</a></li> <li><a href="#">Link 3</a></li> <li><a href="#">Link 4</a></li> </ul> </div> </div> <div class="featured-image"> <img src="http://go.pardot.com/my/path/feature_image.jpg" /> </div> <div class="content"> <div class="row"> <div class="content-left col-md-8"> <!-- Start Editable Content Section --> <div pardot-region="main-content"> <h1>INSERT YOUR HEADLINE HERE</h1> <p>Lorem ipsum dolor sit amet, consectetur adipiscing elit. Duis facilisis elit ex, at condimentum leo varius porttitor. Ut sed malesuada enim. Cras eget tristique diam. Nam eget accumsan sem, <a href="#">eu pulvinar nisl</a>. Donec quis aliquet dolor, quis finibus leo. Fusce commodo enim est, quis porttitor enim molestie vel. Sed quis sapien egestas nulla rutrum accumsan.</p> <ol class="custom-counter"> <li> <span style="font-size:18px;color:#435c71;font-weight:bold;">This is an important point</span> <p>Nullam eget sapien fringilla, cursus lectus ac, ullamcorper sapien. Cras dolor nisi, blandit venenatis sapien at, elementum luctus arcu. Pellentesque.</p> </li> <li> <span style="font-size:18px;color:#435c71;font-weight:bold;">This is another important point</span> <p>Donec a diam at quam pellentesque commodo et sed felis. Nulla efficitur erat eu tortor aliquet semper. Vestibulum aliquet sollicitudin dui id cursus metus.</p> </li> <li> <span style="font-size:18px;color:#435c71;font-weight:bold;">This is an important point</span> <p>Etiam cursus consectetur lacinia. Donec vehicula dui quam, sit amet facilisis felis tincidunt in. Sed ac eleifend velit, sit amet rutrum nullam.</p> </li> </ol> </div> <!-- End Editable Content Section --> </div> <div class="content-right col-md-4"> <div class="form-container"> <div class="form-header"> <!-- Start Call To Action Title --> <div pardot-region="cta-header"> <h3>CALL TO ACTION TITLE</h3> </div> <!-- End Call to Action Title --> </div> <div class="form-body"> <!-- Start Form --> %%content%% <!-- End Form --> </div> </div> </div> </div> </div> </div> <div class="footer"> <div class="row"> <div class="col-sm-8 copyright"> <!-- Start Editable Footer --> © Insert your copyright and other footer text here. <br /> <a href="#">Privacy Policy</a> <a href="#">Other Link</a> <a href="#">Other Link</a> <!-- End Editable Footer --> </div> <div class="col-sm-4 social-links"> <!-- Start Social Media Icons --> <!-- facebook icon start --> <svg version="1.1" id="Capa_1" xmlns="http://www.w3.org/2000/svg" xmlns:xlink="http://www.w3.org/1999/xlink" x="0px" y="0px" viewBox="0 0 486.392 486.392" style="enable-background:new 0 0 486.392 486.392;" xml:space="preserve"> <g> <g> <g> <path style="fill:#3b5998;" d="M243.196,0C108.891,0,0,108.891,0,243.196s108.891,243.196,243.196,243.196 s243.196-108.891,243.196-243.196C486.392,108.861,377.501,0,243.196,0z M306.062,243.165l-39.854,0.03l-0.03,145.917h-54.689 V243.196H175.01v-50.281l36.479-0.03l-0.061-29.609c0-41.039,11.126-65.997,59.431-65.997h40.249v50.311h-25.171 c-18.817,0-19.729,7.022-19.729,20.124l-0.061,25.171h45.234L306.062,243.165z"/> </g> </g> </g> </svg> <!-- facebook icon end --> <!-- linkedin icon start --> <svg version="1.1" id="Capa_1" xmlns="http://www.w3.org/2000/svg" xmlns:xlink="http://www.w3.org/1999/xlink" x="0px" y="0px" viewBox="0 0 486.392 486.392" style="enable-background:new 0 0 486.392 486.392;" xml:space="preserve"> <g> <g> <g> <path style="fill:#007bb5;" d="M243.196,0C108.891,0,0,108.891,0,243.196s108.891,243.196,243.196,243.196 s243.196-108.891,243.196-243.196C486.392,108.861,377.501,0,243.196,0z M182.397,360.994h-60.799V148.197h60.799V360.994z M153.882,135.156c-15.747,0-28.484-12.768-28.484-28.515s12.768-28.515,28.484-28.515c15.747,0.03,28.515,12.798,28.515,28.515 C182.397,122.388,169.629,135.156,153.882,135.156z M395.193,360.994h-60.799V229.425c0-15.413-4.408-26.204-23.347-26.204 c-31.403,0-37.452,26.204-37.452,26.204v131.569h-60.799V148.197h60.799v20.337c8.694-6.657,30.399-20.307,60.799-20.307 c19.699,0,60.799,11.795,60.799,83.051V360.994z"/> </g> </g> </g> </svg> <!-- linkedin icon end --> <!-- twitter icon start --> <svg version="1.1" id="Capa_1" xmlns="http://www.w3.org/2000/svg" xmlns:xlink="http://www.w3.org/1999/xlink" x="0px" y="0px" viewBox="0 0 486.392 486.392" style="enable-background:new 0 0 486.392 486.392;" xml:space="preserve"> <g> <g> <path style="fill:#00aced;" d="M243.196,0C108.891,0,0,108.891,0,243.196s108.891,243.196,243.196,243.196 s243.196-108.891,243.196-243.196C486.392,108.861,377.501,0,243.196,0z M364.186,188.598l0.182,7.752 c0,79.16-60.221,170.359-170.359,170.359c-33.804,0-65.268-9.91-91.776-26.904c4.682,0.547,9.454,0.851,14.288,0.851 c28.059,0,53.868-9.576,74.357-25.627c-26.204-0.486-48.305-17.814-55.935-41.586c3.678,0.699,7.387,1.034,11.278,1.034 c5.472,0,10.761-0.699,15.777-2.067c-27.39-5.533-48.031-29.7-48.031-58.701v-0.76c8.086,4.499,17.297,7.174,27.116,7.509 c-16.051-10.731-26.63-29.062-26.63-49.825c0-10.974,2.949-21.249,8.086-30.095c29.518,36.236,73.658,60.069,123.422,62.562 c-1.034-4.378-1.55-8.968-1.55-13.649c0-33.044,26.812-59.857,59.887-59.857c17.206,0,32.771,7.265,43.714,18.908 c13.619-2.706,26.448-7.691,38.03-14.531c-4.469,13.984-13.953,25.718-26.326,33.135c12.069-1.429,23.651-4.682,34.382-9.424 C386.073,169.659,375.889,180.208,364.186,188.598z"/> </g> </g> </svg> <!-- twitter icon end --> <!-- youtube icon start --> <svg version="1.1" id="Capa_1" xmlns="http://www.w3.org/2000/svg" xmlns:xlink="http://www.w3.org/1999/xlink" x="0px" y="0px" viewBox="0 0 486.392 486.392" style="enable-background:new 0 0 486.392 486.392;" xml:space="preserve"> <g> <g> <g> <g> <path style="fill:#e52d27;" d="M243.196,0C108.891,0,0,108.891,0,243.196s108.891,243.196,243.196,243.196 s243.196-108.891,243.196-243.196C486.392,108.861,377.501,0,243.196,0z M392.609,297.641 c-1.642,20.246-17.024,46.086-38.516,49.825c-68.855,5.35-150.447,4.682-221.764,0c-22.252-2.797-36.875-29.609-38.516-49.825 c-3.466-42.498-3.466-66.696,0-109.195c1.642-20.216,16.629-46.876,38.516-49.308c70.496-5.928,152.545-4.651,221.764,0 c24.745,0.912,36.875,26.417,38.516,46.663C396.014,228.3,396.014,255.143,392.609,297.641z"/> <polygon style="fill:#e52d27;" points="212.796,303.995 303.995,243.196 212.796,182.397 "/> </g> </g> </g> </g> </svg> <!-- youtube icon end --> <!-- End Social Media Icons --> </div> </div> </div> </div> <!-- Load jQuery --> <script src="https://ajax.googleapis.com/ajax/libs/jquery/1.11.3/jquery.min.js"></script> <!-- Load Boostrap--> <script src="https://maxcdn.bootstrapcdn.com/bootstrap/3.3.6/js/bootstrap.min.js" integrity="sha384-0mSbJDEHialfmuBBQP6A4Qrprq5OVfW37PRR3j5ELqxss1yVqOtnepnHVP9aJ7xS" crossorigin="anonymous"></script> </body> </html> |
Questions?
Email me, send me a tweet @jennamolby, or leave a comment
Hi Jenna – During Step 5, you delete the form code and add the form %%content%% tag.
When you deleted the code from the template, where did you put the actual form code? Did you put it in the form section of the template? Did you create a new form?
Hi Matthew, When you create a landing page you get the option to select a Pardot form. Once you select the form the form code will automatically populate where you put the %%content%% tag.
Thank you so much! This has been SO helpful. Any idea as for why the form thank you message or redirect link from the form won’t work? I tried also the redirect field from the landing page without luck either. Thanks for any sypport!
Hi Gilberto, So happy you found it helpful! I can’t think of a reason why the redirect link or message wouldn’t work. Are you able to see your test submissions in Pardot?